Are you looking for ways to find or obtain Void Traces in Warframe? I understand that they can be a bit tricky to obtain. Especially, since you will need them to craft Dragon Keys and enhance Void Relic, which you will be needing while looking for Orokin Vaults. So let’s discuss a few ways to get Void Traces!
You can only obtain Void Traces in Warframe by completing Relic Missions. When you’re doing these missions, you need to grab Reactants, which help you open the Void Relics. The drops of the Void Relics include a handful of Void Traces.
Even though it may sound quite simple, it can prove to be confusing at times. For example, some of you might still struggle to locate Reactants, or not grab the appropriate amount to open the Relics.
So I have included a step-by-step guide below to help you figure out the exact method to obtain Void Traces in Warframe.
Related: Can You Trade Warframes In Warframe? What You Need To Know
How to Obtain Void Traces In Warframe?

Follow these steps to obtain Void Traces quickly and efficiently in Warframe:
- Click the icon at the upper right corner of your Navigation Screen to open Void Fissure Missions.
- While in the mission, you need to kill special enemies called Corrupted Enemies.
- These Corrupted Enemies will drop a resource known as the Reactant.
- You will need, at least, 10 of these Reactants by the end of each mission.
- These 10 Reactants will be used to open the Void Relic.
- At the tenth Reactant being picked, you will receive anywhere from 6 to 30 Void Traces.
- You will not be required to equip a Void Relic to be able to obtain these traces.
Specific Rewards
While collecting the drops mentioned above, the Granum Void Rank 1 contains 5 Void Traces in the Normal mode.
In the Extended mode, these Traces increase up to 10, and there can be 15 Void Traces dropped in the Nightmare mode. On the other hand, Isolation Vaults have storage containers that can be broken. These broken containers also contain Void Traces.
What is the Hoarding Limit In Warframe?

Unlike most of the resources in most of the games, the collection of the Void Traces is not unlimited. It contains an upper limit. This means that there is a limit to how many Void Traces you can hold in your inventory, meaning mindlessly farming for them without keeping track of your upper limit can prove wasteful.
You can hold as many void traces as a hundred more than fifty times your Mastery Rank. This brings us to the following formula: Mastery Rank x 50 + 100. This means that a person at Mastery Rank 10, can contain (10 x 50) + 100 = 600 Void Traces.
This means that every single time you level up your Mastery Rank, the amount of Void Storage you will increase and you will have the capability of being able to store even more Void Traces than before.
On the other hand, if you end up winning and storing even more Void Traces than your upper limit of the capacity, you will lose the excess Void Traces. Only the Traces reclaimed after defeating a Kuva Lich remain safe.
Why Do You Need Void Traces In Warframe?
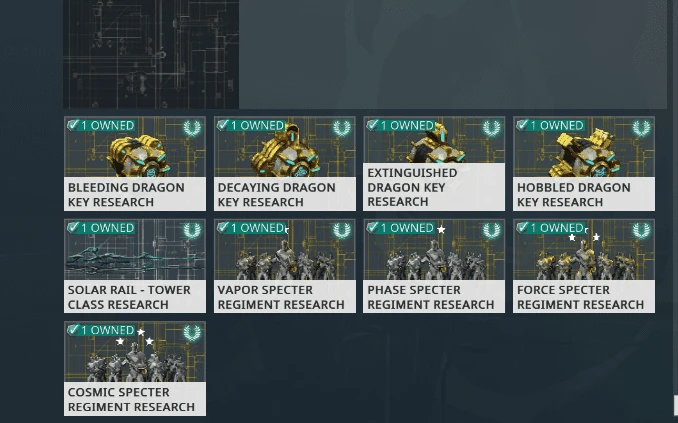
You can use Void Traces for the following things:
- You can craft a Dragon Key, these include the following: Bleeding Dragon Key, Decaying Gradon Key, Extinguished Dragon Key, and Hobbled Dragon Key; where each Key will require 10 Void Traces.
- You can use the Void Traces to get Void Relic Refinement. This refinement increases the possibility of getting even rare rewards. For these, you will need 25 Void Traces for Exceptional Relics, 50 Void Traces for Flawless Relics, and 100 Void Traces for Radiant Relics.
- Another thing I love to do to gain Void Traces is doing Excavations. The cycles of the Excavations are relatively short, and you can stay in them for as long as you like.
- You will need around 150 to 300 Void Traces per rank for the Necraloid standing.
Related: When Does Standing Reset in Warframe? All Timezones
Tips For Gathering Void Traces
Since there are so many possible uses of Void Traces and not enough drops for them per every mission, you may run out of them. Here are a few tips that will help you increase the amount of Void Traces you own.
If you feel like you are low on these traces, but you want to save your Relics at the same time, you can turn on the Fissure missions without equipping a Relic. As we know that the drops of the Void Traces are not dependent on the Relic.
You can obtain them the second you capture your 10 reactants, you don’t have to equip Relics. This, however, does mean that there will not be any bonus rewards for you. I have noticed that it is very helpful to run the Endless Void Fissure Missions because they drop a lot of Reactants required to gain Void Traces.
On the other hand, I have noticed that the Defense Missions also happen to be a brilliant source of Reactants, and eventually of Void Traces. In my opinion, these Defense Missions drop the most amount of easily accessible reactants in the game.
Important Resource Buffs
Ideally, the maximum number of Void Traces that can be obtained from one relic is over 7 thousand (7695 to be exact), however, it is rare to be able to obtain and activate 5 Charm Resource Buffs which opens a relic. In my opinion, having more than one charm is considerably rare in itself.
Additionally, the highest Mastery Rank: Mastery Rank 32 only makes it so that the maximum capacity to store Void Traces is limited to 1700 at a time.
Two resource buffs affect or increase the amount of Void Traces being gained. These Buffs include:
- Resource Boosters
- Smeeta Kavat’s Charm
Resource Boosters
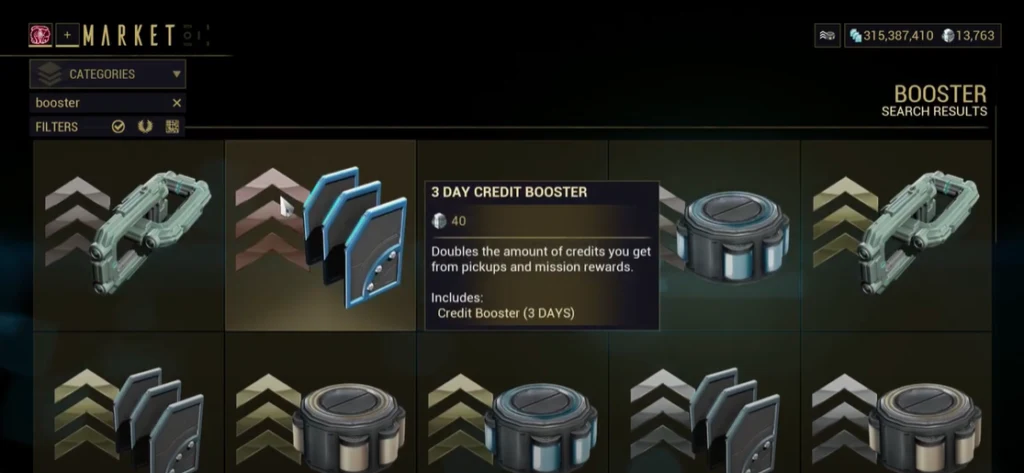
When it comes to these buffs, people have different opinions about them. In my personal experience, these buffs have helped me, at times, to double the number of resources I can pick up in the game. These resources also, obviously, include void traces.
As a regular Warframe player, I often find myself with Platinum. If you are a regular player like me and have 200 Platinum saved up, the best place to use it would be on Resource Boosters. Once bought, these Resource Boosters can stay in your inventory for up to a month.
However, if you don’t want to spend as much Platinum, you can buy cheaper Resource Boosters as well, but the only difference will be that they will last for a shorter duration. In my experience, the best way to spend Platinum in the game is to get the month-long booster.
While gaining Void Traces this way, it will become so easy and quick, you will be able to reach your upper limit of traces in the inventory super quickly. Then, you’ll be able to do everything you hoped on doing, such as upgrading a Relic every three missions.
This is a huge buff in the game for any player. After this Relic upgrade, if you end up doing Radiant Share Missions, you’ll get even more rewards. Additionally, with this booster, you’ll get the Platinum you used, back in no time. If you got any luck, you might make even more than you used up.
Related: How to Use the Codex Scanner in Warframe (PC, PS4, Xbox)
Smeeta Kavat’s Buff

Other than the Resource Boosters, you can also use Smeeta’s Kavat to use as a resource buff. I don’t personally use it a lot because I feel like it is very inconsistent and hard to rely on.
Because it’s always a Russian Roulette when it comes to the Smeeta’s Kavat Buff. This is why I would rather spend my Platinum on resource boosters, and I suggest you do the same.
These were some ways of getting and increasing the Void Traces drops, as well as some efficient ways how to use them. I hope this guide has been helpful to you. Hope you have fun playing, and don’t forget to use your platinum wisely!
And there you have it folks, everything you need to know about gathering Void Traces in Warframe. There aren’t many efficient ways to farm the item within the game, so we wanted to keep this guide solely focused on the one method we know will help you get the most out of your farming session.
Nonetheless, if you think we’ve missed something or need to discuss something else in detail then let us know and we’ll make an update to the guides provided here.

