Steam Deck is a robust machine that not only plays your Steam Library games but you can also use workarounds to emulate older consoles and even remote play your current consoles. Steam Deck can very easily become a hub for all your gaming needs. Speaking of current consoles, you can stream your Xbox One/ Series X to Steam Deck, which we will be covering in detail in this article.
You can use Xbox Remote Play on your Steam Deck by installing and setting up the App Image Launcher and Xbox Xcloud Client.
Scroll down and follow all of the steps below to use Xbox remote-play on your Steam Deck
Enabling Remote Play On Xbox
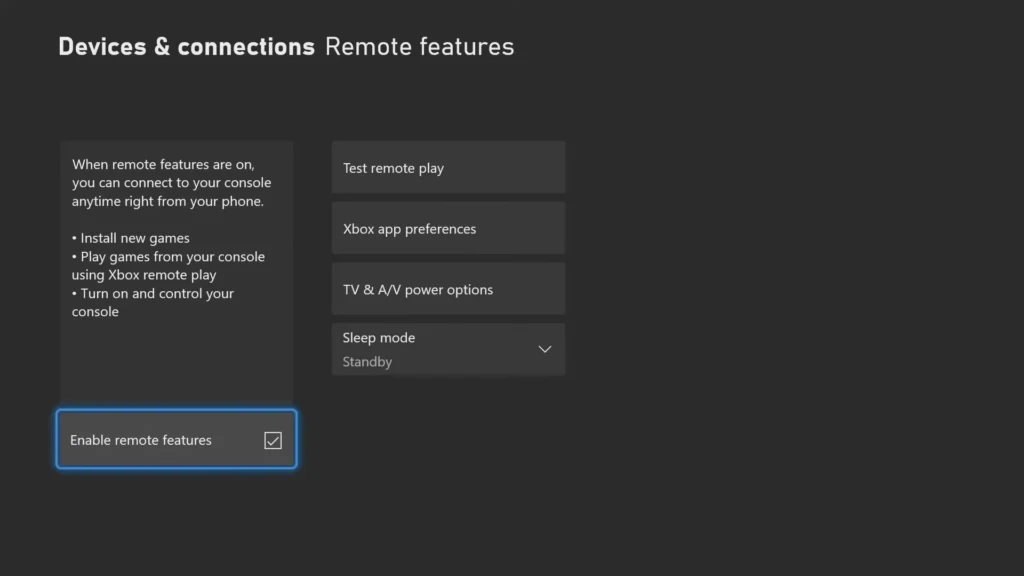
The first thing you need to do is enable the Remote Features on your Xbox. This can be applied on both Xbox One and Xbox Series X/S. You can find this option in:
Settings->Devices & connections->Remote features-> Enable remote features
Enabling this will allow you to stream your Xbox on other devices like your cellphone or in this case the Steam Deck. Do make sure you are logged in to your Xbox account on the console as it will be the same account you will have to log in on the Steam Deck too.
Installing Apps On The Steam Deck
Next, we will have to install two apps on the Steam Deck to make this work, make sure you are in the Desktop Mode:
- App Image Launcher
- Xbox Xcloud Client
Installing App Image Launcher
App Image Launcher is a great tool to add to your Steam Deck as there are other things like emulators and in this case, the Xbox Xcloud Client that uses this and it allows you to launch app images from your Applications folder. To install this you need to:
- Download the App Image Launcher using your browser from the link we have provided: App Image Launcher (it is safe don’t worry).
- Rename the downloaded file to “ail” for ease in the next step. The file will be named ail.AppImage.
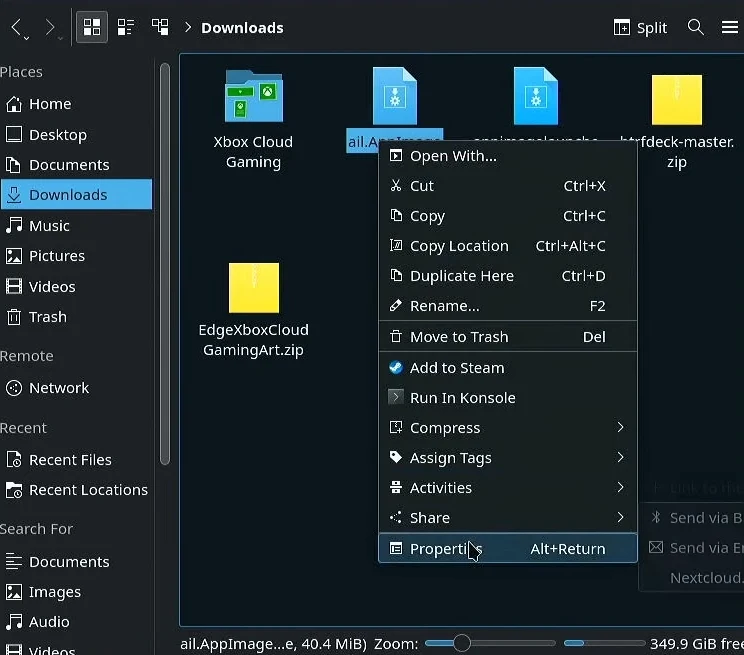
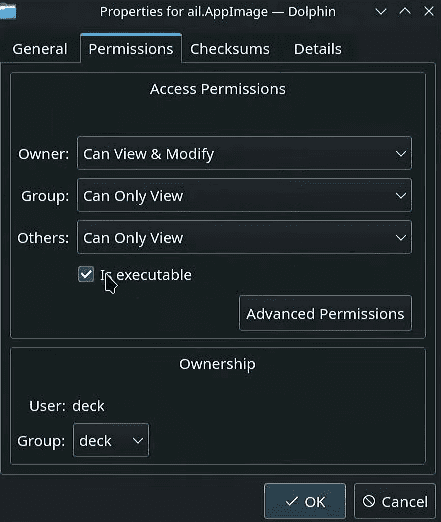
- Right-click on this file and go to Properties->Permissions and enable/tick the “Is executable” option.
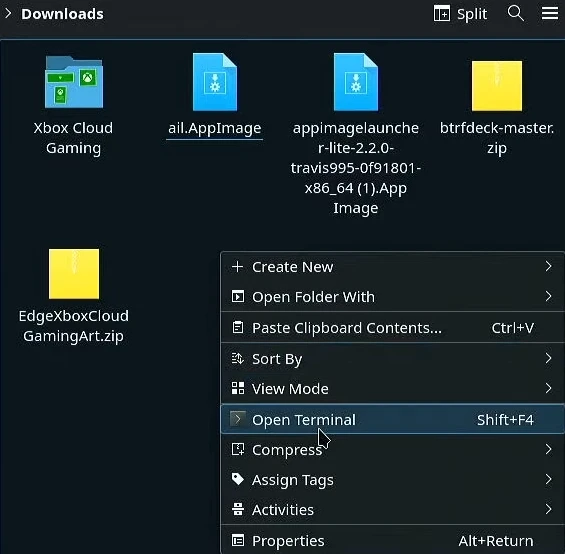
- Next open the Terminal from the same Downloads folder. Right-click anywhere in the Downloads folder and select Open Terminal.
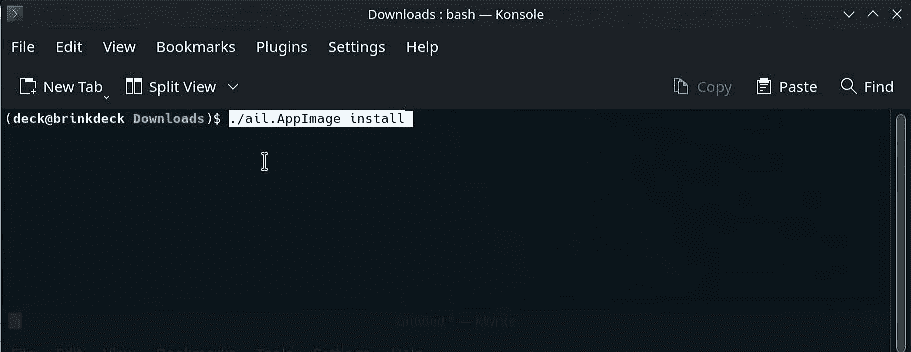
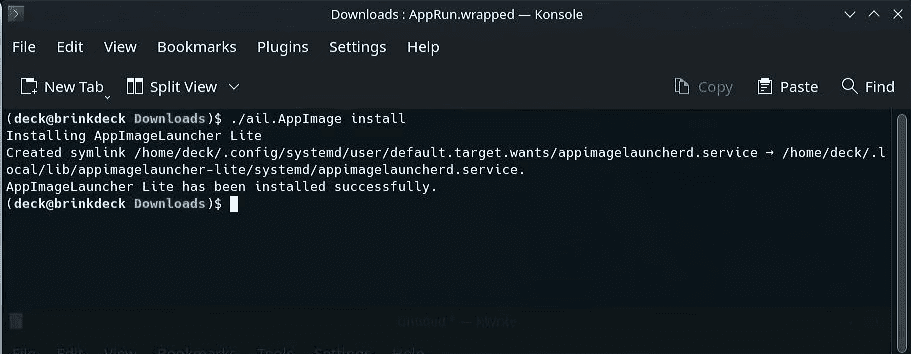
- In the Terminal, run the following command to install the App Image Launcher (as seen in the picture above):
./ail.AppImage install
Copy and paste the command and press Enter to run the command and install the app.
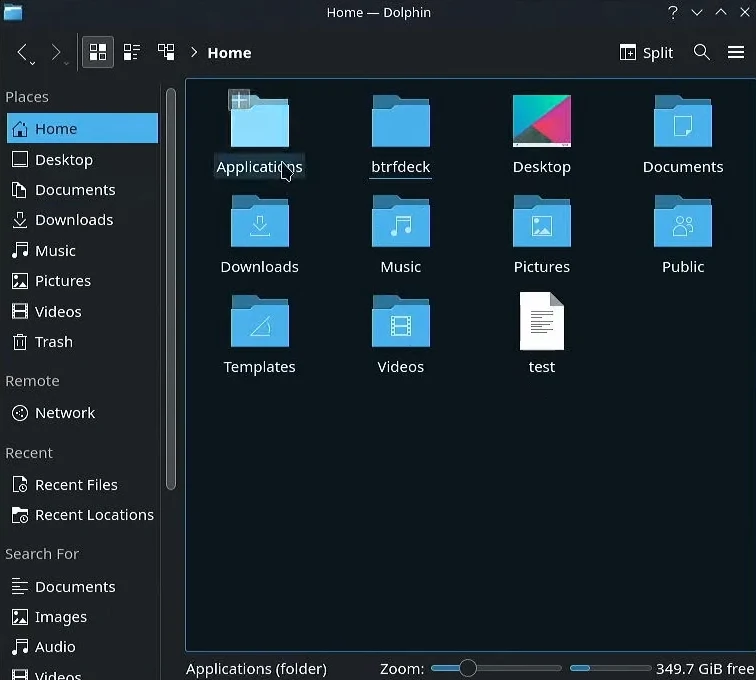
- When the App Image Launcher has been installed, there will be a new Applications folder added to your Home.
Installing Xbox Xcloud Client
Once the App Image Launcher has been installed successfully it is time to install the Xbox Xcloud Client.
- Download the Xbox Xcloud Client using the browser with the link we have provided here:
Xbox Xcloud Client
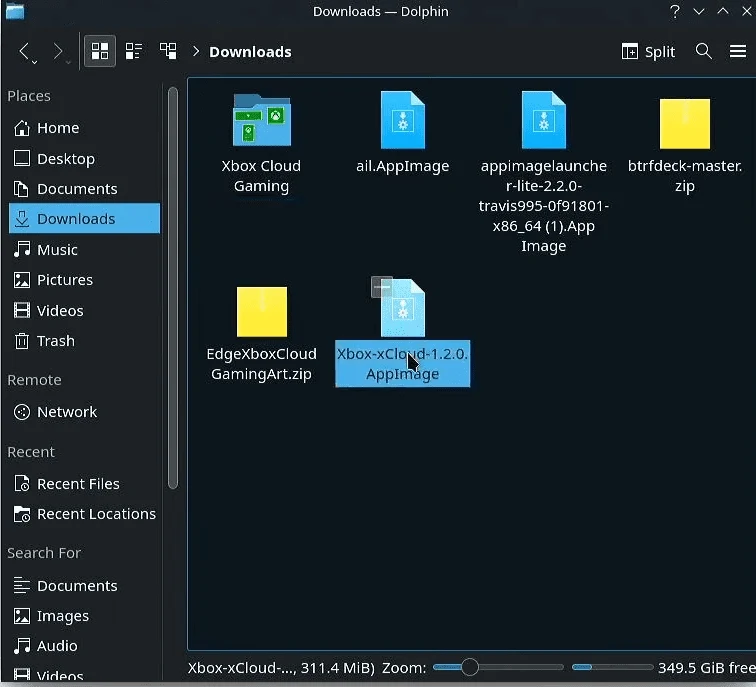
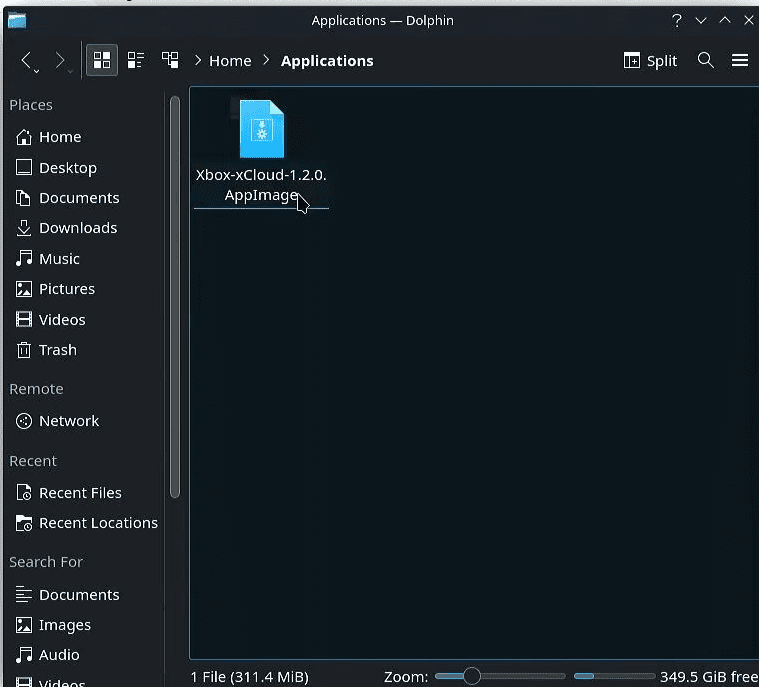
- Now move the Xbox Xcloud Client file from the Downloads folder to the Applications folder. Doing this will essentially install the app to the Steam Deck.
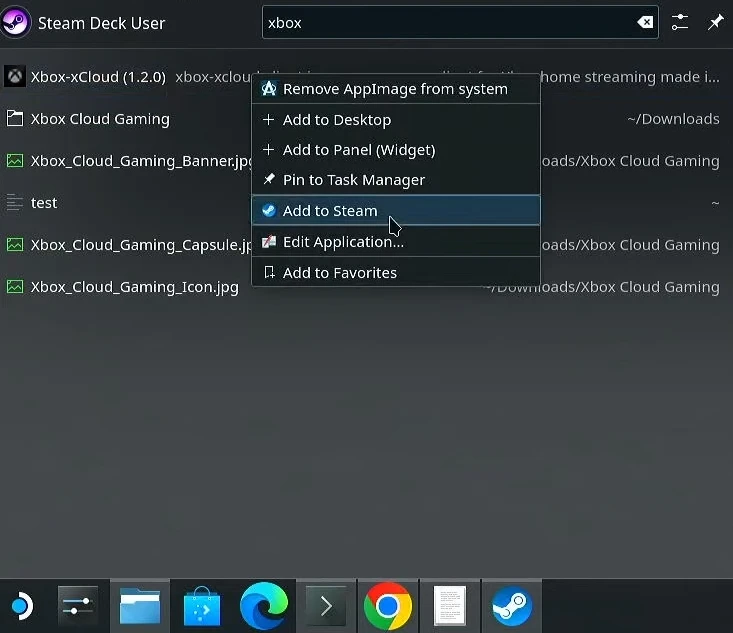
- Search for the Xbox Xcloud app from the Start menu then right-click on it and select Add to Steam option. Now this app is added to your Steam Library.
Setting Up The Xbox Xcloud App
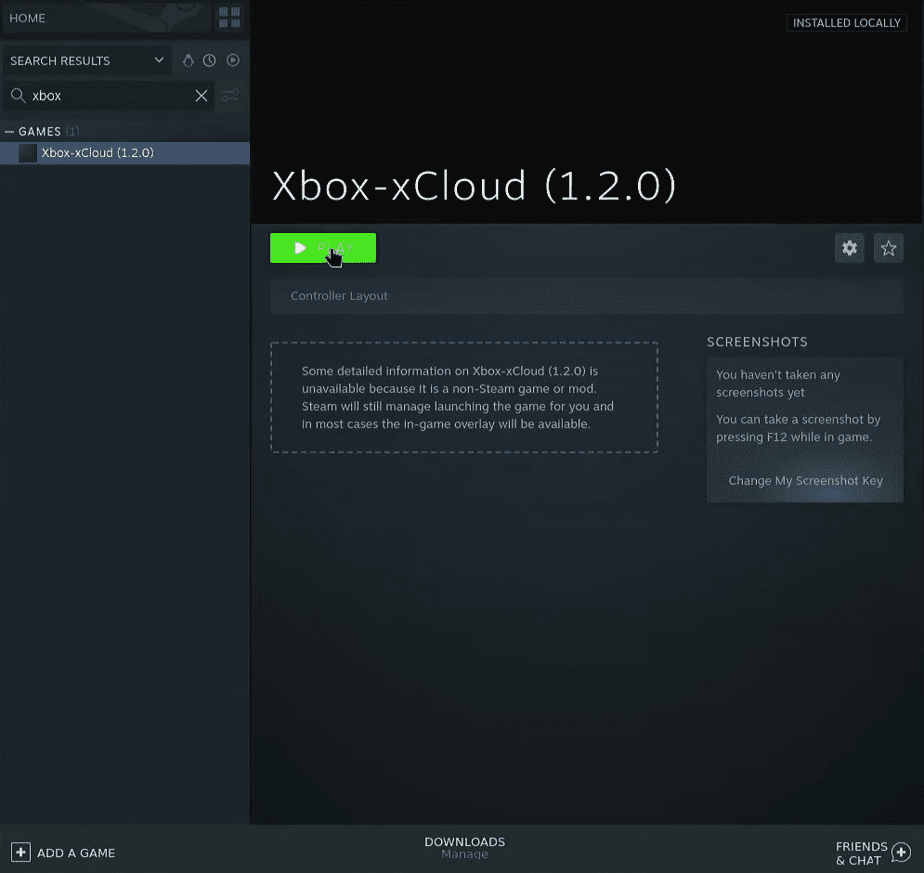
Now that the Xbox app is in your Steam Library, it is time to launch it in Desktop Mode and set it up.
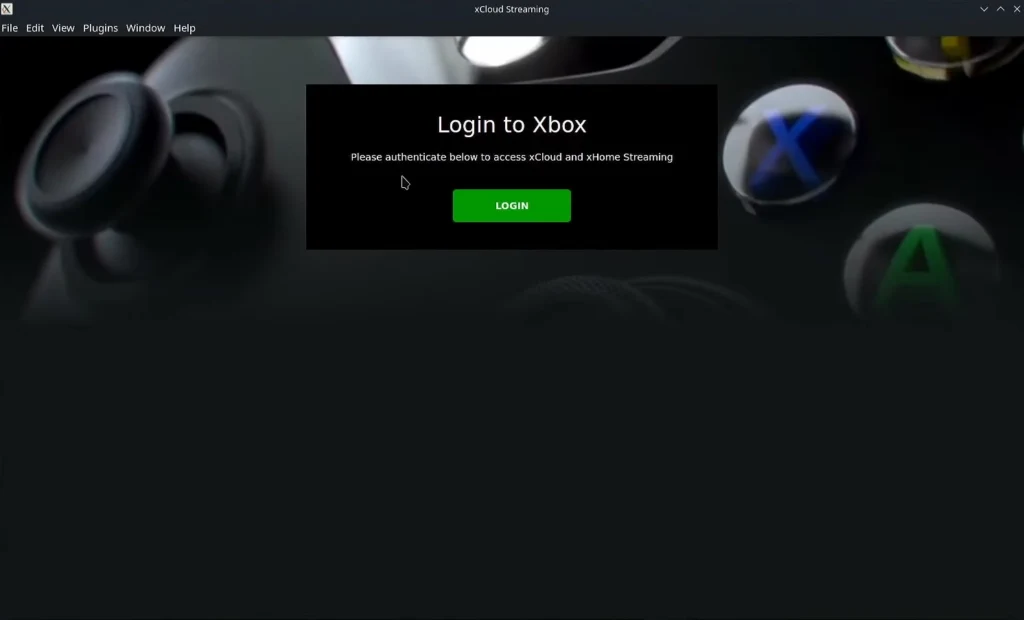
It will launch as a window and will ask you to Login to Xbox, so go ahead and sign in using the same account as your Xbox. Please make sure to select the stay logged in option so that you don’t have to sign in each time you start this app.
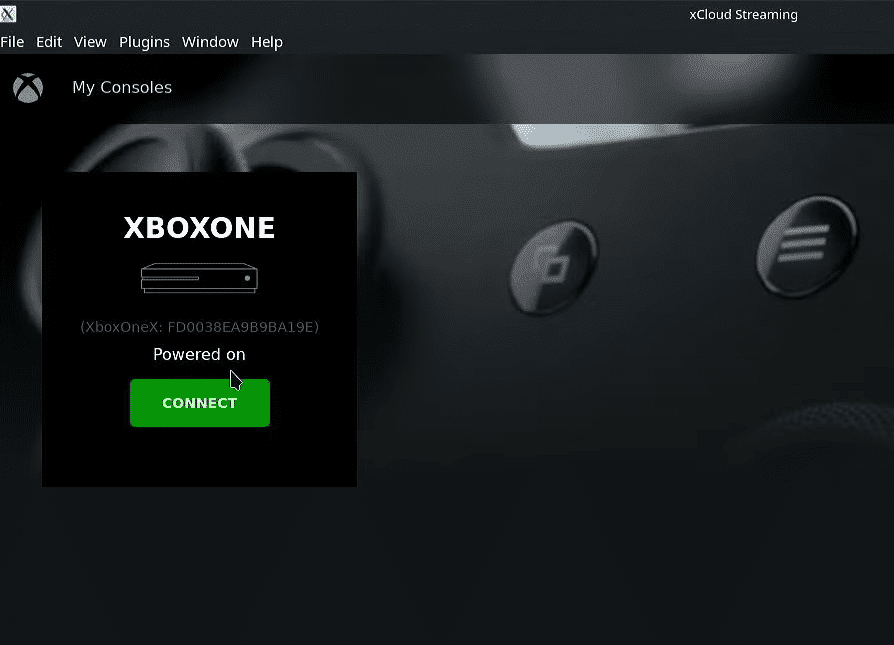
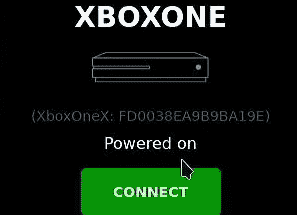
Once you are done signing in, you will see your Xbox ready to Connect. As seen in the picture above, your Xbox needs to be Powered on for this to work.
Now before we move on to the Gaming Mode, there are a few things to look into for proper setup:
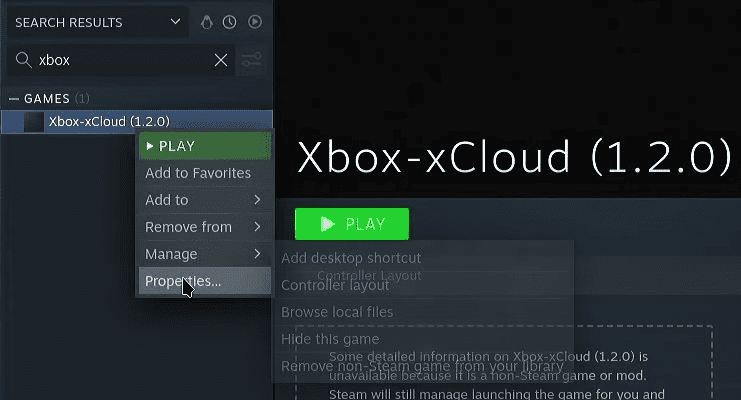
- Go to the Properties of the Xbox Xcloud app. (as seen in the picture above)
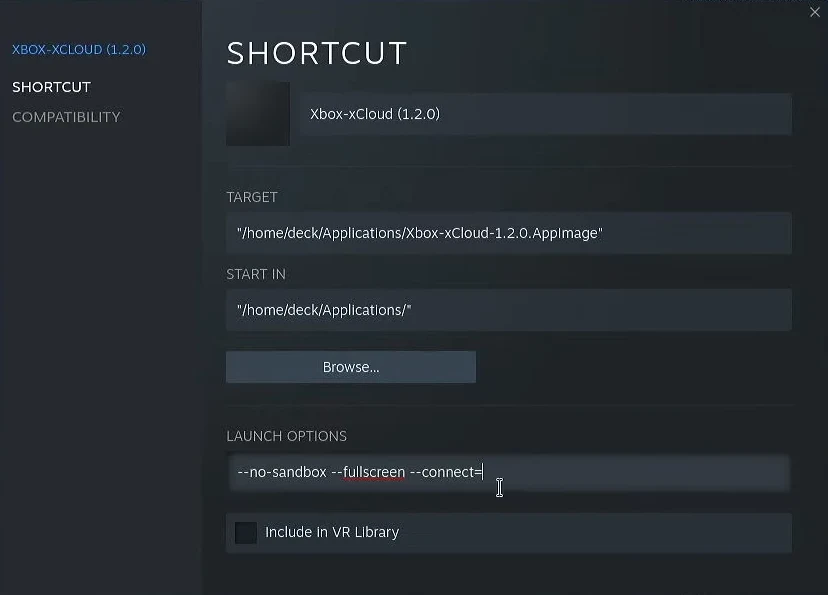

- In the Shortcut tab under Launch Options add the following command:
–no-sandbox –fullscreen –connect=(Your Xbox ID)- This command will launch this app in fullscreen when you launch it in Gaming Mode.
- You can get the Xbox ID from the My Consoles window of the app just above Powered on. Copy and paste it after connect=
- Doing this will launch this particular Xbox directly without having to select it from the app each time. If you have multiple Xbox connected on this app then do not put in the “–connect=”.
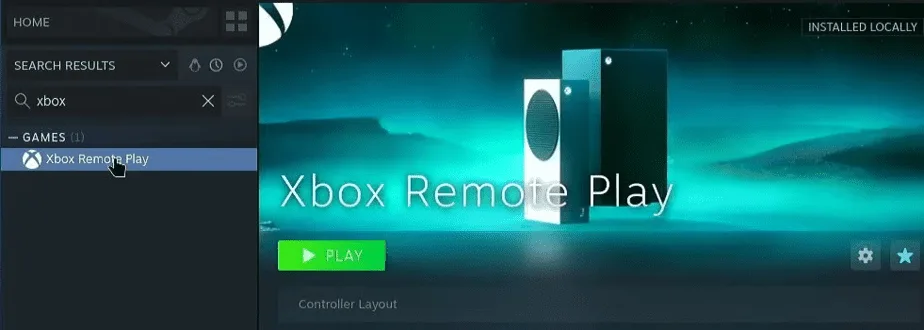
You can also rename the app to Xbox Remote Play from the Shortcut tab too. If you want to make things even better looking then you can add the artwork to this app from SteamGridDB for Icon, Logo, Grid, and Hero.
Xbox Xcloud App In Gaming Mode
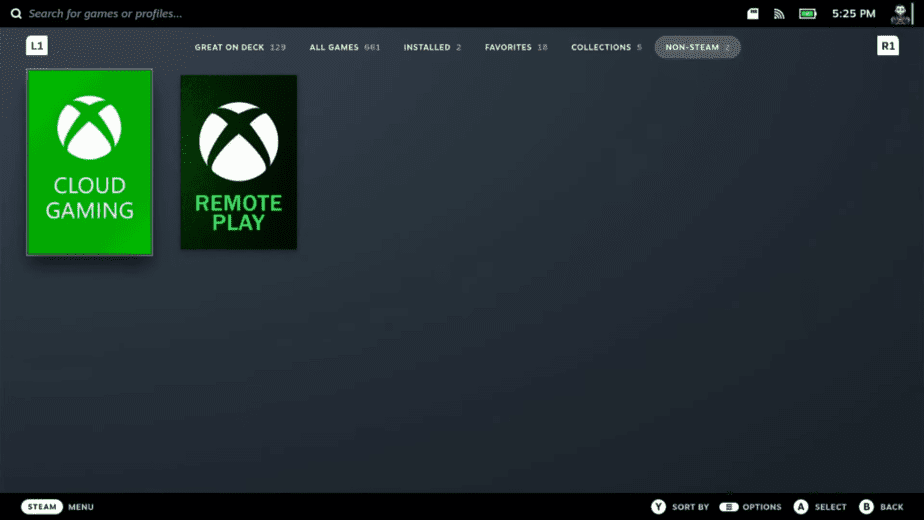
You will find the Xbox Xcloud app in the Non-Steam section in Gaming Mode. When you launch the app, the regular app window will open and it will auto-sign in and automatically connect to the Xbox ID you have inserted in the Launch options or if not added then it will ask you to select the Xbox you want.
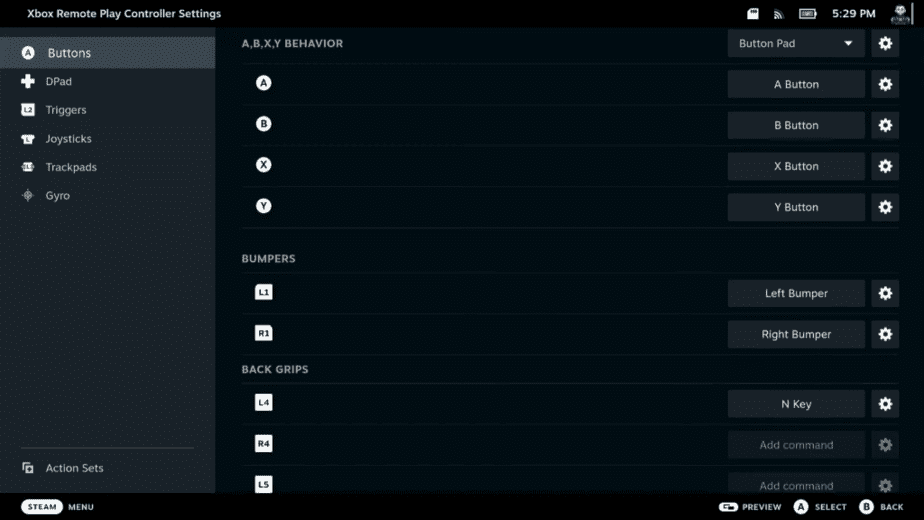
Before you start playing any game, you have to remap the Xbox Button on the Steam controller layout. So go to Controller Settings then Edit Layout and map the Back Grip L4 to Keyboard “N” key which is the default Xbox Button key on the keyboard assigned by this app.
With all of this done, you can begin streaming/remote playing your Xbox over the Wifi on your Steam Deck without any trouble. Your internet connection has to be stable for the games to run smoothly and it should work like a charm!
If you have followed each step perfectly then there won’t be any issue streaming your Xbox on Steam Deck. You can play all your games on your Xbox without having to stay planted in front of the console. Steam Deck’s open design language has made it a hub of gaming where you can enjoy anything and everything game related!

