
The Surge 2 is a very challenging game, but once you know how everything works, then you will have no problem getting through the game. Compared to the first game, there is just a lot more content added, which makes for a better experience in my book. One main thing that the first game lacked in was its bosses. They definitely improved that in Surge 2 by adding a total of 17 bosses currently in the game. Each of the bosses is unique, with the exception of a few being a reskin, but other than them, it seems that they are all different. Here are all the bosses in Surge 2 ranked by difficulty.
If you want to see some tips and tricks for Surge 2, consider looking at this guide I found on Amazon here. Also, if you want to read a Beginner’s Guide for the game, consider reading this article here. Once you know how to beat all the bosses, it becomes second nature to you.
17. Nitro


Location – JCPD Armory, Detention Center
He is the easiest boss in the game because of his health and he is also considered the tutorial boss in the game. He is soo easy, that there is a boss fight within 5 minutes of you defeating him. He could be hard for beginners, but that is because you don’t get to choose the weapon you want right away. You only get 100 Tech Scrap from him when he is defeated.
Nitro is the first boss fight you encounter. He’s armored all over except for his head, so that’s where you should target. Nitro uses an Equalizer, dishing out slow but damaging attacks. Try to back off while he’s attacking, then take advantage of his recovery period to land a few hits.
In case you die, remember to come back through the door you opened earlier to avoid most of the enemies. As you do not have yet have the Exo-Rig at this point, you cannot dodge, run or jump while fighting him. You can also try parrying his attacks, but it is hard since you probably won’t know how to do that yet.
16. Warden Garcia


Location – JCPD Lobby, Detention Center
He is the second boss you encounter in the game right after Nitro, and you are gonna need some armor. He is another very easy boss and it will not take long to defeat him. There is not much to say about him other than he is a very easy boss at the beginning of the game. He gives you 500 Tech Scrap when killed.
Warden Garcia uses an MG Jackknife Pro, the A.I.D. Nightfall Set and a combat drone in the fight. When you are near him, he will attack with his weapon making a three-hit combo. Try to wait for the combo to finish, then go in and strike back. The combat drone activates from time to time, you will see a red laser aiming at you. When this happens the drone is immobile, so try to hide behind a wall or run in circles to avoid the attacks.
If you move far away from Warden Garcia, he will jump at you or launch Molotov cocktails. When this happens, try to evade them by jumping to the sides. When attacking, try to go for his right arm. If you can perform a finishing blow on it, you will be rewarded with the weapon MG Jackknife Pro and the Schematic for A.I.D. Nightfall Arm Gear.
15. Captain Cervantes


Location – Gideon’s Rock
He is a boss you encounter later on in the game, but he is actually very easy. The hardest part of this fight is trying to get to the boss fight itself because of all the enemies outside the arena. There are a ton of Nano enemies and soldiers and you can die really easily. Once you get to the fight, just make sure you dodge a lot and be very cautious with your hits. He gives 6,000 Tech Scrap when he is killed.
The battlefield is rather small and Cervantes can perform a series of both long and short-range attacks. The best strategy is to stay as near to him as possible. Use your drone to break his invisibility as soon as he is activating it and use the de-cloaking window to attack him. If you are quick enough, it’s easy to parry and perform a counter move.
If you are quick enough, it’s easy to parry and perform a counter move.
After performing an attack, he may draw and shot his shotgun. This attack cannot be parried and deals high damage. Try to dodge in circles to avoid it.
He will also throw 3 mines on the field. Just avoid it. He is also very weak to fire damage since he is human. Not a hard boss fight at all.
14. Brother Eli


Location – Port Nixon, Seaside Court Supply Route
This fight is hard when you first start it, but once you see all the moves that he makes, you will notice that he has a very small moveset. The arena is medium-sized and easy to maneuver and the initial boss fight is very easy. He is very slow and if you know how to dodge, you will be fine. He gives you 1,000 Tech Scrap when you kill him.
You can start the fight yourself without talking to him, hit him with a charged attack from the back. He can perform quick attacks that break your balance. Try to wait for his combos to finish and then strike back while he is recovering. He will summon 2 Twin-Rigged SPARK Aspirant in phase 2.
Try to deal with them first and then continue attacking Brother Eli. You can use your drone to shoot their unarmored limbs. As a human, he’s weak to Fire and Electricity damage. If you cut his right arm off in the end, then you will get the Warhammer of Forced Conversion.
13. Brother Eli Revived


Location – CREO Institute of Technology
This fight is basically the Brother Eli fight with a few new enemies added in. He is a little bit faster but not much harder. At this point in the game, I would not be surprised if you beat him on your first try. He drops the Critical Oxygenator and 8,000 Tech Scrap when he is killed.
Brother Eli uses attack patterns similar to the first fight. The difference is that he can now use Nanite Attack too. Try to deal with the Twin-Rigged Spark Aspirant first and then deal with Eli. Focus on the directional block and try to avoid his nanites attacks. Make sure you use fire as the first fight to make it go very quickly.
12. PROTEUS Ambush


Location – CREO Institute of Technology
The only reason this fight is lower on the list is because of the horde boss. There are 4 hard robot enemies that you have to fight, but it is not that hard if you have the right weapons and armor. If you can do it, try cutting off different parts of each robot because you can get the Schematics for the entire PROTEUS Set if you do it to all 4 of them. You can also get the Codename: Parsifal from the fight as well.
When you enter the room you’ll be attacked by 4x Proteus. Try to focus on 1 at a time dealing with some damage and then running off and repeating the operation until there are only 2. You can then handle it like a normal fight. If you have good perks that you do more damage to robots, make sure you put that on. A faster weapon is also helpful with this fight because you are going to want to take them out fast.
11. Little Johnny


Location – Port Nixon, Terminal Z
This boss is the first challenge that you will face in the game. Not only do you have to fight a giant three-legged robot with a fat baby man inside, but you also need to take out tons of little tanks on the body of the robot. He has a big moveset and he sometimes throws out little bombs that can stun you. He gives you 5,000 Tech Scrap when killed and if you cut off the front 2 claws, then you will get the V2.0 of Little Johnny’s Forceps.
The goal is to break his 5 cooling tanks: 2 on the cockpit and 1 on each leg. There’re also 2 pincers on the cockpit, cutting both will reward you V2 weapon that deals poison damage, but they don’t count as tanks. Staying beneath the cockpit may bait him to use stomp attack, there’s a little animation before the attack, giving you time to backlash and position yourself to charge an attack to the cockpits cooling tanks.
When a leg tank is destroyed, he’ll be staggered and start releasing gas from the broken leg. You can go for one leg at a time, switch to another when it’s low-health, then break them all at once. Use your drone to shoot down the tanks on the cockpit when they’re out of reach. If you’re having trouble with poison, Antidote Injection implant, full SPARK Defender, Aspirant or Liquidator set may help.
10. Major General Ezra Shields


Location – A.I.D Command
This is an important boss fight in the game because once you defeat him, the whole world changes so make sure you do whatever you need to do before defeating him. He is actually a pretty hard boss just because of his two phases. It is later on in the game so don’t worry about this boss right away. He gives a lot to the player if you kill him like 20,000 Tech Scrap and a bunch of armor Schematics and a weapon.
In the first phase, the Boss moves and turns very slow. Try to stay near him while going in circles around him and dealing some damage. He won’t be able to kick you if you stay behind him. When you see the guns point down jump backward, wait until the attack is over and go in again to deal some damage. When he throws fire at you, just run in circles until the attack is over and then continue dealing damage.
In the second phase, the general will be expelled from the robot and will fight you melee with punching gloves. The armor will still periodically fire beams at you and use the flamethrower. You can destroy the flamethrower by selecting the robot and selecting the limb. A good strategy is going around the robot while the general chases you. When he starts attacking you, jump away and attack the flamethrower.
9. Delver Echo Alpha


Location – Underground
The Delver bosses were probably some of the most annoying bosses in the game because I did not know how to defeat them. Once you get their moveset down, then you will have no problem taking them out. The Echo Alpha Delver is the dog-like version that is probably the easiest because all you have to do is dodge and attack. It gives you 10,000 Tech Scrap when killed.
When you are far away, it will run across the room trying to stomp you. If it succeeds, it will drag you to a corner. When at close quarter combat, it can perform a powerful dual combo attack that deals high damage. After doing the combo, it will also leap at your location to bite you. If you are having trouble, you can keep a safe distance and use your drone to deal with a considerable amount of damage.
After some time, it will become nanites and go to the roof. This is the most important part of the fight. When it throws nanites at you, it deals damage to itself. It will fire two volleys and then it will throw itself at your location. If you dodge it, it will stagger providing an opportunity to attack. When it falls down, it will recover any nanites that were not destroyed by recovering health. You need to dodge the nanites and then destroy them. If you destroy the nanites, it won’t be able to recover itself.
8. Delver Echo Gamma


Location – Downtown Jericho City
This is another Delver boss reskin and it is basically a walking version of the Delver. It is harder than the Alpha because wherever it goes, it leaves a trail of Nano on the ground so it is kind of hard to not take damage from it. Also, the boss arena is very small compared to the others so that is something that needs getting used to. It gives 20,000 Tech Scrap when killed.
Try to stay running in a wide circle far away from the creature. It will eventually drop itself to the ground and slide to your direction leaving a big trail of nanites behind it. Just wait until its close and dodge to either side.
After dodging use a charged attack to reach the creature and deal as much damage as you can before it can get up. When the creature is up, run away as far as you can and repeat the operation. You can repeat this until the boss is defeated without taking any damage.
7. Delver


Location – Gideon’s Rock
This is the first Delver that you fight and is the hardest one out of all of them. The reason that it is soo hard is that it has 3 phases. The first phase is different from anything else in the game, but phase 2 is like the Echo Alpha fight, and phase 3 is like the Echo Gamma fight. It is challenging because you are pretty much fighting 3 bosses in one. It gives 20,000 Tech Scrap when it is killed and if you can parry the boss, then you will get a great weapon.
The beast is standing on both legs and attacks with its claws. It can perform a 3-hit combo from either direction. Try to parry the first and the next 2 will be easy. It can burrow underground and then come out two different times to perform a single attack. When it comes out, dodge and then go in to deal some damage. The third time it will come out of the ground and leap at you. Try to dodge when it’s near you.
6. Goddess Helena


Location – A.I.D Command
This boss is actually pretty difficult when it comes to health because it has a lot. Also, the boss has a shield that you must take out before you start attacking or it will absorb all the hits. It is close to the statue fights that you have in Gideon’s Rock, but it is a lot harder. You get 12,500 Tech Scrap from killing this boss and the Twinlance of Corruption.
In phase 1, the boss acts very similarly to a Shielded Gaia. When shielded, it can perform fewer varieties of attacks but is better protected. You can break the shield by performing a vertical charged attack. Even with the shield, the boss will be open to attacks while using the Head Beam attack.
In phase 2, when you break the shield, the boss will have a larger array of attacks. Try to stay at close distance and spin around her while dealing some damage. The best opportunity to attack her is while she uses the Beam attack on her head, as she turns slow and can’t cancel the attack.
After some time, the Boss will create a new shield returning to Phase 1.
5. Collective Incinerator


Location – VBS Krakow
This is the first DLC boss you encounter and is actually very difficult. What makes this fight difficult is the small arena that you fight the boss in. The attacks are very fast and are not easy to dodge. Using poison is helpful because he is weak to it. You get the Garage Key Card when you defeat him.
The Collective Incinerator takes advantage of the reduced Battlefield size. The wide swings and fire patches are very annoying providing few opportunities to strike back. If you are confident with your parry abilities you can try to stay close and attack when he staggers.
You will still have to avoid the attacks that can’t be parried such as his charge. Another strategy is staying at a medium distance and wait for his charge. Dodge him take a few hits and then jump backward. You can repeat this and wear him out.
4. CAIN


Location – VBS Krakow
This boss is the final boss of the Kraken DLC and it is on the harder side. The boss fight is optional if you don’t really want to fight it, but you get really good items if you defeat it. You get 25,000 Tech Scrap if you kill the boss as well. There are also 3 alternate rewards you can get if you can defeat it in a certain way.
Cain’s attacks have a very long reach so it’s difficult to fight him from a distance. If you have a tank build you can face him from a close distance. Focus on his legs and every time you break one of them he will become staggered providing you a good opportunity to heal and recover.
If you are not playing a tank build you can wait for him to attack to strike back. When he performs the tornado attack you can use the EMP-44 ‘Starfish’ to stagger him. You can also use your drone to aim to his legs and break them off to stagger him and provide a good attack opportunity.
3. Archangel Eli


Location – The Great Wall
This is the final boss of the entire game and is surprisingly not the hardest. He has many attacks so it is hard to figure out what he is gonna do next. In my opinion, it still was not as hard as a final boss should be. I actually beat him on my second try but it was entirely luck. You get 50,000 Tech Scrap from defeating him and the Greatblade of the Archangel.
Brother Eli can perform many attacks with different timings so it’s difficult to directional block all of them. Try to stay near to him and keep attacking. When he is about to perform the AOE attack jump backward and wait until it’s over to go in and keep doing damage. Try to stock up on Injectable Charges to keep your health as high as possible.
If you keep close enough to him, only backing up if he uses the AOE ground shockwave attack and then rushing in to attack him ASAP, he will not use his spinning sword-throwing attack, neither his follow-up stun/grab attack, thus, eliminating a significant challenge from the fight. This tactic requires high aggression though and intense dodging as you have to be very close to him at almost all times.
2. H.A.R.O.L.D. Boss


Location – Creo Institute of Technology
If you have ever played the first Surge, you will know what these three-legged robots are. These were the most annoying enemies to fight because of how agile they are. He is hard for me because I had a lot of trouble with these types of enemies so that is why I am putting it at number 2.
It behaves in a similar way as the A.I.D. Hound. The battlefield is not so big so try to focus on the directional block. If you perform a finishing blow on his tail you’ll get the alternate drop and his attacks will be more limited. He also sends out little mini versions of himself that can be the end of you if you get hit with at least 2 of them.
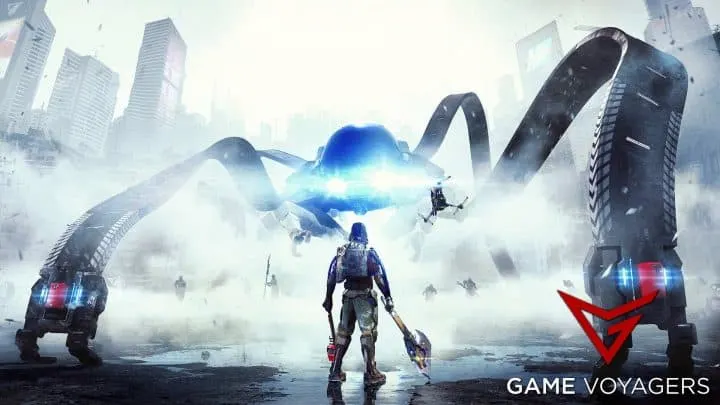
1. Matriarch Celeste


Location – Cathedral of the Spark
She is the hardest boss in the game because she is like a giant floating witch. She is very fast and she hits hard. In her second phase, she starts throwing lightning around so the best thing to do is to stun her before anything happens. She gives 25,000 Tech Scrap when you kill her and also drops my favorite weapon, the Icon of the Spark.
There are two strategies. You can stay near to her and try to directional block her attacks while striking back. Her attacks are rather simple so you won’t have problems. The other strategy involves getting away from her and wait until she charges at you. It’s easy to parry the charge. After you’ve parried her charge she will almost always attack from above. Parry it and you’ll stagger her.
In phase 2, a good strategy is staying near her and focusing on the directional parry. If she uses the hug attack, you can opt for dodging and dealing some damage or parrying, let her grab you and then deal damage to her. Also, you will need a lot of stamina because you will be dodging a lot. If you can stun her, then it is all downhill from there.
Conclusion
In conclusion, there are plenty of bosses in Surge 2. I know you might not agree with me with the placement of them, but this is how difficult I found all the bosses to be. Everyone struggles with different things, but I am pretty sure this is as close to anyone’s numbers as it is going to be. If you have not beaten the game yet, then good luck to you, and if you are starting NG+, I hope you have an easier time than your first playthrough.
All images are taken from the Fextralife Wiki.