

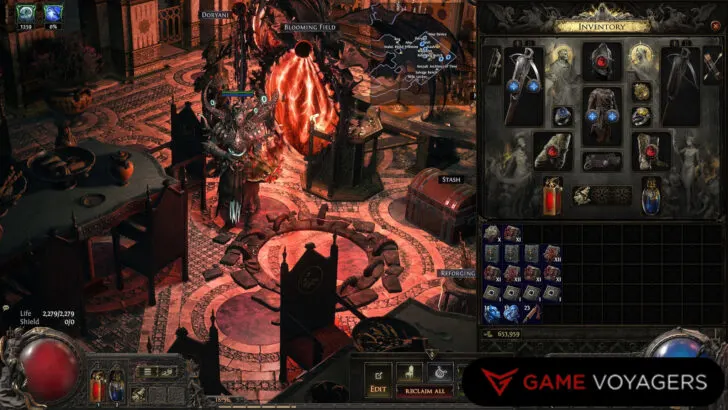
Diving into Path of Exile 2 is a challenging task. There are a ton of mechanics and features, to say the least, that the game expects you to discover on your own. You’d be surprised how often you get bogged down by the menus, get confused when looting, or don’t know what to keep or throw away. You can use some nifty tricks to make things easier for you.
In this beginner’s guide, we will go over some best practices and additional tips to help you get the most out of the game and make your Path of Exile 2 journey less cumbersome.
1. Settings To Change

At any given time, there is a boatload of enemies to kill in Path of Exile 2, and they drop items constantly. Most of the stuff is throwaway items, but there are many items that you can’t miss out on. By default, you have to either hover your cursor over the loot on the ground to see what it is or hold down the ALT key to see all the loot currently lying on the floor.
It happened to me a couple of times where I moved on after defeating a horde of enemies only to realize I missed an essential item like an Uncut Skill Gem on the ground. Some smaller items are hard to spot and skip your vision altogether if you aren’t paying attention.
To address this wasteful habit, pause the game and navigate to Options. Choose the Interface tab and scroll down to the Gameplay section. Here, ensure that the Always Highlight setting is enabled.
Now, all the loot on the ground will always be shown to you, so you’re much less likely to miss something vital because you didn’t see it to begin with.

While you are in the options menu, we recommend enabling the Show Mini Life Bar Above You. Doing so will allow you to see your health and Mana bar directly above your character. This can help you keep better track of this critical information without looking down into the corners of your HUD during combat.

Additionally, you should also change the Show Mini Life Bar Above NPCs dropdown menu to Allies and Enemies. By default, you have to hover over an enemy to bring up their health bar. This is almost impossible to do when a mob of enemies surrounds you.
By changing this setting, you can view each enemy’s health bar and strategize accordingly. For example, you can target the weaker enemies to clear space and focus on the enemies with fresh HP bars.
2. Quick Item Descriptions

When you pick up an item in Path of Exile 2, you don’t necessarily see everything it does and what the many keywords underlined in the description mean. You can expand this description by holding down the ALT key or holding the right stick on the controller while hovering over the item. This is especially helpful if you need clarification about what a Keyword (underlined) means.
3. Collect All Socketed and Quality Loot

Now that the game will show you the description of all loot that drops on the floor in combat, be on the lookout for items with a small dot/square at the end of their names. That symbol indicates that this is Socketed gear, meaning the loot has a slot into which you can put a rune. You must grab it!


You are not expected to equip every socketed gear you find but you better store it. Take the useless gear back to any Town and head over to the Salvage Bench. Break down these items to receive the Artificer’s Shard. Collect ten shards to turn them into an Artificer’s Orb. You can use this orb to add a Rune socket to any piece of armor or weapon.

Similarly, you should also be on the lookout for any gear with some Quality percentage on it. Grab as many as you can and take them to the Salvage Bench. Breaking down Quality items will result in random potent goods like Blacksmith’s Whetstone, Arcanist’s Etcher, and Armor Scraps.

These items can then be applied directly to your favorite gear to improve its Quality, making it slightly better overall. Every bump in quality will be tiny, but making your gear 3% to 4% better can go a long way, especially in certain boss fights where you feel you need all the help you can get.

Another way of gathering socketed and quality loot is through the Vendors present in each town. Make sure to check their stock to pick up such items. The best time to purchase is when you are close to leveling up (indicated by the golden bar at the bottom of the HUD) since their stock and prices update once you level up.
Make it a practice to warp to each town and buy all the socketed and quality items before you level up. Take the worthless to the Salvage Bench and do as instructed.
4. Organizing Stash

The deeper you get into Path of Exile 2, the more loot you’ll amass. If you don’t take time to organize your stash, it will look like a cluttered nightmare in a very short time. Organizing your mess can be ironed out if you want to dish out some bucks.
Visit the Microtransaction Store, and under the Sales tab, you can purchase item category-specific tabs for your stash, like the Gem Stash Tab and Currency Stash Tab. Not only will they add more space to your stash, but you can better organize your stash using these tabs.

This does cost premium currency, but you can get around it if you have already paid for the Early Access version of the game. This would have given you some currency that you can use to buy the stash tab you want. The tabs are currently on sale, so use them to your advantage.
Once you have the specialized tab unlocked, for example, the Gem Stash Tab, you can open your inventory, hit CTRL, and Left-Click on any gem, and it will automatically send it to the Gem Stash Tab, neatly organized as you go.

You don’t have to spend your currency, though, since you can technically do this for free with any regular stash tab. Right-click on any tab and change its affinities to anything you want. Now, every time you CTRL and Left-click on any item of that affinity, it will send it directly into that tab.
5. Trade With Other Players

You should know by now that you can trade anything with other players in the game. However, there’s also an official Path of Exile 2 trading website that you can use to deal not just with locals in your party but with a vast number of players across the entire game.
The site is shockingly easy to use to find what you are looking for. You can use the filter feature to look for exact weapon types, exact rarity, and even a minimum or maximum level requirement. The site will tell you the name of the player selling the item as well as what they’re looking for in exchange. You can use the site to sell off your loot and get your desired useful items in return.
This is a nice way of passively trading items rather than consuming your precious playtime.
6. Assigning Skills to Specific Weapons

When inspecting your list of Skills, take note of the tiny Arrow next to the DPS number (marked in the picture above). Clicking that arrow will open a second window off to the side, which has more key information regarding that skill, such as critical hit damage, bonus resistance, penetration, etc.

At the bottom of this window, you can see the Used With Weapon Set with tick boxes to the side with I and II. Checking only one or checking only two will ensure that whenever you use this skill, you’ll always use it with the weapon set you selected here.

This will come in handy when you have certain weapons that buff particular spells or status effects. In this example, I have a staff in the weapon set one that buffs all my cold spell damage. When I only apply weapon set one to my Comet (cold-based) spell, it will instantly shift to the weapon set one when I activate the skill to take advantage of the cold buff and boost my damage seamlessly, even if I had some other weapon in my hand.
7. Weapon Set Specific Skill Points

Similar to the previous tip, you can assign specific Passive Skills Points to a particular Weapon Set. Since you have two different weapon sets, you can put points into your passive skill tree that will only turn on depending on which weapon you have out at the moment.
Head over to the top right of your passive skill tree and select either weapon set one or weapon set two before investing a new point to ensure it’ll only be active when using that weapon.
For example, you can have a whole bunch of different cold-specific passive skills active when you are using the cold-based staff. You can then switch to a fire-based weapon, and all fire-specific skills will become active. The skills can be seen lit up as active according to the weapon in hand.
8. Hunt Down and Farm Every Boss

Next time you’re looking at the overworld map, be sure to take a mental note of all the random icons that appear beside the main location waypoints. These are side quests with area bosses marked with a skull icon, treasure chests, etc. The greyed-out ones are already completed quests, while the lit-up white ones are yet to be tackled.

It can be really tempting to try to speedrun through the entire game and focus only on the main quest, but finding and killing these random bosses is extremely important. Not only do they drop decent loot, but many of them also give super valuable and unique rewards. You should finish icons with a plus sign as they unlock permanent rewards like stat boosts.
These include things like granting additional passive skill points, permanent resistance to a particular element, or a permanent boost to Spirit. It’s even worthwhile if you have to backtrack to an act you’ve already completed just to find and kill random bosses, for the reward will be valuable.
9. Reset Areas To Farm

If you’ve already completely cleared an area on your map that you want to farm again for more loot drops, you can reset it. Hover over the waypoint of your desired location on the map, then hit the CTRL key on the keyboard and hold down A/X on a controller before entering.
Reset the area and run it back! There are a few bosses you can find and farm quickly on repeat. The chances of getting your desired loot will only broaden if you repeat such areas.

An easy farming example is in the Sandswept Marsh area in Act Three. If you leave your starting location and hug the leftmost or rightmost edge of the map, you should find the local area boss in a minute or two.
Using this method, I’ve gotten extra-quality loot that I can take back to a Salvage Bench and break down into useful items. I’ve even gotten a few Unique rarity loot drops. We all know how important farming becomes in ARPGs, which will add some variation to your runs.
10. Gem Cutting Tip

When activating an Uncut Support Gem, the game will show you available options to customize each individual skill you have equipped. However, those are just recommended options.
To view every option, you can head to the bottom-most tab and select the All Gems option. This will show you the whole list of Support Gem options you have at your disposal.


You can filter Support Gems by stats or color: Red for Strength, Green for Dexterity, and Blue for Intelligence.

Furthermore, you can type in keywords at the bottom to search for your build-specific Support Gems. For example, if you are playing as a Sorceress that utilizes cold damage, you can just type in the keyword Cold and go through all the cold-based Support Gems. I found some interesting options this way that missed my eyes before.
We highly recommend that you poke around here and look at all your Support Gem options.
Bonus Tip – Save and Use Orbs Wisely

You can stockpile Exalted and Regal Orbs for when you really need them. Many shards and their corresponding orbs have some fantastic effects that could potentially spice up your build at the right time. Some noteworthy examples:
- Regal Orb – Upgrades a Magic item to a Rare item, adding 1 Modifier
- Orb of Alchemy – Upgrades a Normal item to a Rare item with 4 Modifiers.
- Orb of Transmutation – Upgrades a Normal item to a Magic item with 1 Modifier.
- Exalted Orb – Augments a Rare item with a new Random Modifier.
The best use case would be when a boss is causing much trouble, and farming is just a huge hassle. You can use these potent orbs to upgrade your gear instantly to give yourself that extra oomph to kick the boss to the curb finally.
We hope these beginner’s tips enhance your experience in Path of Exile 2. This is merely scratching the surface of the game’s intricacy. There’s a lot to cover, so keep an eye on our website for additional Path of Exile 2 guides as we gradually explore this vast ARPG.