
Sekiro is full of all sorts of enemies and one main part of the game is how many Mini-bosses there are to defeat. Mini-Bosses are special Enemies that are uniquely named and have 2 or more health bars.
This means they require at least 2 Deathblows in order to kill, they are generally much more difficult than normal enemies, and they drop some of the best loot in the game.
There are a total of 30 Mini-bosses in the game and that does not count the different versions of the same Mini-bosses as well. Even though some have multiple of the same boss, they are defeated the same way.
Here are all the Mini-bosses in Sekiro: Shadows Die Twice and how to beat them easily. There are SPOILERS in this article as a warning for any player who has not played too much of the game.
Check out this awesome guide for Sekiro: Shadows Die Twice on Amazon here, it is a very helpful guide.
- Leader Shigenori Yamauchi
- General Naomori Kawarada
- Chained Ogre
- General Tenzen Yamauchi
- Headless
- Shinobi Hunter Enshin of Misen
- Juzou the Drunkard
- Blazing Bull
- Armored Warrior
- Long Arm Centipede Sen-Un
- Lone Shadow Longswordsman
- General Kuranosuke Matsumoto
- Seven Ashina Spears – Shikibu Toshikatsu Yamauchi
- Ashina Elite – Jinsuke Saze
- Shichimen Warrior
- Snake Eyes Shirafuji
- Tokujiro the Glutton
- Mist Noble
- O'Rin of the Water
- Snake Eyes Shirahagi
- Lone Shadow Vilehand
- Long Arm Centipede Giraffe
- Shigekichi of the Red Guard
- Sakura Bull of the Palace
- Lone Shadow Masanaga the Spear Bearer
- Seven Ashina Spears – Shume Masaji Oniwa
- Ashina Elite – Ujinari Mizuo
- Great Serpent
- Okami Leader Shizu
- Great Colored Carp
- Conclusion
Leader Shigenori Yamauchi


- An experienced swordsman who guards the reservoir entrance to Ashina Castle.
- Location – Ashina Reservoir
He is the first Mini-boss you encounter and is considered to be the tutorial boss. He is not hard but he teaches you how to block and destroy an enemy’s Posture Bar. He also teaches you about Mini-bosses and how you have to Deathblow them at least 2 times before you defeat them. Just block until his Posture Bar fills up and then go in for the Deathblow and repeat until he is dead.
General Naomori Kawarada


- A samurai general in charge of guarding the farthest outskirts of Ashina.
- Location – Ashina Outskirts
Approach the general towards the higher ground on the left and perch yourself on the gate near him. Jump down and Deathblow his first health bar when a red circle appears. You can deflect his jumping slash or sidestep it. Avoid playing long range as he will coat himself in white and regain posture undoing most of your hard work. Continue blocking his attacks and getting an attack in when you see an opening to defeat General Naomori Kawarada.
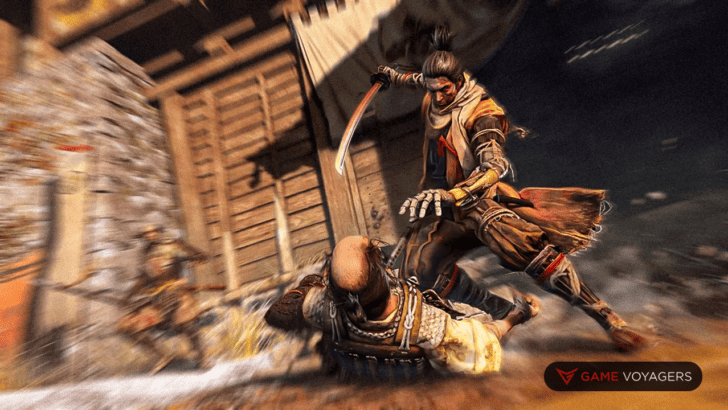
Chained Ogre
- An ogre that has been chained and tamed as a ferocious soldier.
- Location – Ashina Outskirts
This Mini-Boss is hard to deflect or block, so it is advised that you Dodge mostly. Try not to stay directly in front of him, because his 3 grab animations are deadly. Keep circling him as much as possible and hit him when he is done an attack. You are able to Deathblow him once if you use a Gachiin’s Sugar and you sneak up next to him. Get under him and move around until you see the Deathblow marker and you can knock off one of his health bars.
General Tenzen Yamauchi


- A powerful Samurai ready to take on any that defy the master.
- Location – Ashina Outskirts
He is right after the Chained Ogre fight so make sure you go back and rest at the Idol before progressing. Sneak back to where you killed the enemies and watch the boss movement. Once he turns his back to you, sneak walk towards him to get a free deathblow in. This will greatly help in the fight. Deflect his attacks while jumping over his perilous sweeping attack. He has strange timing for his attacks, and it’s easy to deflect too early. Be sure to deflect a bit later than usual for the max effect.
Headless


- A headless apparition-type enemy that emits terror to anyone it crosses its path.
- Location – Ashina Outskirts, Sunken Valley, Ashina Depths, Ashina Castle, Fountainhead Palace
There are 5 total Headless enemies in the game and they each give you a different Spiritfall item. For this fight, you’ll need Divine Confetti to deal damage to this boss. To start the fight, you’ll want to jump and land as near as possible to the enemy to deal some damage while its “waking” up. Attack him as fast as you can because the enemy won’t be attacking soon even though it looks like it’s winding for an attack. During the fight, Headless will cast a mist around him that will slow you down. When you are not attacking, walk around to his back and he won’t attack you, that is where you can do the most damage.
Shinobi Hunter Enshin of Misen


- A skilled Shinobi hunter armed with a spear, ready to pierce a Shinobi it crosses its path with.
- Location – Hirata Estate
Eliminate the lesser enemies first while using the flowers on the left-hand side to Backstab Deathblow this Mini-Boss for one of its health bars. Afterward use the Mikiri Counter to punish his thrust attacks, or dodge his attacks while following up with counter-attacks. Like most spear enemies its best to stay aggressive. He is actually pretty easy if you know what you are doing.
Juzou the Drunkard


- A katana-wielding foe who is the leader of the bandits that have invaded Hirata Estates.
- Location – Hirata Estate
The most effective way to defeat Juzou is by thinning out some of his bandits on the left-hand side and then clearing out all other enemies besides Juzou, avoiding him until this is done. When facing Juzou, play defensively, deflecting his slower and more telegraphed attacks to build up his posture bar while avoiding his perilous sweep and grab attacks. Also, have the NPC help you fight him for an easier time.
Blazing Bull


- An enraged beast of destruction and flames that Ashina planned to use against their enemies.
- Location – Ashina Castle
The strategy for this fight is to try to stay behind him and bait him into swiping at his side, dodging to stay behind him and then attacking. Every 10-15 seconds he will sort of go berserk and this is a good time to use the Shinobi Firecracker to stun him and get in some attacks. Now attack him from behind once again, repeating this process as necessary. You can also parry his headbutt so if you are comfortable with parrying, it will make the fight shorter.
Armored Warrior


- A heavily armored foreigner of western lands who guards the monks of Senpou Temple for the sake of his dying son.
- Location – Senpou Temple, Mt. Kongo
Build his posture meter by deflecting attacks and attacking when he is open. This enemy will not be stunned when attacked so only attack a few times before preparing to deflect or avoid his next attack. One his posture meter is nearly full, lure him near either edge of the bridge. Position yourself such that his back will be facing off the bridge when looking at you. Perform your last few attacks to break his poise. Then perform a deathblow to push him over the edge of the bridge.
Long Arm Centipede Sen-Un


- A leader of the Centipede Clan at Senpou Temple, ready to eviscerate any intruders at a moment’s notice.
- Location – Senpou Temple, Mt. Kongo
Before you start the fight make sure to clear the enemies on the ceiling rafters so they can’t throw firebombs at you during the fight. Mini-Centipedes, similar to Lizards, can be Deathblown simply by locking on to them and jumping into the air. After that, just keep Deflecting the Boss’s attacks and he will eventually be open for a Deathblow.
Lone Shadow Longswordsman


- A purple-clad shinobi of the Interior Ministry who heard tales of the defeated wolf and wished to duel him.
- Location – Ashina Reservoir, Hirata Estate, Mibu Village
You can rip one health bar off this guy if you head past the initial well entrance and find the hole a little way after. This will allow you to drop onto him. You’ll then need to deflect many attacks, trying to dodge his kick attacks when possible, as these do a lot of Posture Damage. Use dodge counter-attacks whenever possible to chip away his Vitality, as this allows you to more easily fill his posture bar. His Death Kick can be Mikiri Countered, dealing considerable posture damage to him.
General Kuranosuke Matsumoto


- An experienced general who guards the main entrance to Ashina Castle, inspiring his men for the coming war.
- Location – Ashina Castle
Kill all the rifle enemies around him first and then fight him on the stairs. Alternate deflect and attacks to quickly whittle his health and posture. Avoid his perilous attack by jumping over the sweep then pressing jump again to damage his posture. Shurikens work well if you time it between his attacks and Shinobi Firecrackers can give you opportunities to get some attacks in.
Seven Ashina Spears – Shikibu Toshikatsu Yamauchi


- One of the Seven Ashina Spears, in charge of guarding the Moon Tower where lord Kuro was imprisoned.
- Location – Ashina Reservoir
You can easily stealth up behind him and do a stealth deathblow that will take one of his health bars away. He does a 4 hit attack, where on the 3rd and 4th attack, he does a long wind up before the attack, use this chance to get behind him and deal some damage. A good strategy is to use the Flame Vent with Oil. He is very susceptible to fire so take advantage of that.
Ashina Elite – Jinsuke Saze


- One of the top swordsman with mastery over the Ashina fighting style, prepared for any who dare trespass into the Ashina Dojo.
- Location – Ashina Castle
He is a straightforward, but punishing mini-boss that relies on quick and devastating attacks to overwhelm you very quickly. His most used Ashina Slice attack deals heavy posture and vitality damage through a block and comes out extremely fast making the deflect or dodge timing very unforgiving. The best thing to do is use Whirlwind Slash with the Shinobi Firecrackers and he won’t know what hit him.
Shichimen Warrior


- An apparition-type warrior who uses the spirits of the dead to terrorize opponents in combat.
- Location – Abandoned Dungeon, Ashina Depths, Fountainhead Palace
It is actually really simple, use Divine Confetti. Activate it, and start attacking him. Be aggressive and when he disappears, he will reappear somewhere else and send a beam of Fear at you. Run toward him and block it, and then be aggressive with your attacks. Keep doing this till he is dead.
Snake Eyes Shirafuji


- A female descendant of the Okami Clan who guards the secrets of the Sunken Valley along with Snake Eyes Shirahagi.
- Location – Sunken Valley
When you enter the platform and face Shirafuji, to your left is a descent. Lure here above said descent to the rocks and wait for her to start an attack animation. Simply fall down onto the descent and watch her still attacking you from above. Now almost every attack from her will miss you besides the gunshot. You can jump attack twice after every attack animation it will take a while but it gets the job done.
Tokujiro the Glutton


- A wayward outlaw who now spends his days with his new monkey companions.
- Location – Ashina Depths
This boss is pretty much the same as Juzou the Drunkard, however, the fight takes place in a much smaller area, and the player doesn’t have the option of getting help from an NPC. The same strategy as Juzou’s can be employed here while considering the aforementioned conditions. He is actually very easy.
Mist Noble


- A noble of the Fountainhead Palace whose task was to hide the entrance to Mibu Village using ghostly illusions and a thick mist.
- Location – Hidden Forest
This Mini-Boss can be defeated in mere seconds using a Drop-Down Deathblow. As the boss attempts to stand after the plunge, just use normal attacks until it dies. It’s more than likely you’ll never see it do anything other than take hits from you.
O’Rin of the Water


- A lonesome shamisen player who searches for lord Sakuza, ready to cross swords with anyone who stands between them.
- Location – Mibu Village
Before triggering the fight, one can get behind O’Rin and then throw a ceramic shard, opening her up for a deathblow for about half a second. Fighting O’Rin traditionally requires either learning her combo timing or having very quick reflexes. She hits hard but after successfully parrying/dodging her full combo she will allow a couple of counterstrikes before going ethereal and retreating. As soon as she phase shifts and retreats use that time to heal if needed. Trying to run away to heal can lead to a quick death due to her being able to close in on you from almost any range inside the arena. Once you learn her moves, she will die quick.
Snake Eyes Shirahagi


- A female descendant of the Okami Clan who guards the secrets of the Sunken Valley and the Gun Fort along with Snake Eyes Shirafuji.
- Location – Ashina Depths
This boss can easily be beaten by, backing them into the ledge, preferably the one next om the statue to the left. Once the boss against the ledge, they cannot back step away to shot you, be aggressive to slasher when she tries to shot. This will limit her to effectively 2 attacks, her kick, and her grab. You can also Deathblow one health bar if you can successfully sneak up on her as well.
Lone Shadow Vilehand


- A veteran shinobi of the Interior Ministry who uses poisonous attacks to weaken his foes.
- Location – Ashina Castle
A way to beat this miniboss very easily is with the puppeteer ninjitsu. simply use it on the enemy in the same room as Vilehand and then attack him in the back while he’s distracted by the enemy. then run away until the other enemy attacks him again, then hit him in the back again, repeat this and you’ll easily deal a lot of damage to Vilehand. if you want to do this the entire fight, just backstab and use the Ninjutsu technique on the enemy every now and then to fully heal him.
Long Arm Centipede Giraffe


- A leader of the Centipede Clan who readily guards the entrance to the Sunken Valley deep within the Gun Fort.
- Location – Sunken Valley
This boss is a tutorial on block dancing which is a technique that any player uses to virtually avoid damage from rapid attacking enemies, block dancing is performed by spamming the block button which in turn should cause you to parry all of the Centipede Girrafe’s flurry of attacks. He also sometimes starts or ends his combo with a sweep attack. Jump, and then keep Block dancing and you will easily win this fight.
Shigekichi of the Red Guard


- A large warrior who uses flames and sake in combat, and part of the forces of the Interior Ministry during their invasion of Ashina.
- Location – Ashina Outskirts
Kill all his underlings around him first, turn the last couple with the Puppeteer Ninjutsu. Initiate combat with a deathblow. He fights like a fire-aligned Juzou. Constantly running around him until he drinks or lights his sword or blows fire, then attacking him from behind, will eventually win you the day.
Sakura Bull of the Palace


- An undying guardian of the mist nobles at the Fountainhead Palace who carries the karma of the countless souls it has killed.
- Location – Fountainhead Palace
This boss can be defeated instantly by using firecrackers to startle him while he is unaware. However, there is a bug that causes him to freeze in place when you remain undetected after he has gone into panic mode. To prevent this, deal any damage to him while he is panicking, and he will run into the wall, instantly becoming stunned and vulnerable to a deathblow.
Lone Shadow Masanaga the Spear Bearer


- A shinobi of the Interior Ministry who seeks vengeance for the death of one of his comrades.
- Location – Ashina Castle Grounds
You can perform a deathblow by sneaking through the outer corridors of the shrine instead of entering directly to it. By taking this route you are able to silently backstab him. Keep up the attacks and block when necessary. There is not a huge way to cheese this fight so you just have to learn his moves. Take him to the open area so you are not so cramped in the building.
Seven Ashina Spears – Shume Masaji Oniwa


- One of the Seven Ashina Spears who waits for the return of Genichiro to turn the tide of battle in Ashina’s favor.
- Location – Ashina Reservoir
It is possible to backstab Oniwa after the samurai general, making the fight trivial with Puppeteer. He is easy if you can Deathblow a health bar off as well. Use his own man against him and the fight will be over before you know it.
Ashina Elite – Ujinari Mizuo


- A master of the Ashina Style developed by Isshin Ashina and his clan; Mizuo can be found in the small dojo located underneath the room where the Tengu guarding Isshin Ashina once stood before the forces of the Interior Ministry began their final assault on Ashina Castle. His loyalty has driven him to the brink of madness.
- Location – Ashina Castle
Much like other red-eyed enemies, he is stronger than a regular Mini-Boss. His attack is extremely simple and straightforward when compared to other enemies, but their true power lies in speed and strength, which can quickly overpower the player. Defeating Ujinari is a battle of patience and quick reflexes. Always hold block during this fight, as the area is small and limits the movement of Sekiro; if needed, bait Ujinari to the corridor prior to his room, as it has more space to move around. Be careful when moving while not blocking, won’t need to be running around and if you get caught by his attack with 17 Vitality without deflecting or blocking it, you will die! Have patience and you will power through.
Great Serpent
- The great serpent believed to guard the secrets of Sunken Valley.
- Location – Sunken Valley
After the third encounter with the snake, go to the first Senpou Temple, Mt. Kongo Idol and turn right. Use the Puppeteer Ninjutsu on the little guy with the hat and he will unwind the kite. You can then use the kite to find another Idol and then finally make the jump for the Deathblow of the giant snake.
Okami Leader Shizu


- A female samurai guarding the Fountainhead Palace.
- Location – Fountainhead Palace
An extremely weak miniboss. After grappling onto the tree branch rush her and you will take her down in 3 to 4 strikes.
Great Colored Carp


- A giant carp found at Fountainhead Palace.
- Location – Fountainhead Palace
This enemy has a one-shot attack and can only be defeated by completing its quest.
Conclusion
In conclusion, there are a lot of Mini-bosses in Sekiro, and they all are unique, with the exceptions of the reskins. Even the reskinned bosses had new attacks so they have that going for them. I would say that trying to kill all the bosses without a walkthrough is a great option because it teaches patience and learning skills. It also teaches you how to overcome an obstacle on your own, something you must know for everything in this game. I would say the Mini-bosses alone make this a great and challenging game.