
Bloodborne is full of surprises and all sorts of secrets, and it does not let down with the amount of content packed into it. There are just soo many weapons to choose from and use and it can be hard to figure out which one suits your playstyle the best. If you are having trouble, I have made a list of every weapon in the game and where to find it. I hope it can be of use to you. Here are all the weapons in Bloodborne, melee and firearms both included.
Related: If you want an amazing guide to Bloodborne, then consider checking out this guide I found on Amazon here.
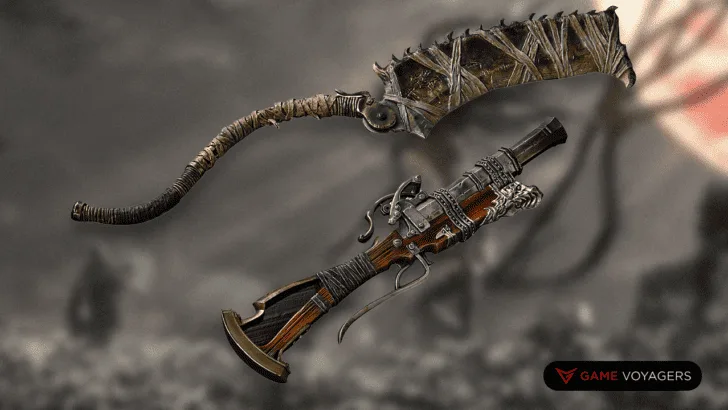
Amygdalan Arm


Location – The Hunter’s Nightmare, cave to the right after getting out of the building that used to be the shortcut to the Cleric Beast.
Transforms from a club to a scythe-like arm with a deceptively long reach and a whip-like, fluid motion. It will land two extra swings if you charge it all the way, then wait. Both deals high damage and have good reach. Using the trick mode of this weapon in PvP is risky, as the additional slashing motions that come with the R2 attacks can leave you wide open if they miss. The Arcane damage and scaling on the weapon is negligible, it can basically be considered a Strength weapon. Good against crowds and can keep enemies away with its reach if transformed.
Beast Claw


Location – Ailing Loran Chalice
The regular form is a simple claw weapon that is used as an extended fist. The transformed mode morphs the hunter’s arm into a werewolf form. If you have the Beast’s Embrace rune equipped, this weapon will gain additional attacks and change how the Hunter fights. If you use an actual Beast Blood Pellet, it will not change anything in regards to the Beasthood generated by this weapon. In fact, it resets the Beasthood meter when the pill’s effect wears off, which can potentially be harmful if you depended on the increased damage inflicted on opponents.
Beasthunter Saif


Location – The Hunter’s Nightmare. Area to after passing the Nightmare Cathedral.
Transforms from a curved long sword to a short weapon like the Saw Cleaver. Unlike the Saw Cleaver and Saw Spear, the Saif actually flips directions when transforming. In both modes, the same blade on the outer edge is used to attack, while the Saw weapons use different blades for different modes. The few times the inner edge is used is in the untransformed dash R1, the initial transformation attack, and the untransformed, uncharged R2 attack.
Beast Cutter


Location – Walking down the stairs from the Nightmare Cathedral Lamp in The Hunter’s Nightmare, stick to the right and aim for the higher areas.
Transforms from a cleaver to a whip-like blade with a long reach and fluid combos. A good weapon choice for dealing with large groups of enemies due to its long-range, great stagger, and wide swing arc. This weapon’s moveset in both forms consists entirely of Blunt attacks. Using gems that increase Blunt damage is recommended. In whip mode, it has the highest amount of windup and recovery frames of any weapon, however, it also has the most damage frames.
Blade of Mercy


Location – Can be purchased from the Messengers for 40,000 Blood Echoes after obtaining the Crow Hunter Badge from either finishing Eileen’s quest or killing her.
The normal form of this weapon is a curved sword with a standard and versatile move set. Very standard. On the flip side, the transformed mode utilizes dual mini-curved swords that have a faster attack speed; this comes at the cost of disabling a normal left-handed weapon and less damage per individual strike. The Blade of Mercy is best suited for fighting individual targets rather than a group due to its move set; this is due to the weapon’s kit favoring sidestep thrusts and quicksteps that are difficult to retaliate against in a battle of speed when your opponent is alone.
Bloodletter


Location – The Hunter’s Nightmare cells before Research Hall. Can be obtained after killing Brador.
Transforms from a short one-handed mace to a large two-handed bloody morning star at the price of its user’s health. Similar to the Chikage, the Bloodletter consumes the wielder’s blood to achieve its true form. Whereas the Chikage drains health over time as long as the transformed mode is active, the Bloodletter takes a large chunk of health on transformation with no health drain afterward. Attacks in transformed mode knock down any enemy that can be knocked down by firearms, such as dogs and spiders.
Boom Hammer


Location – The Hunter’s Nightmare inside the house that used to be the location of the wheelchair gunner.
Transforming the weapon makes the hunter ignite the hammer, giving bonus fire damage to the next attack. Attacking with an ignited hammer consumes roughly double the stamina as non-ignited attacks. Ignited hammer also lowers the amount of health recovered on rally attack. It is an all-around good weapon if you can find it.
Burial Blade


Location – Can be purchased from the Messengers for 60,000 Blood Echoes after defeating Gehrman, The First Hunter.
This trick weapon assumes the form of either a one-handed curved sword or a two-handed scythe. Compared to other weapons with similar attack speeds, the Burial Blade sacrifices a bit of raw damage for better crowd control capabilities thanks to its wide swings, long-range and high rally potential. The scythe form grants an even further reach that specializes in crowd control as well.
Chikage


Location – Can be purchased from the Messengers for 50,000 Blood Echoes after obtaining the Cainhurst Badge.
Transforms from a sword to a two-handed ‘Bloodied’ sword. The Lost Chikage has a circular blood gem imprint, like guns. The Chikage deals physical damage in normal mode and blood damage in transformed mode, not both types at once. Moreover, the damage in normal mode scales with Strength and Skill, whereas that of transformed mode scales with Bloodtinge.
Church Pick


Location – The Hunter’s Nightmare dropped by a hunter wearing Yahar’Gul set in one of the cells that you open with the Underground Cell Key from the Research Hall.
Transforms from a large sword to a war pick. The transformed L2 attack does very little damage but has a large stagger effect. This can be used to combo enemies which normally cannot be unlocked by R1 attacks. When transformed, all attacks deal Thrusting dmg. This makes it very effective against enemies weak to thrusts and allows the setting of powerful “adept” blood gems.
Holy Moonlight Sword


Location – The Hunter’s Nightmare on the Underground Corpse Pile after the fight against Ludwig, The Holy Blade.
Transforms from a One-handed Claymore into the Moonlight Greatsword. Transformed attacks performed with the R2 button deal 0% of the listed arcane damage if you have bullets. Instead, 100% of the arcane damage but not physical damage is dealt with in the Lightwave. If you have no bullets, it deals with 70% of the listed arcane damage. The normal moveset consists of horizontal slashes and a thrust charge attack which can be followed up with a vertical slash which hits from bottom to top, very similar to a Dark Souls one-handed greatsword moveset, particularly the Claymore.
Hunter Axe


Location – Acquired at the very beginning of the game from the Messengers or later purchased for 1100 Blood Echoes from them after acquiring the Saw Hunter Badge.
This particular trick weapon transforms between an axe and an extended axe. Overall, the transformed mode is superior for melee combat (extended reach, no noticeable difference in attack speed, useful against a single opponent or a mob), but disables a left-handed choice as a tradeoff. It’s mostly a strength weapon, but it has decent potential for “quality builds” (STR/SKL) due to its scalings and Rally potential.
Kirkhammer


Location – Can be purchased for 3000 Blood Echoes from the Messengers after obtaining the Sword Hunter Badge.
When transformed, the Hunter inserts the sword into a huge rock and wields the new form as a gigantic hammer. Both transforming attacks have two parts: damage is dealt with in the first part, but the 2 components of the weapon are not combined/separated until the second is complete. The Dashing R1 attack of the Hammer is a two-handed “push” towards the enemy using the handle of the hammer.
Kos Parasite


Location – Dropped by Orphan of Kos.
Transforms from right-hand tentacles to dual-wield tentacles. Without the Rune, the character will have the regular unarmed moveset when using this weapon, however, the Arcane damage will be added, meaning it can still be effectively used with good enough gems. This weapon will not cause you to recoil backward after you hit a wall. Coupling this with its great reach, the Kos Parasite is great for attacking through walls or around obstacles.
Logarius’ Wheel


Location – Can be purchased for 13,000 Blood Echoes from the Messengers after obtaining the Wheel Hunter Badge.
This trick weapon is primarily for strength/arcane builds since it utilizes both stats to great effect. It’s considered a Church weapon; enemies susceptible to this modifier will receive an additional 30% damage from both modes. When transformed, the Logarius Wheel gets -30% physical damage, +0.5 Arcane scaling, +200% arcane damage, and +20 flat arcane damage.
Ludwig’s Holy Blade


Location – Can be purchased for 20,000 Blood Echoes from the Messengers after obtaining the Radiant Sword Hunter Badge.
The transformed mode is essentially an oversized greatsword wielded with both hands. In its slower with the transformed mode, but it does a lot more damage. It, along with the Kirkhammer, has a unique mechanic where pressing R1 immediately after a neutral transformation causes the hunter to perform a special attack that combines the fighting style of both forms.
Rakuyo


Location – Fishing Hamlet at the bottom of the well. It can be reached from the underground tunnels at the end of the Area or via a ladder in the well right away.
Transforms from a Twin-blade to a dual-wielded saber and dagger. In dual wield mode, the hunter alternates between thrusting with either sword in their R2 combo, which can continue indefinitely as long as stamina permits. In addition to having the same blades as the Chikage, the Rakuyo’s rolling attack are identical to its same moves.
Reiterpallasch


Location – Obtained in a chest on the ground floor of Cainhurst Castle.
This particular trick weapon transforms between a rapier and a gun with bayonet attachment. When the weapon is in transformed mode, you can then fire Quicksilver Bullets from it to deal with a ton of extra damage. You can pair this up with another gun and dual-wield if you so desire. Just make sure you have enough bullets so you don’t run out quickly.
Rifle Spear


Location – Can be purchased for 4000 Blood Echoes from the Messengers after obtaining the Powder Keg Hunter Badge or obtained from a body in Old Yharnam.
This trick weapon transforms between a spear and a gun with a bayonet attachment. The spear tip folds downwards to create a modified halberd of sorts. This weapon is mainly a defensive weapon so keep that in mind. Make sure you upgrade it as much as possible and equip the best blood gems to it to be sure it will do the most damage that it can do. The gun is only active when it is transformed so check your bullets and transform it when you need to.
Saw Cleaver


Location – Acquired at the beginning of the game from the Messengers or later purchased for 1000 Blood Echoes from them after finding the Saw Hunter Badge.
This weapon is one of the starting weapons and is actually very good. It transforms from a saw to an extended cleaver which makes for some spacing between you and an enemy. If you don’t choose it at the beginning but you want it, later on, you can always just buy it from the Messengers when you get the Saw Hunter Badge. You can get better versions of the weapon when you want them.
Saw Spear


Location – Found on a body in Central Yharnam or can be purchased for 1000 Blood Echoes from the Messengers after finding the Saw Hunter Badge.
This weapon transforms between a saw and a spear. In my opinion, I tried this weapon and the Saw Cleaver is superior, but that is my opinion. Contrary to what its name suggests, the spear utilizes slashes rather than thrusts (except in its R2 attacks), functioning much like a sword with extended reach. Enemies susceptible to serrated weapons receive around 15%-20% extra damage from both modes of this weapon.
Simon’s Bowblade


Location – Found on the body of the Harrowed Hunter next to the Lighthouse Hut lantern after answering the first option at Hunter’s Nightmare shortcut.
Transforms from a one-handed blade to a bow. Since its introduction, the Bladebow has become an almost infamous weapon amongst avid PvP players due to it’s perceived ease of use and scant weaknesses. The weapon sports a dual “S” Scaling in both Skill and Bloodtinge, fair reach, a wide, circuitous swing, coupled with a fair period of recovery. On top of being able to hold it’s own up close, ranged attacks are quick enough to demand constant attention on the part of an opponent as well as discourage deserters, making it capable of adapting to most ranges.
Stake Driver


Location – Can be purchased for 8000 Blood Echoes from the Messengers after obtaining the Powder Keg Hunter Badge.
This trick weapon doesn’t have a true transformation, but pressing L1 does open up a new move set nonetheless. While primed, the stake’s charged R2 attack deals some of the highest amounts of damage possible in a single hit in regards to all Trick Weapons in Bloodborne. However, to deal with the full amount of damage, it must be charged for a handful of seconds.
Threaded Cane


Location – Acquired at the beginning of the game from the Messengers or later purchased for 1200 Blood Echoes from them after finding the Saw Hunter Badge.
This trick weapon transforms between a cane and a notched whip. It’s currently the only known trick weapon in the base game that has both special damage modifiers (serrated and church), each one separately used by a different mode. The cane form’s attacks are faster than the whip.
Tonitrus


Location – Found on a body in Hypogean Gaol or can be purchased from Messengers for 26,000 Blood Echoes after obtaining Spark Hunter Badge.
This trick weapon doesn’t have a “true” transformed mode. Instead, pressing the L1 button will buff it with bolt damage for a short period of time. After a little while, the buff ends and you must buff it again with the transform button. Keep in mind that this weapon has the lowest durability of any weapon in the game, especially when it is in the transformed mode.
Whirligig Saw


Location – From the Nightmare Church Lamp in The Hunter’s Nightmare go down the stairs and follow the path. Dropdown into the pools of blood and follow the path further to grab the weapon.
Transforms from a Long-handled Mace to a Buzzsaw-on-a-Stick. Buzzsaw form seems capable of scoring multiple hits. In PvP, this makes the weapon ideal for punishing dodge-spammers. This weapon is classed as serrated in its transformed mode. It also is a good choice for Poison gems due to easily scoring multi-hits with many of its attacks, including its L2.
Cannon


Location – Found in the rafters of a building inside the Forbidden Woods.
The Cannon is one of two firearms in the game that utilizes explosive projectiles. It is primarily a Strength weapon because it takes 30 base Strength to wield. It also uses 12 Quicksilver Bullets per shot. This weapon is perfect for dealing massive damage to one single target. The scaling is very useful too because of Bloodtinge.
Church Cannon


Location – Found after activating the altar elevator to the Research Hall with the Eye Pendant activate the new elevator to go down. Cannon is in a chest down there.
Similar to the regular Cannon fires a cannonball at a large bullet cost, 2 less than regular Cannon. It reloads faster then the normal one and it has more range on a target if you don’t lock on to the enemy. If you aim your camera upward, it will travel a farther distance if you locked on before.
Evelyn


Location – Can be purchased from the Messengers for 16000 Blood Echoes after receiving the Cainhurst Badge from joining the Cainhurst Vilebloods. It can also be found in a chest in Cainhurst Castle.
It has the highest potential Bloodtinge scaling amongst all firearms in Bloodborne. When comparing the Evelyn to the Repeating Pistol for a high bloodtinge build, it’s important to try to find a balance between factors of ammo consumption, damage per shot and the enemy’s defenses. While the Repeating Pistol offers more damage per shot, the Evelyn deals more damage per Quicksilver Bullet.
Fist of Gratia
Location – In The Hunter’s Nightmare, locked inside one of the cells after the Ludwig, the Holy Blade fight.
This is a left-hand weapon and has no transformation. Fast animation on its attack and high stagger make this great as an opener for both slow and fast weapons, more so on durable large targets, a lighter weapon may not stun. Capable of interrupting high-poise enemies. Can interrupt Maria’s “uninterruptible” overhand swing as well as some Orphan of kos’ attacks.
Flamesprayer
Location – Acquired from Gilbert after entering the Cathedral Ward or can be purchased from the Messengers for 8000 Blood Echoes after obtaining Radiant Sword Hunter Badge.
This hunter firearm is primarily for arcane builds due to its high scaling. Bone Marrow Ash can be used to boost this firearm’s damage output. As long as you hold down L2, it applies the same BMA activated to every tick of damage. You can also use an Oil Urn to boost this firearm’s damage output.
Gatling Gun


Location – Hunter’s Nightmare, cave to the right after getting out of the building that used to be the shortcut to the Cleric Beast in the main game. Gattling Gun Hunter drops the weapon. Amygdalan Arm and a Blood-Starved Beast can be also found here.
It is a portable version of the gun used by Djura and is part of The Old Hunters DLC. Requires 16 Blood Stone Shards, 16 Twin Blood Shards, 16 Chunks, and 1 Blood Rock and 4 Blood Echos to fully upgrade. An +7 Gatling gun with a decent gem can do between 2 and 3 thousand damage with its 20 quicksilver bullets, good for finishing off a boss or certain kinds of enemies. It’s also a good weapon in co-op for pulling aggro away from allies.
Hunter Blunderbuss


Location – Acquired at the very beginning of the game from the Messengers or can be purchased later from them for 1700 Blood Echoes after obtaining the Saw Hunter Badge.
This particular firearm is one of two “shotgun” firearms that is wielded in the left hand. Being one of two firearm choices at the beginning of the game, the player must make a choice essentially between a handgun and a shotgun. When choosing between the Hunter Blunderbuss or Ludwig’s Rifle, keep in mind the distance that each firearm covers.
Hunter Pistol


Location – Acquired at the very beginning of the game from the Messengers or can be purchased later from them for 1600 Blood Echoes after obtaining the Saw Hunter Badge.
This firearm is the first pistol you can find/buy in the game. It has moderate scaling with bloodtinge and is a good choice for low bloodtinge builds. Being one of two firearm choices at the beginning of the game, the player must make a choice essentially between a handgun and a shotgun. Unlike the Hunter Blunderbuss, this firearm is very difficult to hit moving targets with, so it is important to learn when to fire in order to hit weak spots effectively.
Hunter’s Torch


Location – Found in Old Yharnam on a corpse.
Like the Torch, the Hunter’s Torch provides illumination in dark areas, albeit it does have a few differences. The Hunter’s Torch has a B scaling for Arcane when compared to the normal Torch. It should be noted this scaling is consistent through all upgradable levels. It is usable for combat.
Loch Shield


Location – Research Hall: Can be seen right when entering on a platform together with one of the crawling experiments. Obtained after activating the lever to raise the stairs, and then dropping down and following the path down. It is reached by dropping down.
This shield cannot be upgraded nor fortified with blood gems. It doesn’t prevent harmful status afflictions even while blocking. The Loch Shield isn’t useful for physical damage prevention and is even weaker than the Wooden Shield in this regard.
Ludwig’s Rifle


Location – Can be purchased for 10,000 Blood Echoes from the Messengers after acquiring the Radiant Sword Hunter Badge.
Despite the name, this firearm behaves more like the Hunter Blunderbuss, albeit with some differences in the spray pattern. When fully upgraded, the higher base damage and lower scaling make Ludwig’s Rifle deal more damage than the Hunter Blunderbuss if your Bloodtinge is less than 28. Keep in mind that the distance your opponent is fired at will make a considerable difference in each firearm’s effectiveness from a damage standpoint.
Piercing Rifle


Location – Purchasable at the messenger bath after acquiring the Firing Hammer Badge.
The shot and recovery speed is similar to a Blunderbuss, with the recovery being a bit slower, which may cause missed visceral opportunities. Good against groups, as its piercing shots can deal full damage to all enemies in a straight line.
Repeating Pistol


Location – Can be purchased from the Messengers after obtaining Sword Hunter Badge.
The Repeating Pistol is unique in that it fires two Quicksilver Bullets at once; this is both a strength (high potential damage) and weakness. It isn’t possible to get hit by only one of the two Quicksilver Bullets fired.
Rosmarinus


Location – Can be purchased from the Messengers after obtaining the Cosmic Eye Watcher Badge.
The Rosmarinus is an excellent choice for high Arcane builds due to its very generous scaling. It operates exactly like the Flamesprayer, albeit it has a few unique characteristics. You can hold down L2 to continuously fire. Compared to the Flamesprayer, the main difference is that the Rosmarinus fires damaging, the arcane-infused mist instead of searing flames.
Torch


Location – Found in Central Yharnam on a corpse.
The torch can’t be fortified or upgraded. This is a placeholder for Hunter’s Torch and can be sold once you receive it. If Hunter’s Torch is not grabbed and you do not already own one, you will play through the game with an inadequate torch.
Wooden Shield
Location – Found in Cathedral Ward on a corpse.
The Wooden Shield can’t be upgraded or fortified by any means. It is only used to block an oncoming attack and to soak up damage. It is not good for any melee combat so keep that in mind when using it. You can use your melee weapon with it, but the shield can do absolutely nothing.
Conclusion
In conclusion, there are actually a ton of weapons to choose from when playing Bloodborne. It can be confusing to know which ones are best for you, but that is easy because all you have to do is an experiment and figure it out by just playing the game. I know the Saw Cleaver is probably one of my favorites because I used it basically the entire game. All you have to do is find your weapon.