One of the most popular and arguably the biggest games, Minecraft, is absent from Steam, making it unavailable to play on the Steam Deck.
Not all hope is lost, as you can employ unconventional methods to make it work on the machine, thanks to some apps you can install on the Deck. So without further ado, let’s get down to how you can play Minecraft on the Steam Deck.
This article will cover how to install both the Java and/or Bedrock Editions of Minecraft, controls, and performance, and address some issues you might face.
Desktop Mode
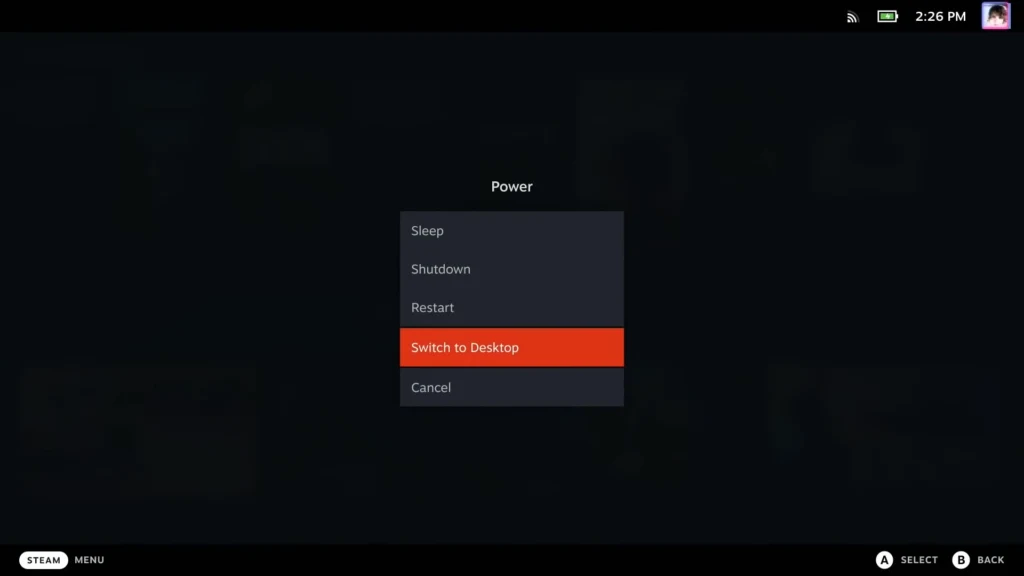
Before we start installing, you need to know that this game isn’t available on Steam. You will need to install it using apps from the built-in Linux store.
To access these apps, you need to be in Desktop Mode. To enter the desktop mode, you must either press the Steam button or hold the Power button to get the Power options. Select the Switch to Desktop option to access the desktop mode.
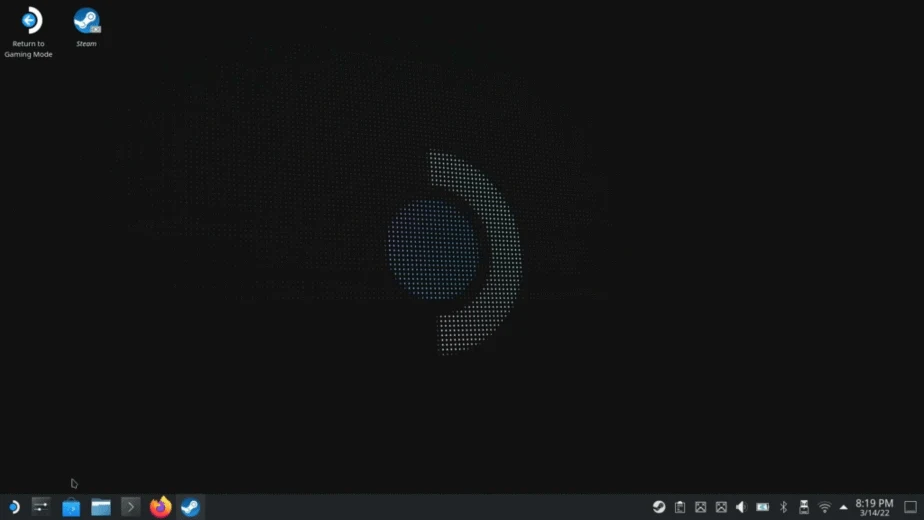
This is the desktop Linux OS interface where you can use various apps like a traditional PC system. You can install these apps using the onboard store, Discover, which you can find on the taskbar. Once you have all this figured out, let us begin installing the game.
Installing Minecraft Java Edition
To install Minecraft Java Edition, you need to follow the steps mentioned below:
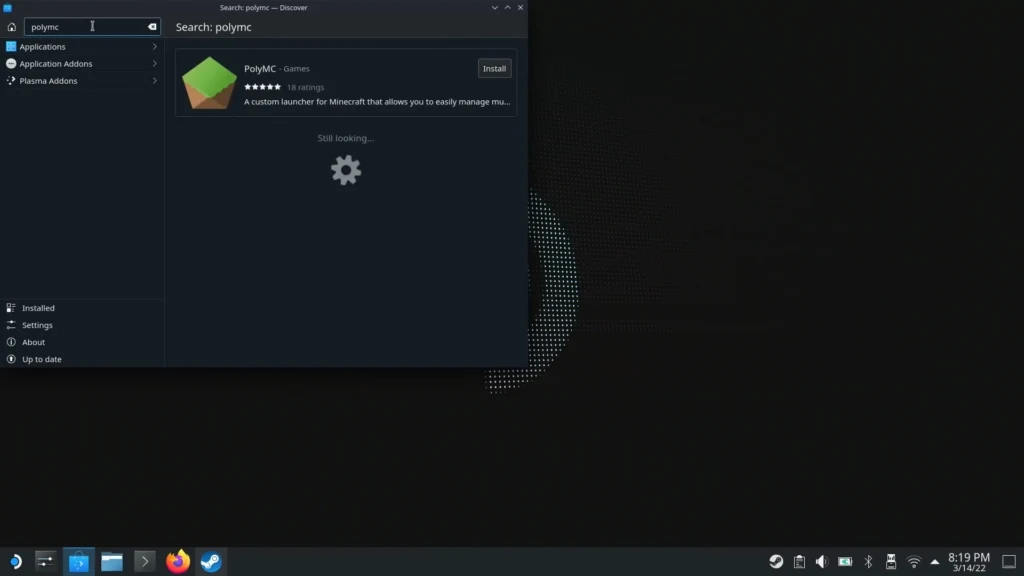
- Use the Discover app to search for PolyMC and install it on your device. This unofficial launcher for Minecraft for Linux allows easy installation of the game with multiple instances. It is also useful along with installing mods and other things Minecraft-related, all under one roof essentially.
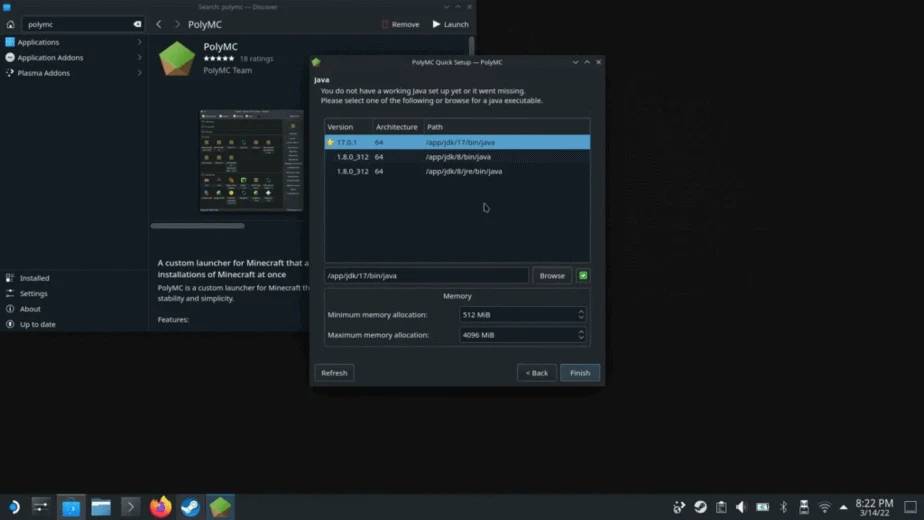
- Launch the PolyMC app to set it up. The app will ask for your language of choice and which Java version to download. Select the 17.0.1 (or the latest) Java version for the most updated Minecraft experience.
- If you want to play an older version of Minecraft, you can switch to Java 8 (the other option in the list). This can be done later, too, so there is no need to worry.
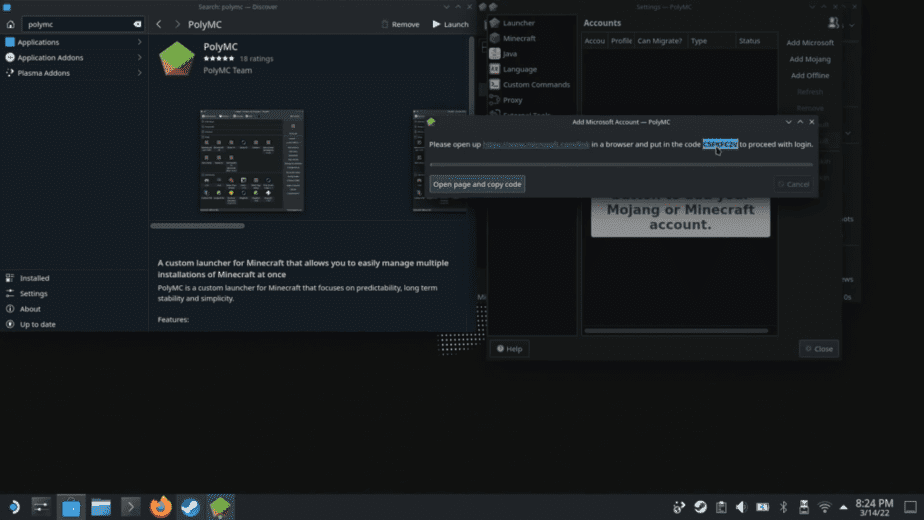
- Once in the PolyMC app, you must add your Minecraft/Microsoft account. You can do this by either selecting Profiles->Manage Accounts or by visiting the Settings option and going to the Accounts tab. On the right side, select the Add Microsoft option, and you will be presented with a link and a code to grant permission to use this app.
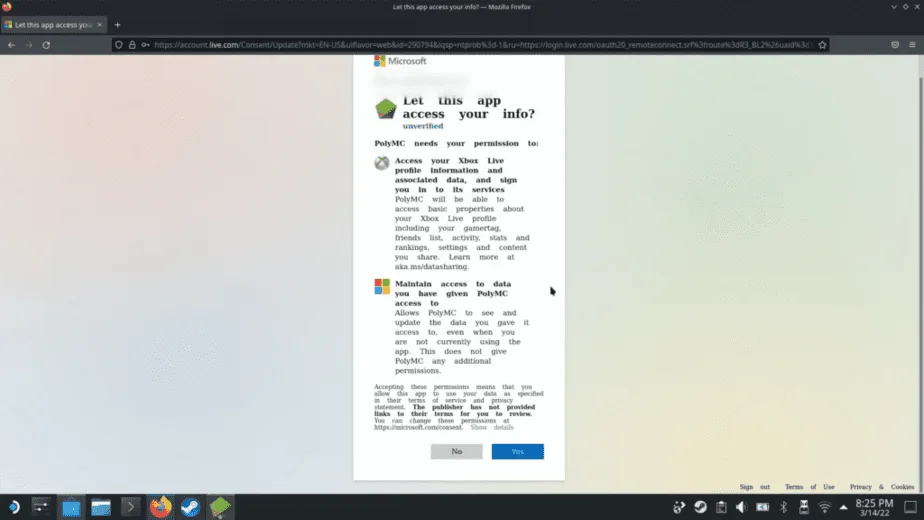
- The link won’t open automatically due to some Flatpak issue, so you must visit the site manually. We have linked the site here. You can visit this site on your Steam browser or any other device you want; it doesn’t matter. You must enter the given code on this site and then sign in with your account. After these steps, permit to let this app to access your info. Doing all of this will sign you into Minecraft on the PolyMC app.
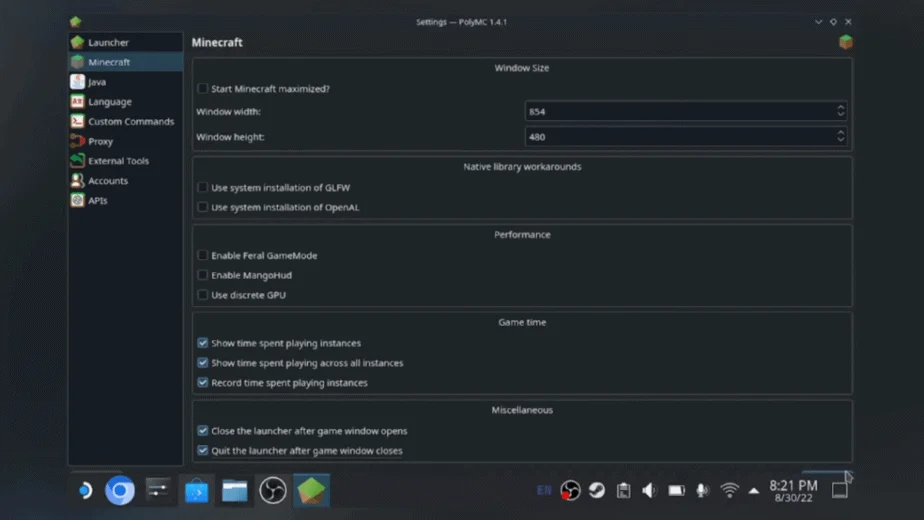
- Staying in the Settings menu, head on over to the Minecraft tab and tick/check the following options:
- Close the launcher after game windows open
- Quit the launcher after the game window closes
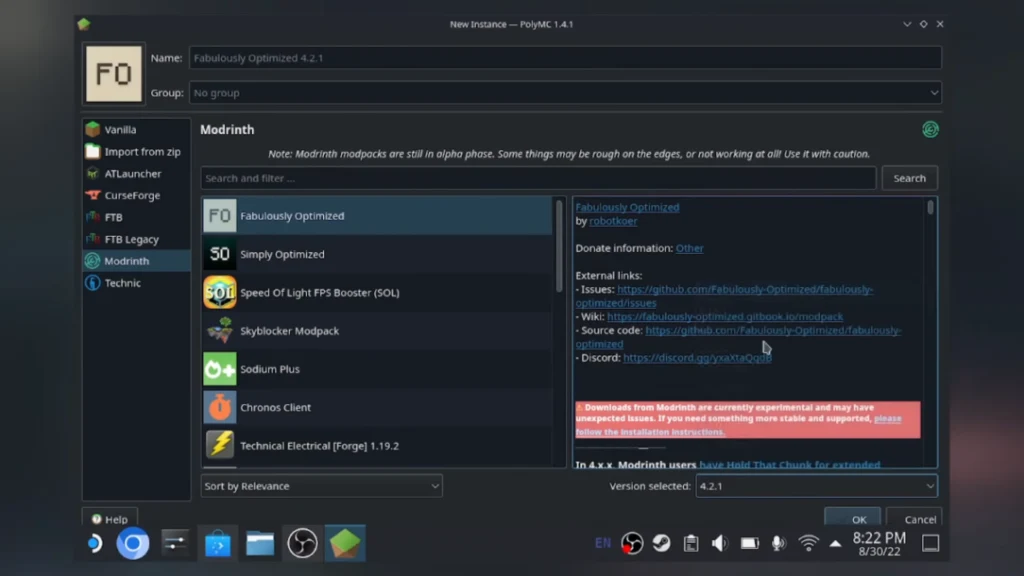
- The next thing we need to do is add an instance of Minecraft. Click the Add Instance button from the main PolyMC screen to do this. Here you can see and select from many instances of Minecraft, from vanilla to heavily modded even CurseForge can be played. Select the one you are interested in but be aware that some of these are not properly optimized for Steam Deck, and you might face some issues.
- You can select a normal Vanilla version of Minecraft, although you will need other mods for controller support. So we recommend heading to the Modrinth tab and searching/selecting Fabulously Optimized. This mod pack adds some performance benefits and enhancements to the game, along with controller support.
- If you are facing some stuttering issues or inconsistent FPS, then you can choose Simply Optimized in the Modrinth tab, which provides Minecraft with even better performance. Although, you should be aware that you might lose some other bells and whistles.
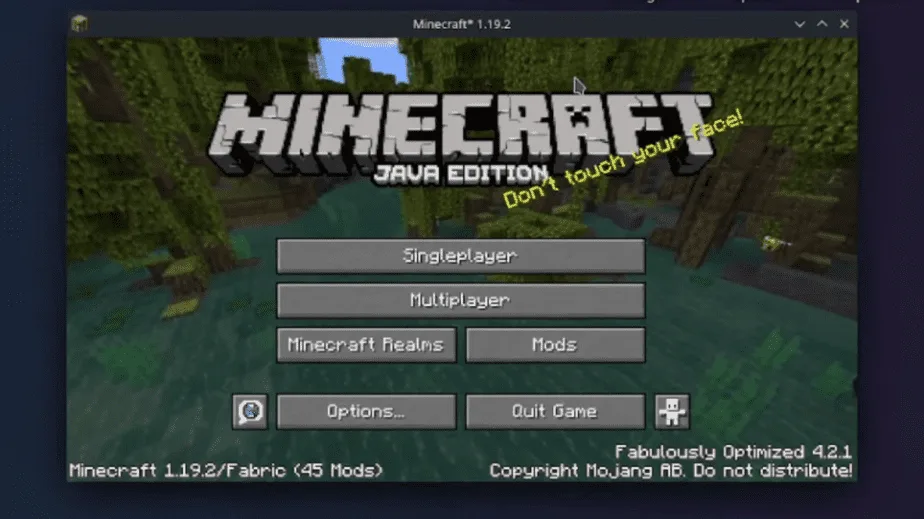
Launching the newly added instance, Fabulously Optimized, from the main menu will start the game.
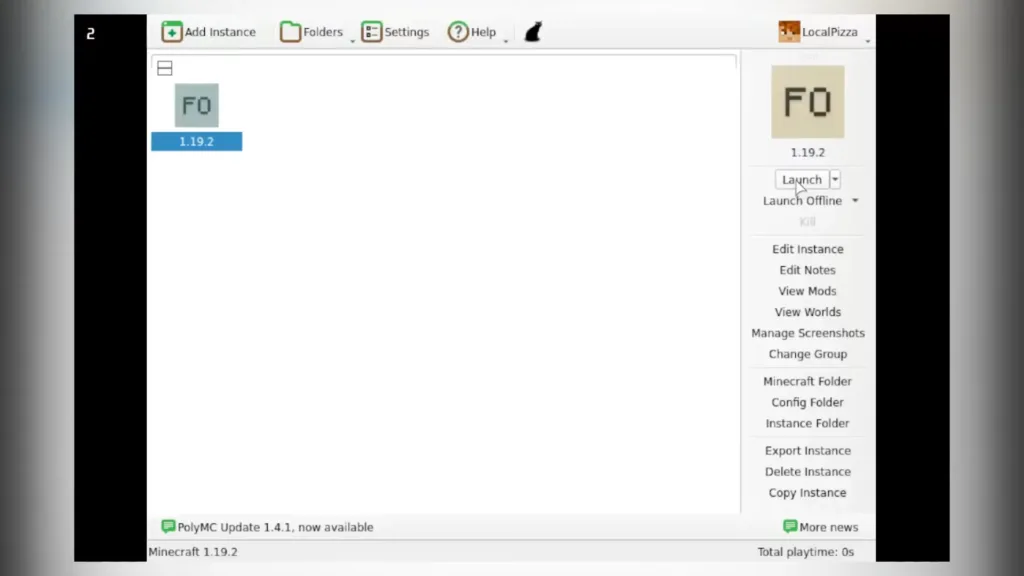
And once the game is added to Steam (detailed below), you can play it in Gaming Mode under Non-Steam Games. The game launches the PolyMC window in fullscreen just like in Desktop mode, and from here, you have to select the instance, in this case Fabulously Optimized, and launch the game. It will work even better when the proper controller layout has been selected. Scroll down to find out.
There is an issue that some players are reporting where the game won’t boot, and an error of outdated Java pops up. To tackle this, you can go to Settings, then the Java tab, and check/tick the auto-update Java. This will keep you updated with the latest version of Java and remove the error.
You install Forge as a mod, then put optifine.jar into the mods folder. After that, you can download and install any shader.
Installing Minecraft Bedrock Edition
To install Minecraft Bedrock Edition, you need to follow the steps mentioned below:
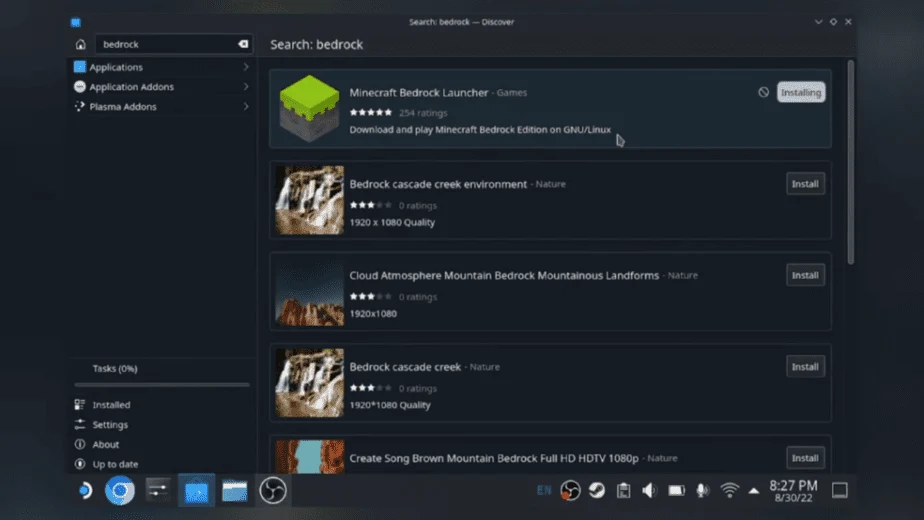
- Use the Discover app to search for Minecraft Bedrock Launcher and install it.
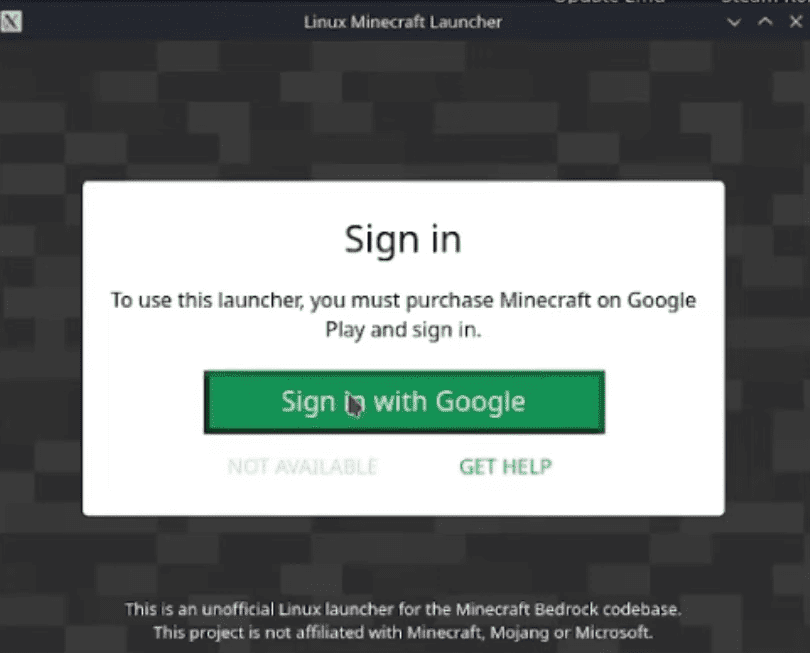
- Once installed, open Minecraft Bedrock Launcher. Remember that you will need to own Minecraft Bedrock on the Google Play Store to play this. The app will ask you to “Sign in with Google,” so go ahead and do that. Once logged in, you can press the Download and Play button to play the Bedrock Edition of Minecraft.
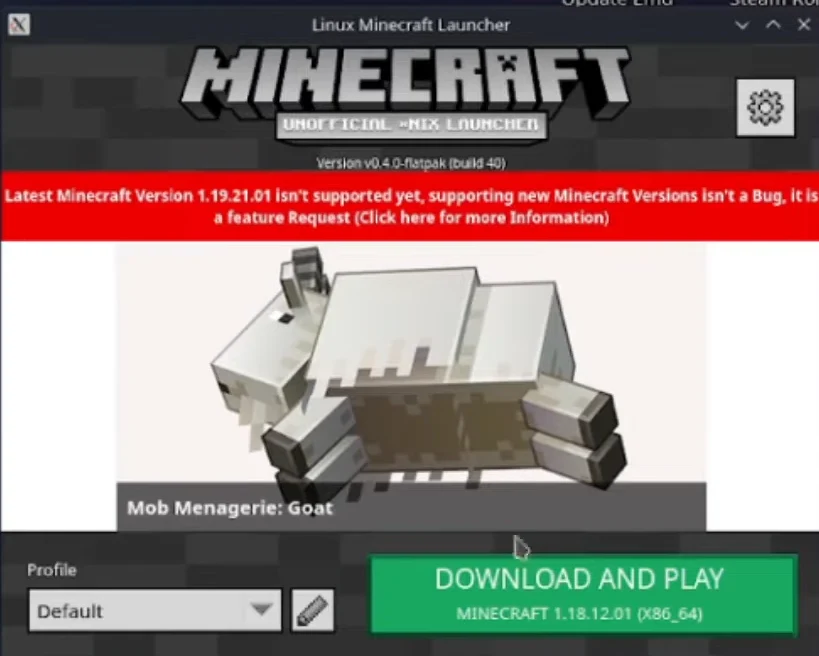
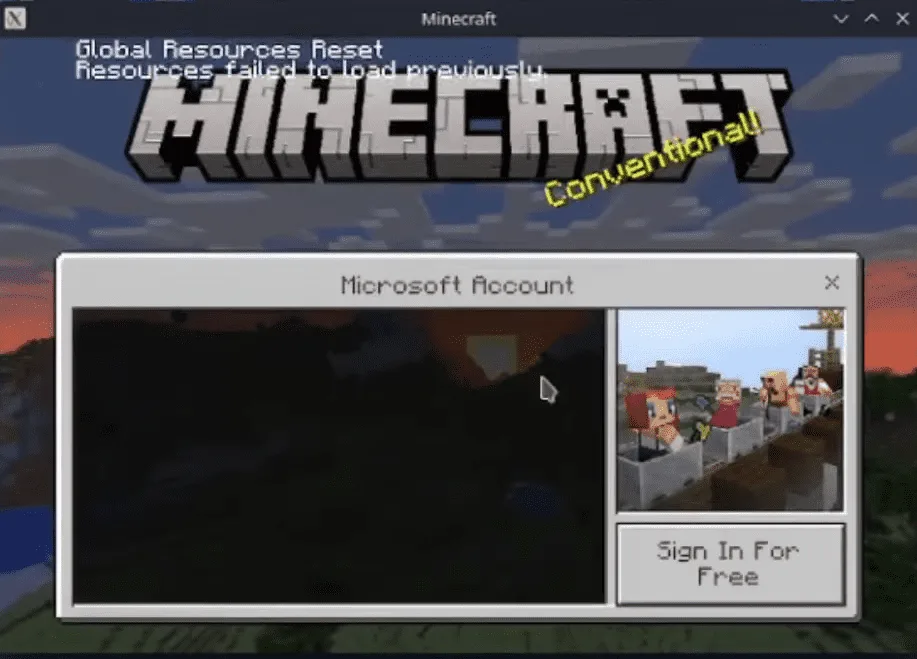
- Now, note that this app may not support the latest version of Minecraft Bedrock, and some users are finding the issue of being unable to log in to their Google accounts. This is because the 1.18 version of the game is obsolete, and everything has moved on to version 1.19.
Adding Minecraft To Steam/Steam Deck
You can play these games from the Desktop mode, but there is a way you can add them to Steam and play it in the Gaming Mode. This will allow you to play Minecraft like any other game on Steam Deck, and you can use the controller and different controller layouts, essentially streamlining it for the console.
There are two simple ways of adding the games to Steam:
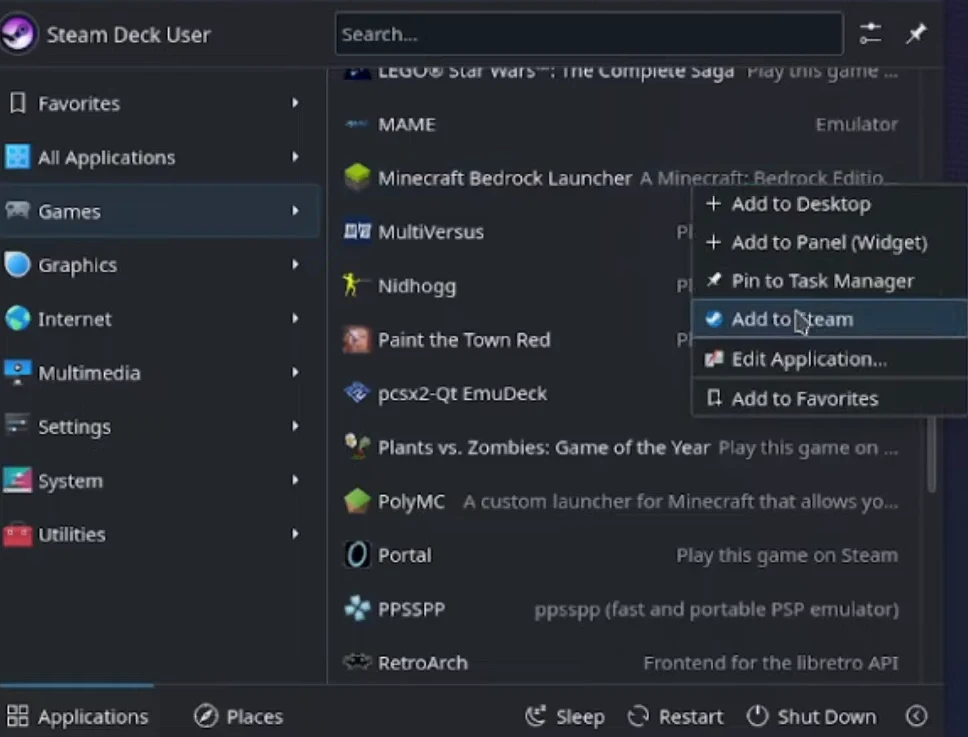
- Go to the “Start Menu” and then select the Games tab from where you can search the Minecraft edition/launcher you want to add, then right-click it and select the Add to Steam option.
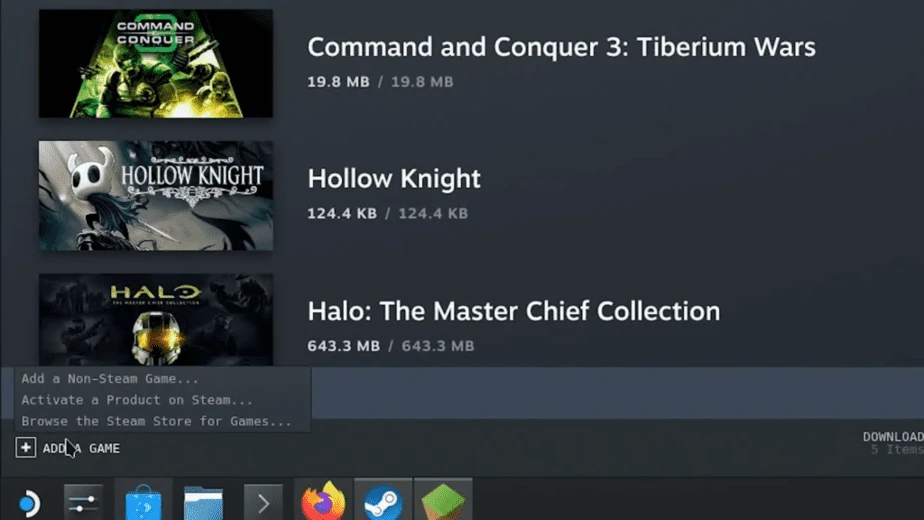
- Alternatively, you can use the Steam app in Desktop mode to add this game. Simply open the Steam app, and there will be an option to Add A Game in the bottom-left corner. Select the Add a Non-Steam Game option from here, and you will be given a list of programs on your device. You can select the Minecraft edition/launcher you want to add, like PolyMC, and hit the Add Selected Programs button.
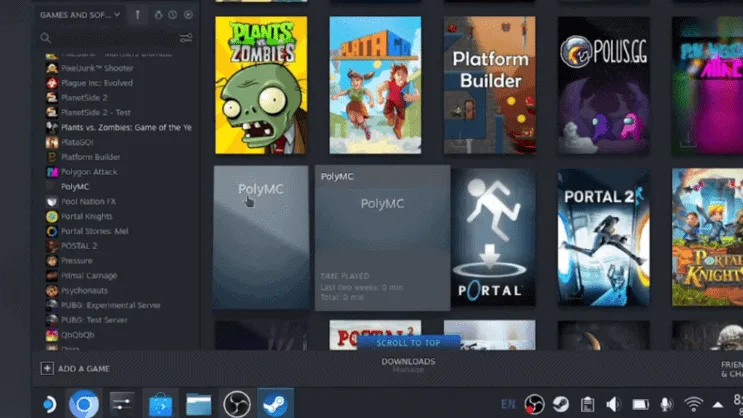
As you can see above, PolyMC is added to the Steam Library grid. As it is not an official Steam game, the game tile and internal artwork will all be grey. We do have a remedy for this, so if you are looking to fix this, scroll down. Once in Gaming Mode, you can find PolyMC in the Non-Steam Games section.
Adding Artwork To Minecraft On Steam
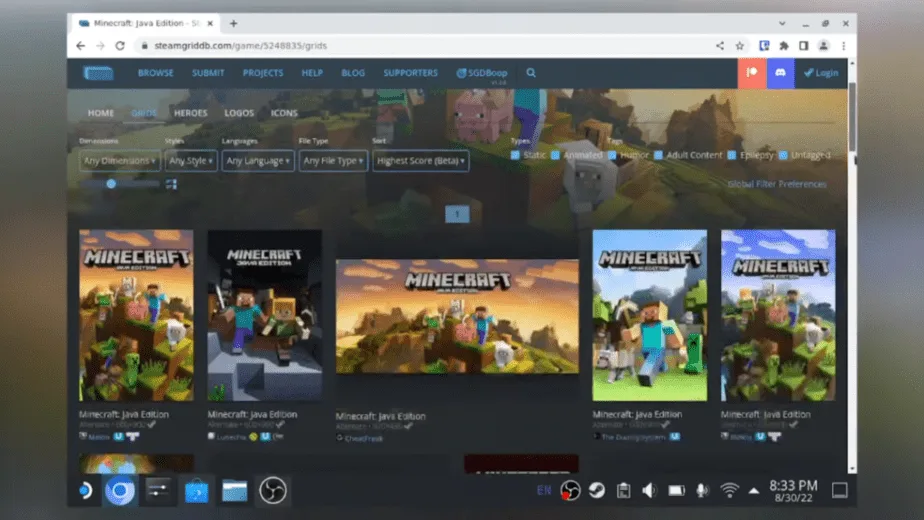
Adding artwork to Steam for Minecraft is a personal preference and is not a requirement. However, it provides professionalism, and you can spot it more easily in your library. There are 4 types of artwork that you will have to add. For this, you need to first visit SteamGridDB.com and search for Minecraft Java Edition. From here, you must download one picture of your choice from each of the Grids, Heroes, Logos, and Icon categories (seen at the top of the page).
Once you have the pictures, you can go ahead and add each of the 4 artworks to their respective locations:
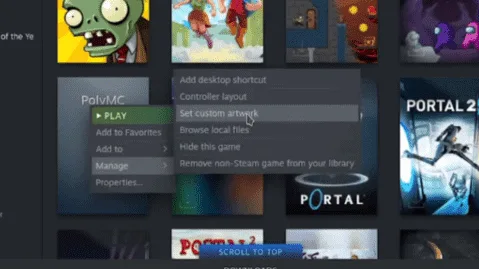
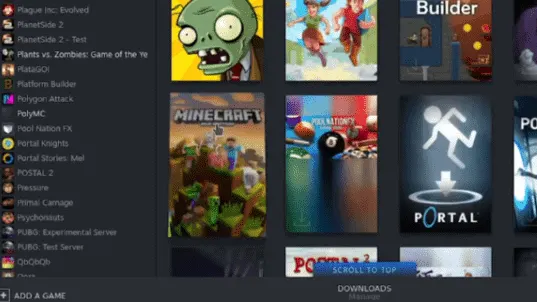
- Grids: Locate the PolyMC tile in Steam Library and right-click on it and select Manage->Set Custom Artwork then upload the Grid category picture you downloaded from SteamGridDB.
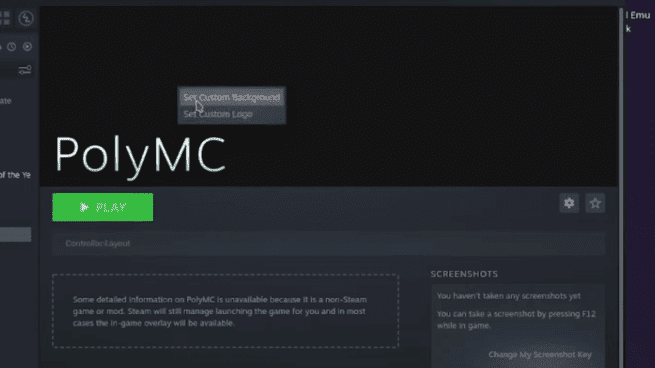
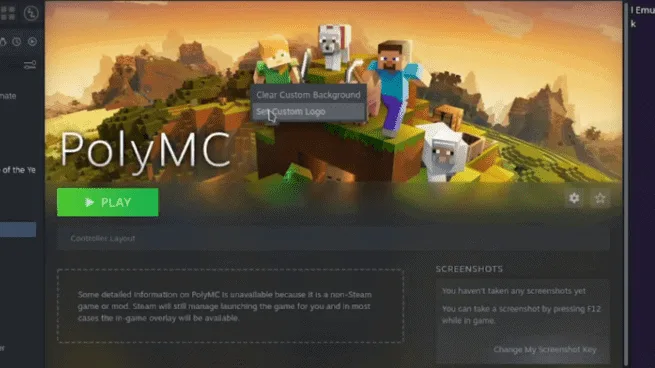
- Hero/Background: Enter the PolyMC tile and right-click on the top empty background area, and select the Set Custom Background option. Choose the Hero category picture you downloaded from SteamGridDB.

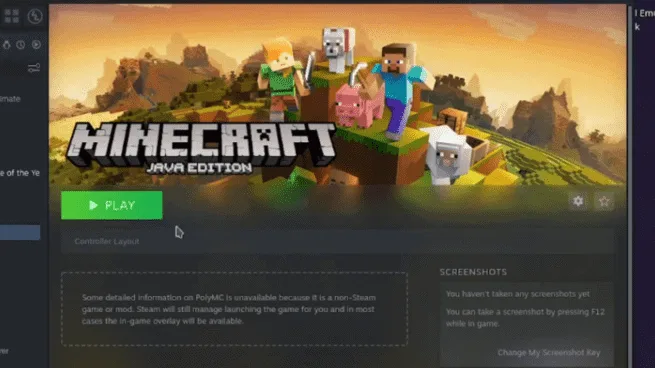
- Logo: Right-click on the top background area and select the Set Custom Logo option. Choose the Logo category picture you downloaded from SteamGridDB.
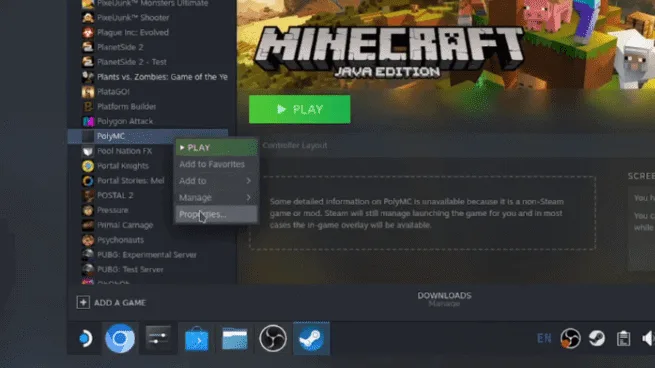
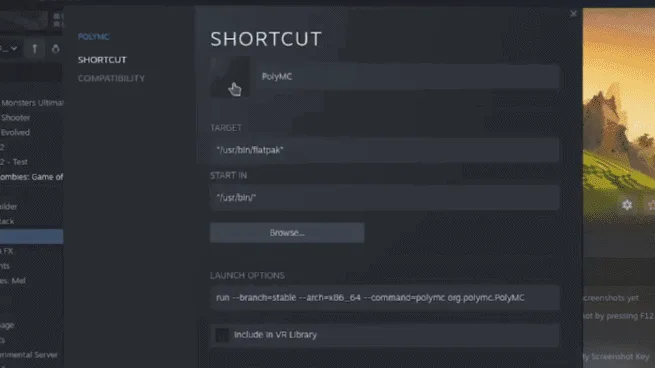
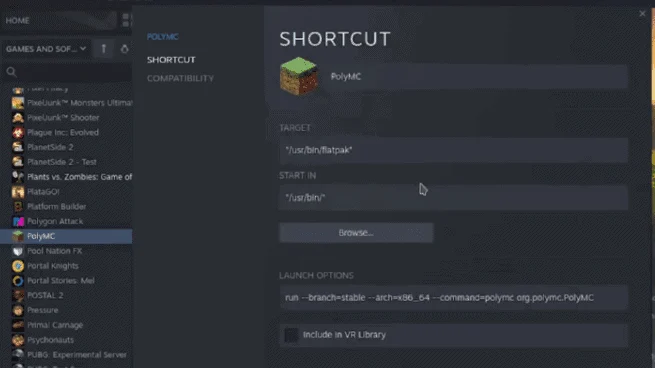
- Icon: Right-click the PolyMC icon on the list to the left and select the Properties option. Then press the empty little square below “SHORTCUT” and choose the Icon category picture you downloaded from SteamGridDB.
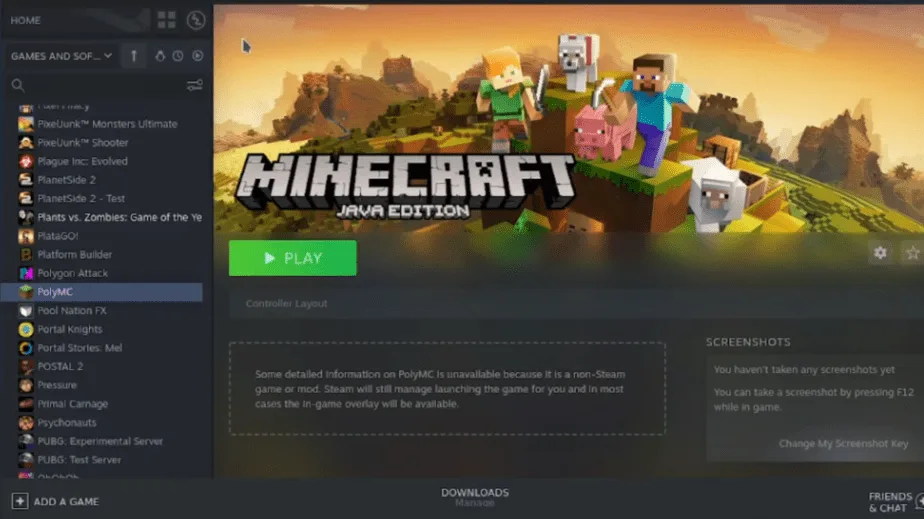
With all the artwork added, it looks like a legit Steam game, just like the rest of your library. We used the example of PolyMC here, but this can be replicated for the Minecraft Bedrock Launcher too. Rejoice!
Minecraft Controls / Controller Layout On Steam Deck
Now that Minecraft is installed and added to Steam, it’s time to play the game in Gaming Mode and adjust the controller layout to your liking. Return to the Gaming Mode by either holding the power button or selecting the Return to Gaming Mode icon on the Desktop. Once in Gaming Mode, you can find PolyMC and Minecraft Bedrock Launcher in the Non-Steam Games section.
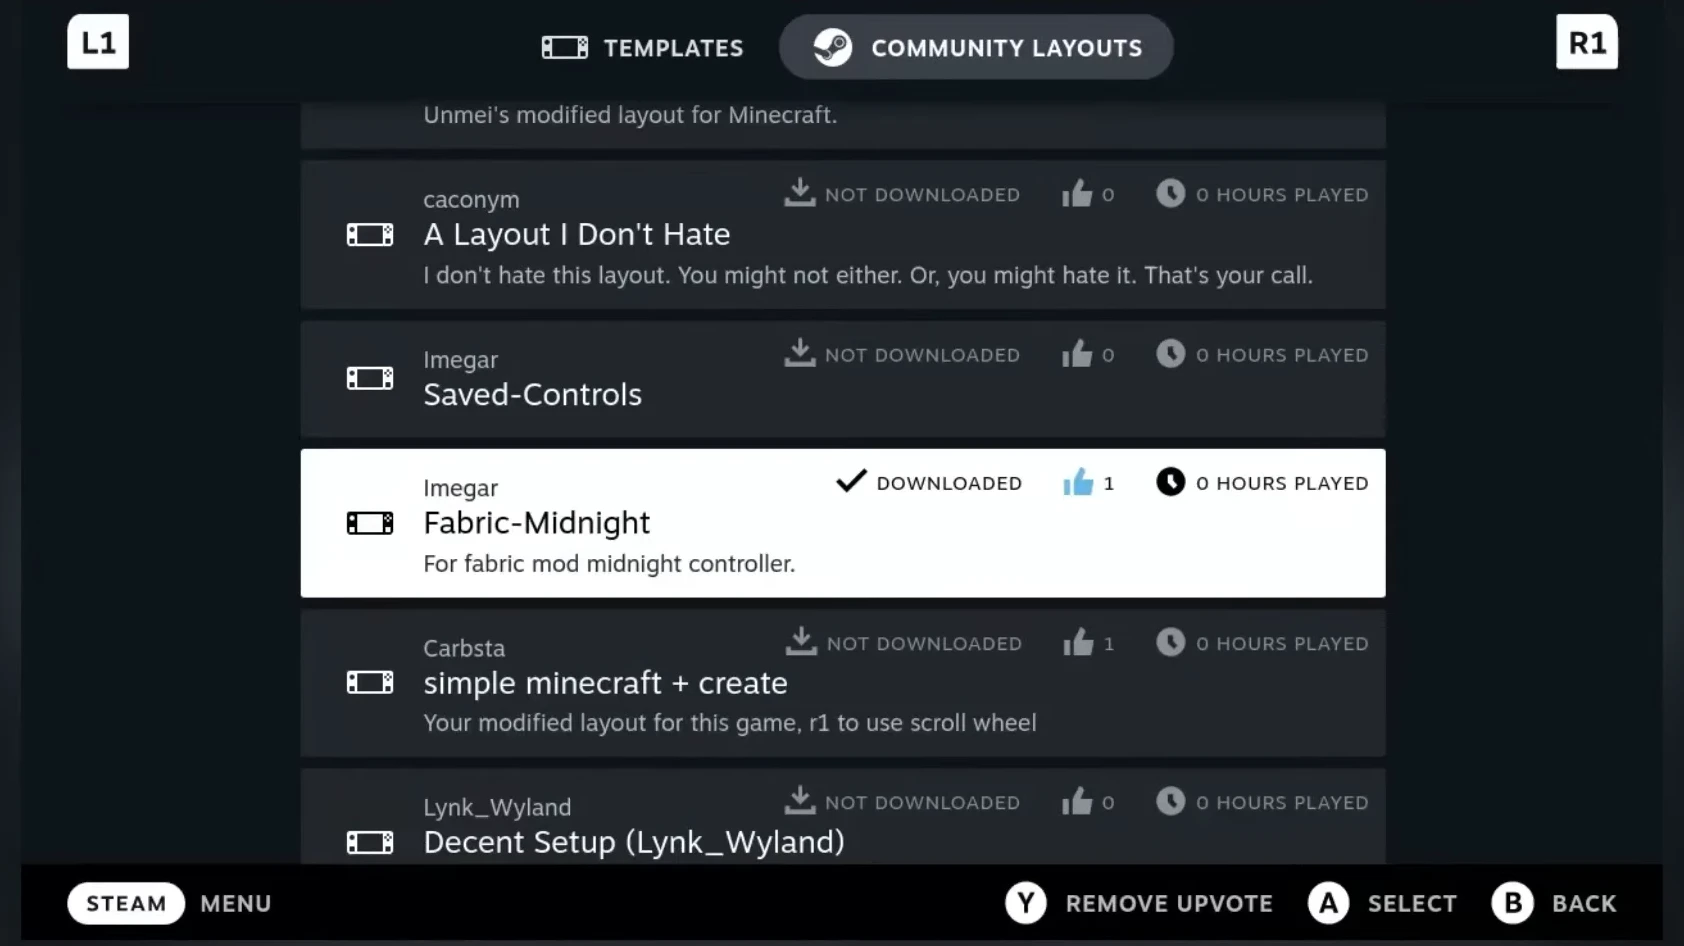
Select the Controller Settings Icon, then go through some controller layouts and choose or customize what you find best. For the Java edition/ PolyMC, we already have a mod built into Fabulously Optimized for controller support, so we’ll head over to Community Layouts and scroll down until you find the Fabric-Midnight controller layout. This is the controller layout made for this specific mod hence it is recommended.
If you have gone for some other Minecraft instance/mod, then search the Community Layout for its specific layout, as each game instance can be very different and requires a different playstyle. The community here is quite active, so you will probably have no trouble finding the right match. For CurseForge, you can use the Controllable mod linked here.
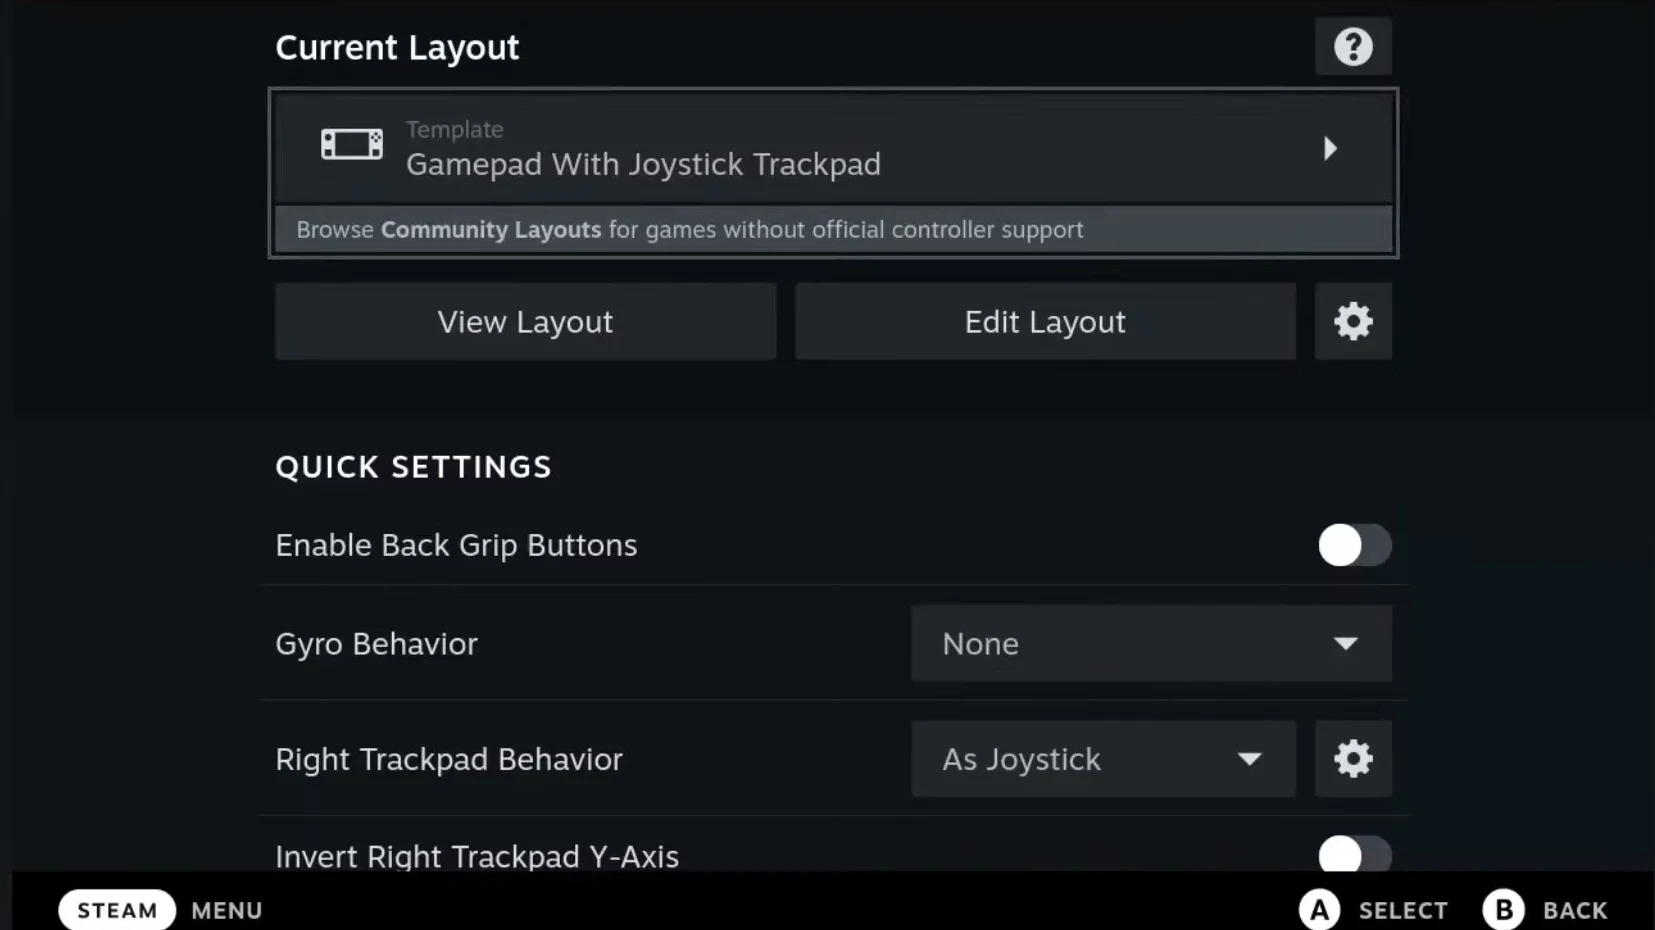
As for the Bedrock edition, the default should work fine if you just set it to Gamepad With Joystick Trackpad. You shouldn’t have too many issues with it potentially.
Performance
The screen on the Steam Deck is limited to 60 FPS, so that is the maximum benchmark we have to reach.
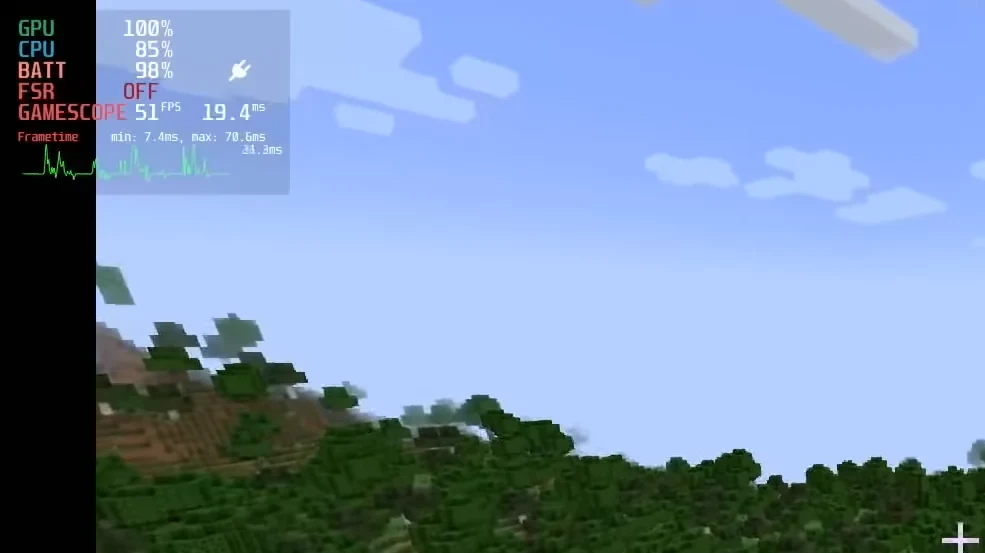
- Java Edition:
- With some heavily modded instances, we could get 50-60 FPS with frame drops only when many new chunks of the landscape are loading in, which is pretty normal in Minecraft.
- Instances like Fabulously Optimized can hold steady at 60 FPS and even go beyond that, while Simply Optimized can reach above 100 FPS.
- The Bedrock edition has no trouble staying above 60 FPS.
- Using the default settings, 60Hz refresh rate, with no framerate cap, full resolution (1280×800@60). The Steam Deck battery ran for 6 hours or more at best.
This detailed article covered every aspect of installing both versions of Minecraft on the Steam Deck and the nitty gritty you have to get into to make the game more easily playable and better optimized for the device. The Java edition, PolyMC, contains a sea of modded Minecraft content. With such a vast array of games, there are bound to be some individual issues and optimization whose solutions are either unavailable or you have to dig into the annals of the internet to solve.

