Last Epoch came seemingly out of nowhere and goes toe to toe with the best ARPGs out there. Furthermore, the game’s unique take on some standard features of the genre has the potential to leave the OGs of the genre in the dust. We’ve curated a helpful beginner’s guide for players who are just starting out their Last Epoch adventure to make things easy for them.
We’ll talk about a lot of things, including the different game modes, skills, specializations, classes, inventory management, itemization, and a whole lot more. Aight, lets start then!
Character Creator
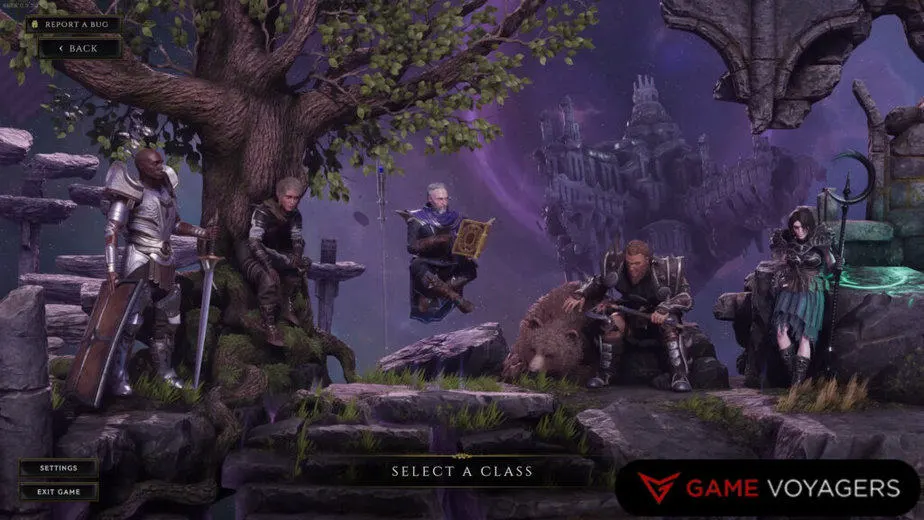
As usual, your journey begins with creating your character. Last Epoch has 5 distinct Classes, each with 3 unique Masteries. Classes range from standard pure melee warriors to dark sorcerers with an army of the undead.
Once your class reaches levels 20 to 30, you need to make the hard choice of picking your Mastery. This decision will further specialize your play style, giving your class some wildly unique playstyles and some of them may completely change up the way a class plays.
You can only choose a single mastery. You can not respec masteries so choose wisely or else you are stuck with your decision.
Classes and Masteries
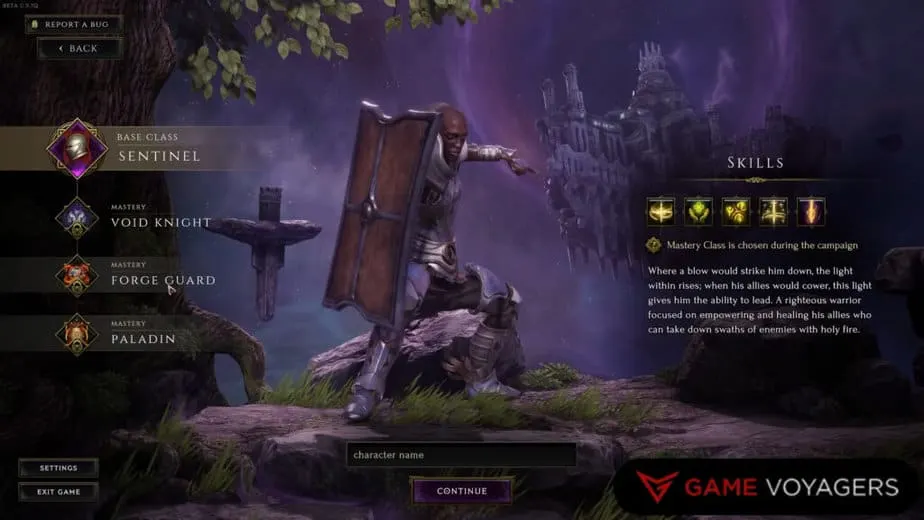
Here is the list of all 5 Classes and their respective Mastery. As you progress with your class and start dumping points in the Masteries, you’ll soon have to choose one and commit:
- Sentinel
- Paladin
- Void Knight
- Forge Guard
- Primalist
- Shaman
- Druid
- Beastmaster
- Rogue
- Bladedancer
- Marksman
- Falconer
- Mage
- Sorcerer
- Spellblade
- Runemaster
- Acolyte
- Necromancer
- Lich
- Warlock
Game Modes
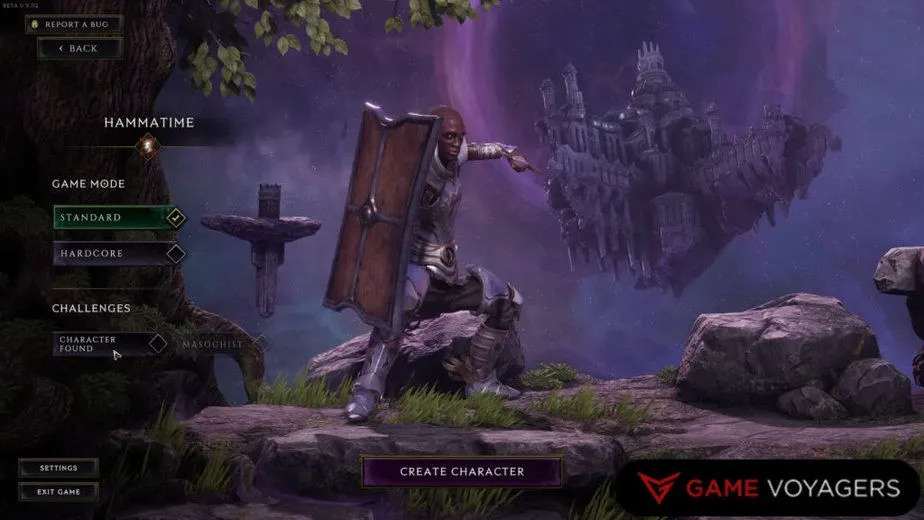
Next, you have to choose your game mode. There are two Game Modes or difficulties in Last Epoch that change the way you approach the game.
Firstly we have the Standard Mode. This is your standard game type nothing special. The other is Hardcore Mode. It is a harder run with the added challenge of once you die, you die. Worry not, your character will still respawn but revert to Standard Mode.
Next, you have Challenges. These are special conditions that vary up the game. For example, the Character Found challenge will force you to find all your starting loot instead of handing it to you.
As beginners, we advise you to choose the Standard Mode and no challenges. Nevertheless, tweak these to your difficulty preferences.
Character Stats
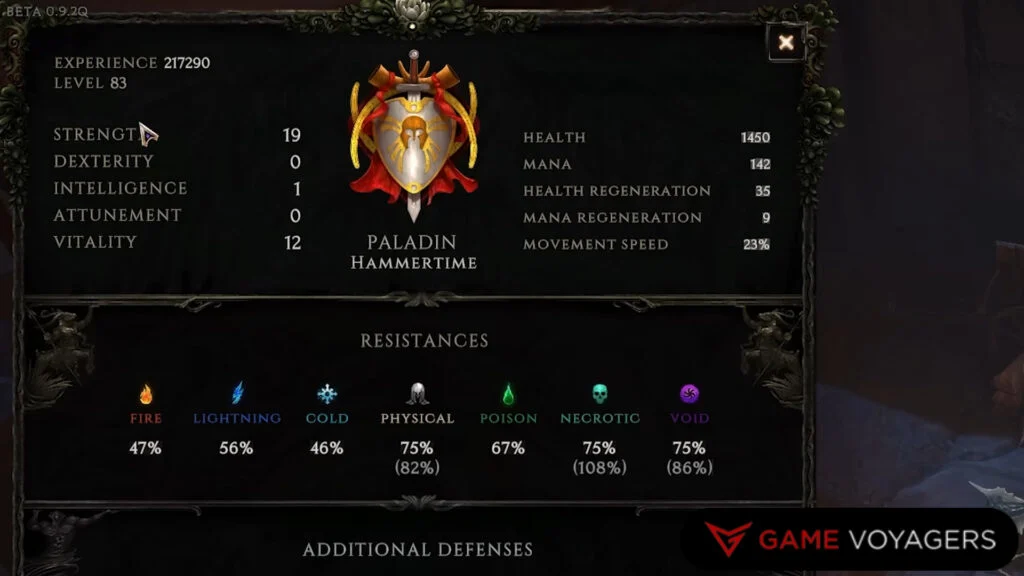
The Character screen displays all your stats, attributes, XP, level, and resistances. There is a ton to take in here and not as straightforward as it might seem. XP and level are pretty simple to grasp.
Hovering over each stat will reveal additional information.
- Strength: Each point of strength increases armor by 4% and improves skills that rely on raw strength.
- Dexterity: Each point adds 4 dodge rating and improves skills that rely on dexterity.
- Intelligence: Each point grants 4% ward retention and improves skills that rely on magic. Ward is the overshield before you start receiving actual damage.
- Attunement: Each point here grants 2 mana and improves skills that rely on innate magic.
- Vitality: Each point adds 6 HP and 1% poison and necrotic resistance.
- Endurance: This is the yellow line you see on your health. When your health drops below this point, you will receive less damage depending on your Endurance stat.
Always check your skills’ Scaling Tags to determine which one of the stats helps it scale better.
Additionally, you’ll find all the different types of resistances to various damage types here too. And it includes defensive attributes too like block chance, armor protection percentages, and ward stats.
Bottom most section of this screen will show all of your final totals of your stats. There are tabs for everything even your minions if you have such a build.
Skills
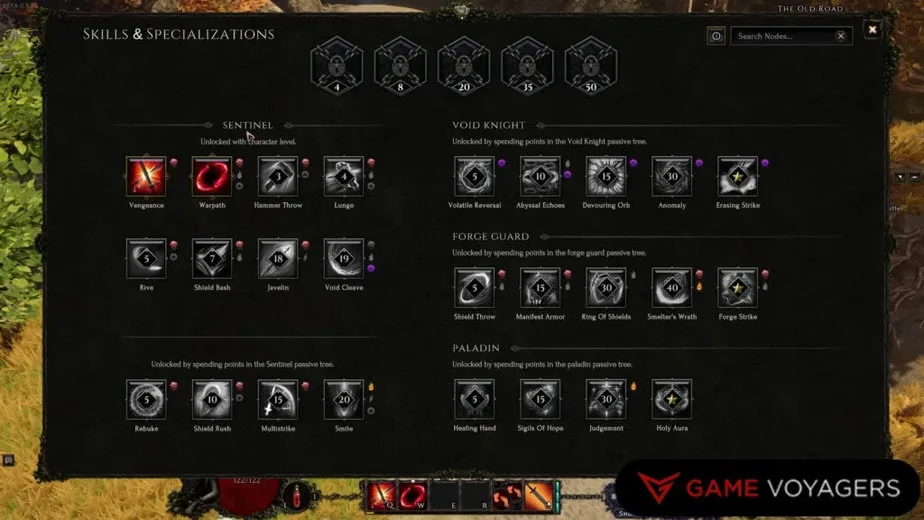
You can see your class’s path by opening the Skills and Specialization menu by pressing the “S” key on the keyboard. We’ll cover skills in this section and Specializations in the next.
On this screen, the class skills are on the left side, and the right side are the skills for the mastery you eventually unlock for that class.
In the picture example above, you can see my Sentinel class on the left and all of their masteries locked on the right.
The Sentinel’s abilities are unlocked by progressing your character level. For example, as you hit level three you’ll unlock Hammer Throw then Lunge on level 4.
On the other hand, to unlock skills for the masteries on the right side you need to dump points in their respective Passive Tree. For example, if you want to unlock the Abyssal Echoes skill for the Void Knight, you must first invest 10 points in the Void Knight passive tree.
You can hover over the skill and it will display the type of damage it deals and the attributes it scales off of. Use this feature to put on complementary gear to make that skill even more potent.
Specializations
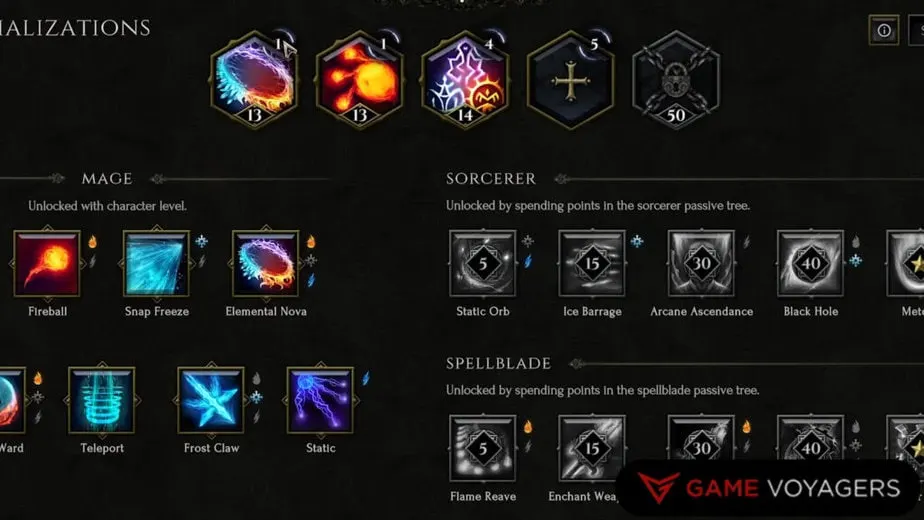
At the top of the Skills and Specializations screen, you’ll see five slots. You will unlock these slots by leveling up to the indicated level. These will unlock when you reach levels 4, 8, 20, 35, and 50 respectively.
Once unlocked, you can then drag your Skill of choice to the open slot and basically open up an entire passive tree for that specific skill. This lets you level up that skill to make it even more devastating, have unique effects, or even change up the element/damage type of the skill.
With all of the skill upgrading, there’s a long progression to this mechanic. You want to start by slotting in your primary damage ability ASAP and start leveling up to make that skill shine.
The number of points you can invest in each specialization slot will be displayed in a circle on that particular slot. Each slot has its respective points to invest in and is not shared.
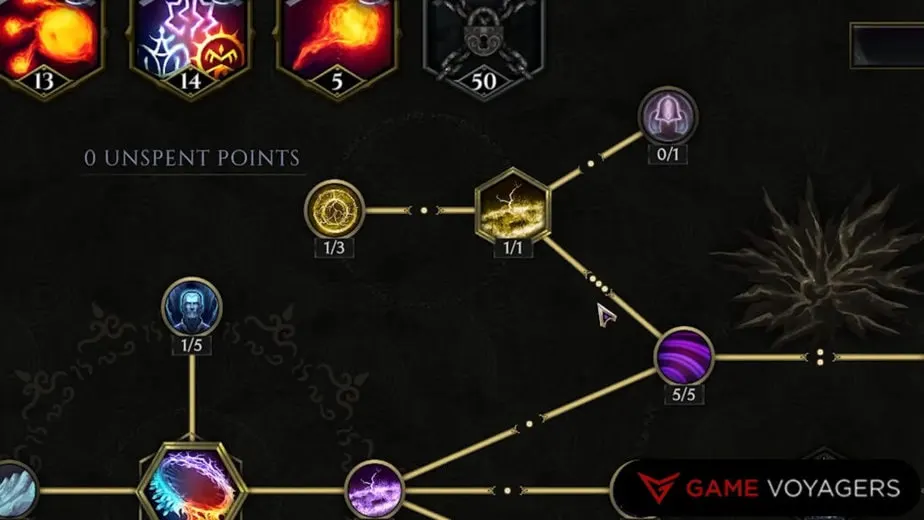
When you open the skill tree, you’ll notice the lines connecting the tree have dots on them. It cleverly shows the number of points you need to invest in the previous node to unlock the next node.
Respec Specializations
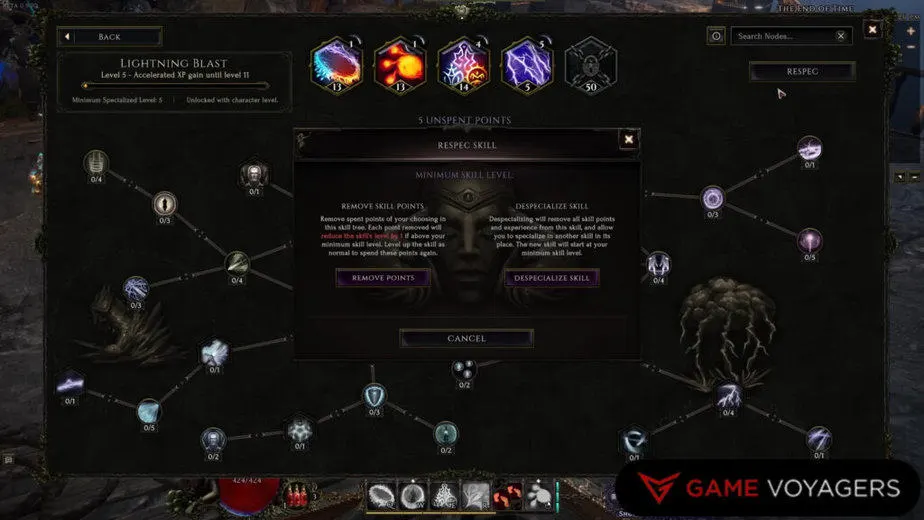
This game is super fluid whereby it lets you Respec anytime you want. You just need to hit the Respec button on the top right corner of the skill specialization screen.
This will give you two options: Despecialize skill will completely remove the skill and clear all points invested in it, and/or Remove Skill Points will let you individually remove points/nodes within the skill.
Do keep in mind, when you respec points the overall skill level will go down. You will have to level up the skill again to re-allot the point.
Passives Trees
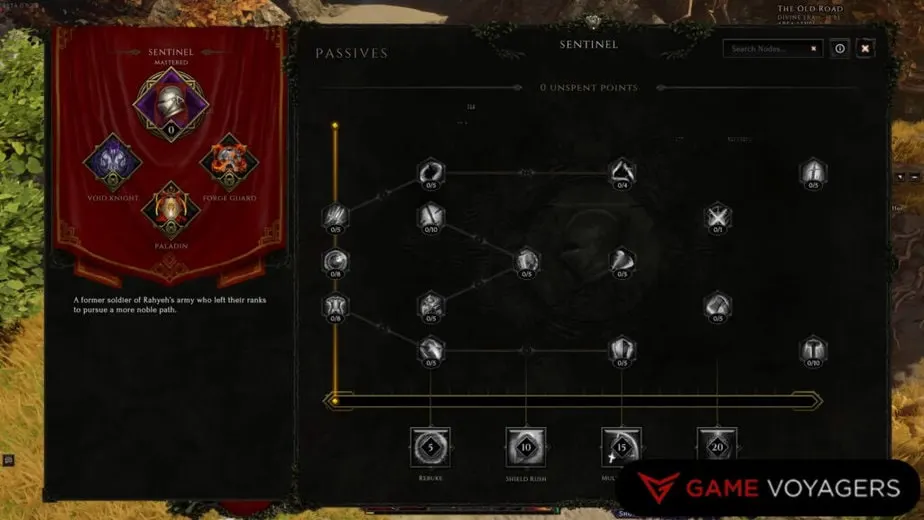
Speaking of Passives, pressing “P” on the keyboard will show the Passives screen. These trees are again divided into the base class and the three subsequent mastery.
The base class’s skills will be available at all times. However, unlocking Passives for the Mastery does come with a bit of a caveat.
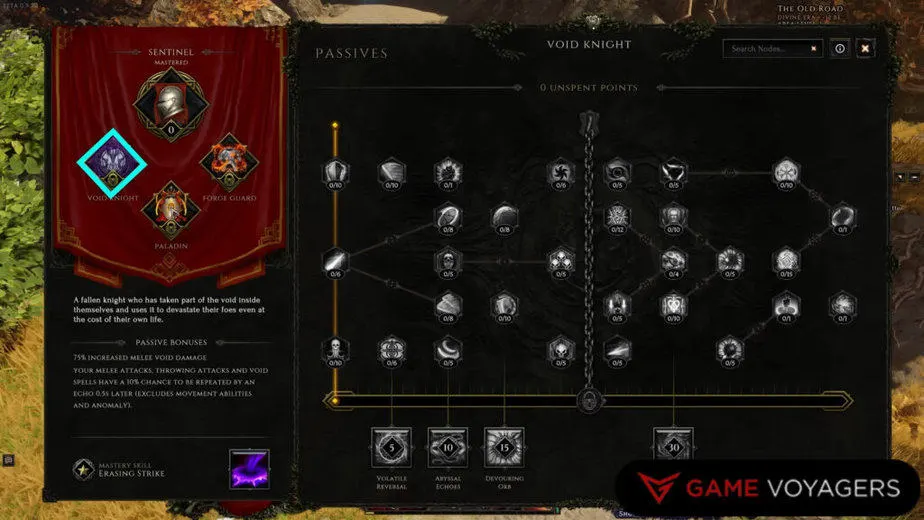
You’ll be able to unlock passives from every single Mastery regardless of which Mastery you choose until the chain in the middle. To get past this chain and get your hands on those juicy latter passives, you have to choose or commit to that Mastery exclusively.
Regardless of your Mastery commitment, you can still invest points in other masteries’ passives from the first half of the tree (before the chain).
You essentially get to dip into four different trees, opening up the possibility for some truly unique builds.
At the bottom of the trees, these are the skills that you’ll unlock as you spend points in those trees. For example, putting 5 points in Paladin will unlock the Healing Hand skill.
Respec Passives
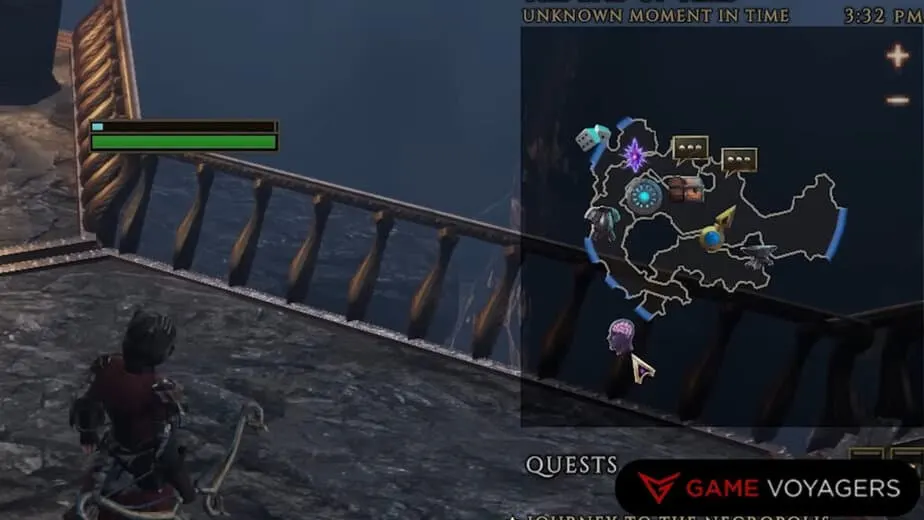
To respec your passive, you can’t simply use the menus to do that. Instead, you want to look for the “purple brain head” icon on the map. Visit this guy and they will reveal the option to Respecialize Mastery Point Allocation.
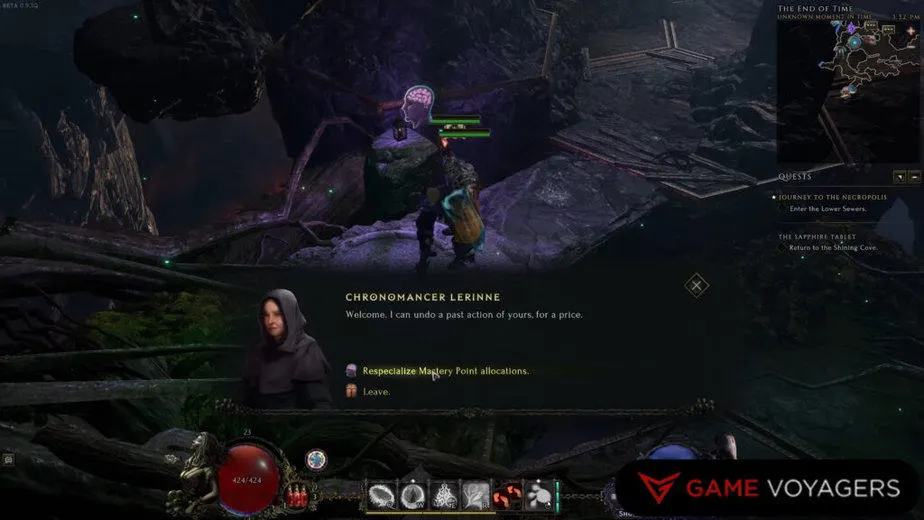
Selecting this option will open up the Passives menu, and from here, you can individually select the nodes you want to remove. Respeccing passives will cost varying amounts of Gold.
Fast Travel
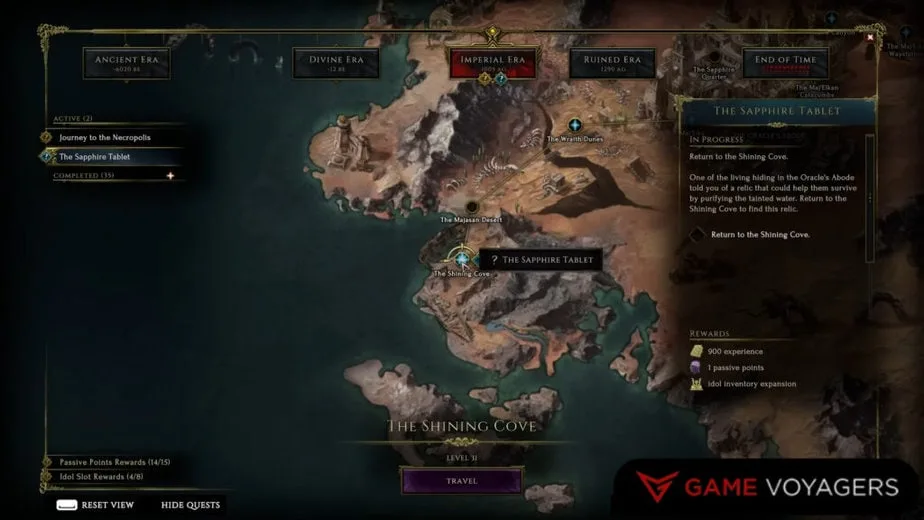
Fast Travel is incredibly simple in Last Epoch. Just locate the active mission or side mission on the map screen and select the marker on the map. Pressing the marker will instantly display the Travel button. Use it to teleport to the mission location.
Additionally while adventuring, you can drop a portal at any time by pressing the “T” button on the keyboard. This portal will send you back to the town where you can interact with your stash or any kind of preparation you want.
Return to the same location by re-entering the portal from the Town.
This piece of simple advice will save you a ton of unnecessary trekking especially when you are a beginner and want to level up fast.
Inventory Management
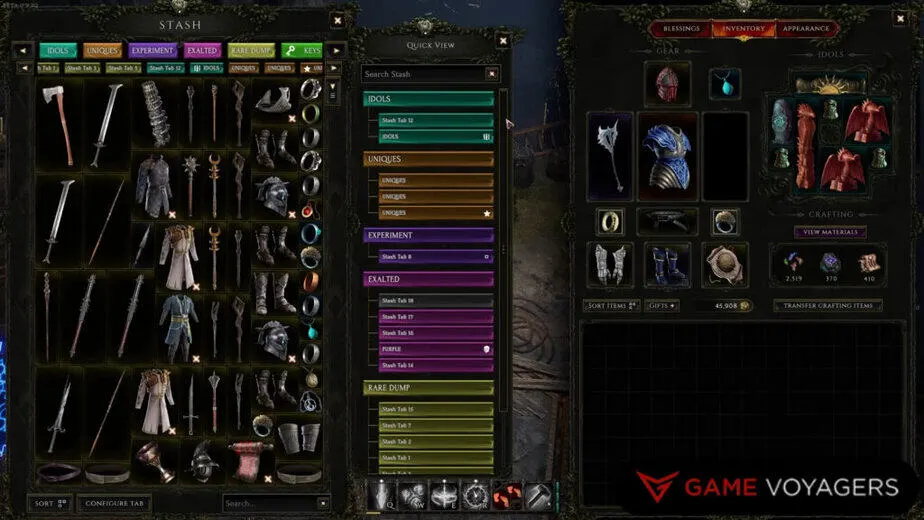
This beginner’s guide for Last Epoch talks about its inventory management systems as well. Since we all know how much of a lootaholics these games turn us into, there is essentially unlimited stash to fulfill your hoarding needs. Not to mention, the sorting and filtering systems are a godsend.
The best thing is that neither is it limited stashes nor do you have to spend real money to buy more inventory stashes. You can buy new tabs in the inventory with the in-game Gold.
You only need to click the “plus” at the end of the tabs section, pay the price and viola you have more space and a category tab to store your goodies in. Right-click on the tab to change its name, icon, and color.
You can further color code them and assign the type of items you want to dump in a single category/subcategory. You can see a prime stash organization example in the picture above.
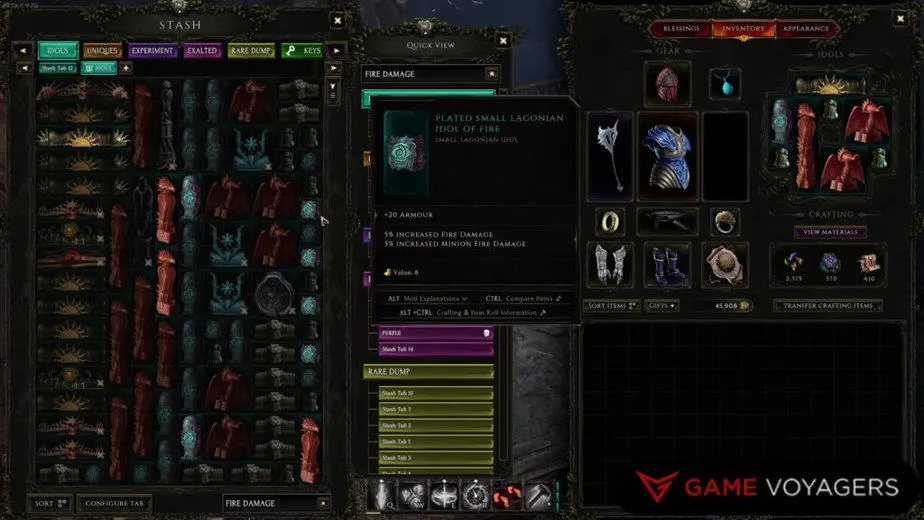
Another handy thing is searching in inventory. This will only showcase the tabs and subtabs that have the type of item you are looking for. In the example above, we searched for Fire Damage items and it displayed all the category tabs down to the exact items with this attribute.
This detailed search feature is very useful when you want to look for complementary items for your builds and skills.
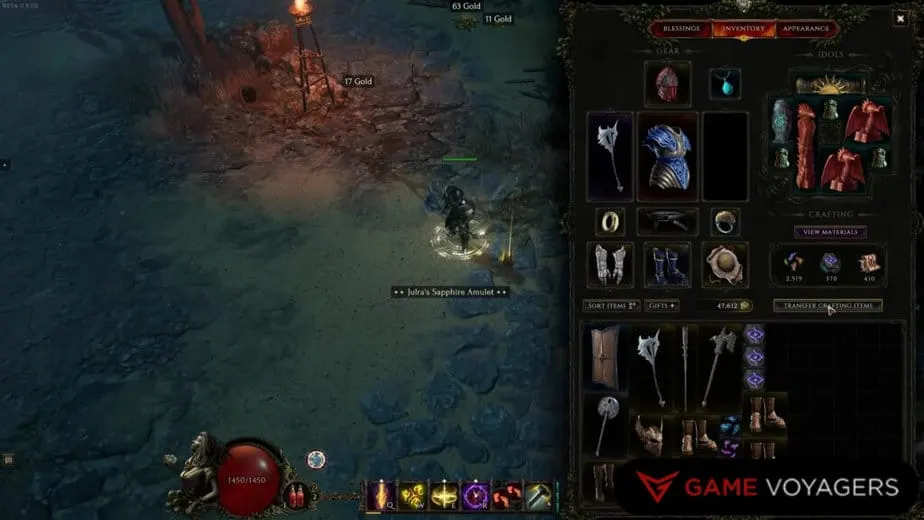
Another great sorting feature is the Transfer Crafting Items in the personal inventory screen. When you pick up loot from the ground, it will include gear along with crafting materials.
Crafting materials will eat up unnecessary inventory space, and for that reason, just press the Transfer Crafting Items button, and it will send them to an unlimited stash made for these types of items only.
You can also press the Sort Items button and it will neatly rearrange all items in your inventory.
Itemization
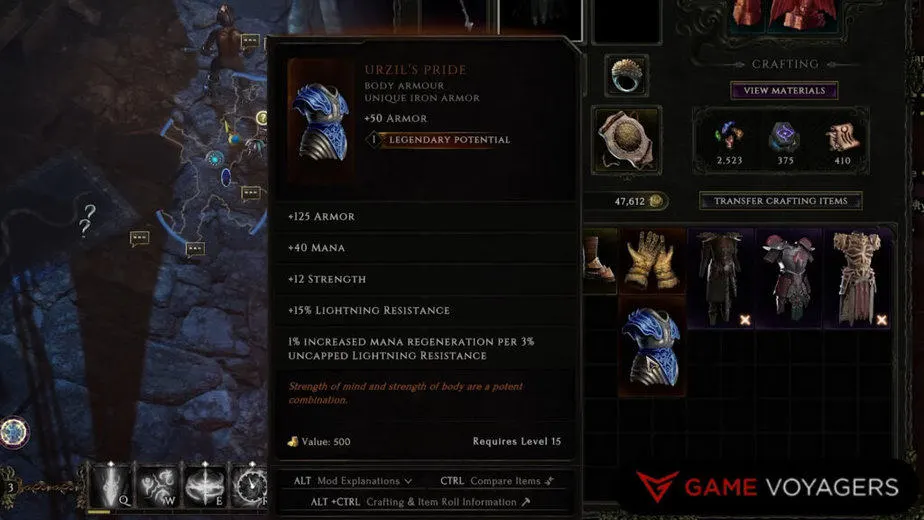
This is how items and rarities work in Last Epoch:
- Common Items (White): These have no special of any kind.
- Uncommon Items (Blue): Upto two special stats.
- Rare Items (Yellow): These items can have 3 to 4 affixes or prefixes on them.
- Unique Items (Bronze): These items will have a unique attribute that can’t be crafted onto an item like spawning a swarm of bees with every hit.
- Legendary Potential Unique Items: These special items can be slotted with a stat from an Exalted item. Depending on the number beside the Legendary Potential, you can slot in that many stats in that item.
- Exalted Item (Purple): These are the cream of the crop items. Their purple-written stats are the highest of them all. These are stats that get transferred over to Legendary Potential items.
- Legendary Items: Unique items slotted with Exalted items’ state will result in legendary items. These items are generally what you want to look out for when moving into the endgame.
Most powerful builds will end up mixing Legendary with Exalted items to come up with some serious powerhouses.
We have just scratched the surface of Last Epoch with this beginner’s guide. There is so much more to this game than we could have stuffed into this guide. Not to mention, this game has just been released, and the devs are patching it constantly, so anything mentioned above is subject to change.

