
Don’t Starve is a brutal game that often leads to many new players giving up in the early game. Many of these players like me play the main game for a while, and then they check out the DLC content.
To my surprise, Shipwrecked is vastly different from the main game, and has many things about it that I absolutely love. The first time I played it, I felt like I had to relearn everything I knew from Don’t Starve. Because of that, I’ve put together this beginner’s guide to tell you everything you need to know to succeed.
Getting Started
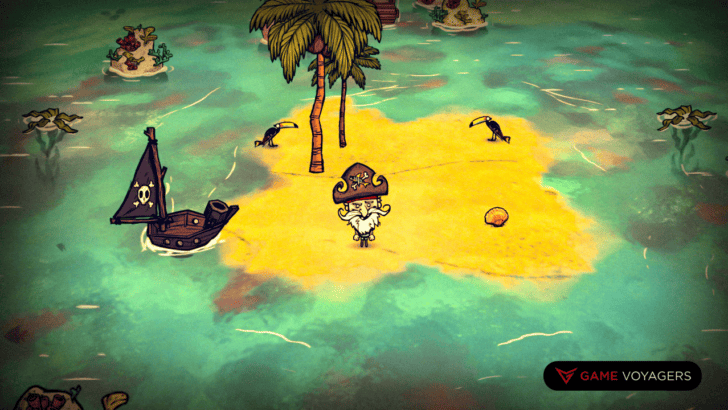
You’ll start out on a pretty small island, and you’ll immediately realize how different this is from Don’t Starve. The foliage is different, the enemies are different, and the entire feel of the game is entirely new.
This tropical setting is much more enjoyable to explore in my opinion, and ocean exploration adds another layer of fun. Because you’re surrounded by ocean, you’ll need to make a raft to head to other islands.
But first, you need to gather as much as you can from the first island. Strip that island of its resources on day 1, and make 1 of each of the craftable tools. If you’ve played the main game, you’ll remember that hammers can only be crafted with the aid of a Science Machine, but in Shipwrecked you can make one from the start of the game.
Craft a hammer when you’re able to, and hammer down the shipwreck debris from your spawn. From the large debris, you’ll obtain a boat repair kit that’ll help you fight the Quaken. You should also hammer any crates you find and get some early resources.
Speaking of Science Machines, your next priority should be to find gold to craft one. Gold is very hard to find at first unless you get incredibly lucky and find one on the first island. The Science Machine unlocks tons of other great items, including the rowboat that will help you get around the world easier.
Once you have enough resources, it’s time to build that raft. There’s a brand new crafting section on your left that’s specifically for boating-related items, so check that out and craft whichever raft you can. There are 2 rafts, one called a Log Raft and the other just called Raft. If possible, build the Raft, as the 2 have the same amount of durability, but the Log Raft is slower.
Depending on how long it took you to take the resources from your island, it might be starting to get a bit dark out. Just make a fire and wait out the night. You don’t want to be there too long, so you should be on the water by the second day at the latest.


Ok, so you’re ready to embark now! Head out into the water and start following the coastline. Unless you found it on the first island, your next goal is to find gold to make a Science Machine.
The coastline is easily identifiable by its lighter color, and the open sea has a darker blue color. You could head out into the sea if you want, but you’re more likely to find an island quicker by following the coast. The open sea is filled with waves that go in specific directions. If you sail your boat into a wave while moving the same direction as you, it’ll give you a speed boost. Sailing into a wave that’s moving towards you will damage your boat, so try to avoid those while you’re out there.
Also, don’t use that first boat repair kit unless it’s absolutely necessary. It can be difficult to acquire the materials for more boat repair kits, so it’s sometimes cheaper to simply craft a new boat altogether. When you have better boats, this strategy becomes less viable, but by then you’ll be able to craft repair kits easier.
Spyglasses can be crafted with a Science Machine, and will allow you to reveal a section of the map in whatever direction you choose. Both these and Super Spyglasses can be found in X Marks the Spot chests. To find these chests, collect a message in the bottle from the water and read it. Doing so will mark a red “X” on the map, which you can travel to and dig up with the shovel.
Once you’ve managed to craft a science machine, you should make a rowboat with a thatch sail. This boat is much better than the raft, and the sail will allow you to stop rowing and hold another item like a weapon or torch. You should definitely craft these items as well as a weapon for fighting the Quaken.
Sailing to the edge of the map will let you travel to the opposite side via a fog that surrounds the map. This is an easy way to get around if you find yourself close to one section of the map.
Best Food Sources
As you sail around the world, your character will quickly become very hungry. You’ll need to know what foods are the best to eat and how to get them.
This is a short list of my favorite food sources. All of these will be more beneficial to eat after they’ve been cooked. There are other foods that are better later on in the game, but all of these are great choices when you need them.
- Fisher Merms – if you get lucky with these, you’re set on food for pretty much the entire game. These creatures constantly pull fish out of small ponds, which you can collect without them attacking you.
- Limpets – these small creatures grow on rocks and shipwrecks all over the world, so collect every one you can find. They don’t grow during Dry Season, so be sure to collect a lot before this.
- Seaweed – spawns in the shallow water around islands. It can be eaten raw but will drain your sanity.
- Berries – spawn on berry bushes in the jungle areas. You should collect 20 – 30 berry bushes to replant at your base.
- Jellyfish – a constant source of food when you can’t find any elsewhere. They cause shock damage, but eating the jellyfish will immediately restore the lost health. This damage can also be negated using a Snakeskin Jacket or Snakeskin Hat.
The Perfect Base


Base location is completely different in Shipwrecked since it encourages a more nomadic style of gameplay. The general consensus in the community is that you should have many smaller bases around the world, rather than one large base.
Many people say that the best place to make your base is somewhere close to both the Seaworthy and the Volcano. The reason for this is that you can always use the Seaworthy to transfer to Reign of Giants, and you can quickly head to the volcano for resources and appeasement of the volcano gods.
If you find an island you think is the perfect location, go ahead and set up shop there. You can always build a better base somewhere else, so don’t feel like you’re stuck with only one location.
Items you need in your base
Other than these next few essential items, you can customize your base however you’d like to.
- Crock Pots
- Alchemy Engine
- Chiminea
- Endothermic Fire
- Resource farms such as berries, grass, and twigs.
- Lightning Rod
- Crafted turf
- Sandbags
- Lots of chests
- Palm Leaf Hut
- Icemaker
- Ice Flingomatic
Major Hazards
Although there are a lot of things that can kill you, only a handful of things that pose real threats to you and your base.
- Crocodogs – these annoying animals will chase you on both land in water, and will spawn at random times. The size of the packs increases the longer you play, so it’s best to set up some defenses to deal with them.
- Bosses – the Quacken is not much of a problem as you need to spawn it yourself, but the Sealnado and the Tiger Shark can be deadly
- Lightning – will kill you and destroy your base if you don’t have lightning rods and/or the proper clothes.
- Wind – it’s more of a nuisance on land, as it blows your crops around, but it creates large waves that could easily sink your ship.
- Puddles – not only do they spawn pesky mosquitos but they also can cause all of your machines to stop working. It this happens, it’s highly likely you won’t survive the season.
- Heat – it’ll hurt you without the proper protection. Once you have these items, it won’t be too difficult to deal with.
- Eruptions -it’s inevitable that eruptions will happen, unless you manage to ward them off completely with the Altar of Snackrifice.
Biomes


- Beach – the area you always spawn in. Has a large amount of essential resources
- Coral Reef – found in the middle of the ocean. Holds Ballphin Palaces and possibly the Yaarctopus, the Shipwrecked equivalent of the Pig King.
- Jungle – holds a large number of trees and other resources. Snakes hide in this biome and come out during dusk.
- Magma Field – a dark biome filled with lots of rock and dried magma.
- Mangrove – a green biome that can only be accessed by boat. Water Beefalo spawn here.
- Meadow – a yellow biome that holds many bees and lots of grass.
- Ocean – The largest portion of the map that requires a boat to explore. Hold and abundant amount of resources.
- Shallow Ocean – the green ocean immediately surrounding islands. Where Shallow Ocean is, an island is guaranteed to be nearby.
- Ship Graveyard – small patches in the ocean where shipwrecks and supplies can be found.
- Tidal Marsh – the Shipwrecked version of the swamp. Fisher Merms are found here, as well as dangerous Flups. One of the most dangerous biomes to be in.
Seasons Guide
As with everything in this DLC, the Shipwrecked seasons are completely different from normal Don’t Starve. There are 4 seasons, each lasting different lengths and bringing their own dangers, but this time, they bring brand new threats that you’ve never seen before.
For these next sections, I’ll give you an overview of each season, the most important info to help you survive, and a list of items to get before the next season.
Mild Season – 20 Days


The Mild Season is by far the easiest time you’ll have in the game. For the entirety of the season, you’ll be preparing for the next 3 seasons, where you’ll face some intense challenges.
During the Mild Season, food and resources are abundant. Because of this, you should spend much of the season collecting resources for your base and exploring. As soon as you start the game, you should immediately get to work on the following tasks:
- Find gold, craft a Science Machine
- Explore nearby islands and collect resources
- Scout out potential base locations
- Collect items necessary for starting a base
- Craft an Alchemy Station
- Set up base (base essentials covered later)
- Kill the Quacken
- Explore much of the map before the next season
Anything else you do during this season is really up to you. With the exception of fighting the Quacken, everything listed above is essential to surviving the upcoming seasons.
What you need before Hurricane Season
Because of the harsh weather of the upcoming season, these are the items that you’ll need to stay alive.
- Miner’s Hat – because of the wind and the rain, it’s almost impossible to have your torch out at night. If you plan to do any night exporing, this is a must.
- Boat Lantern – great for sailing around at night during Hurricane Season.
- Lighting Rod – lightning happens quite often in the next season, so you need at least one of these in your base.
- Chiminea – since the wind and the rain puts out any fires, this item allows you to have a fire at your base without it being snuffed out.
- Snakeskin Hat and Jacket – not only do these items make you completely waterproof but also electricity proof as well. You need these for exploring in the next season, and make gathering jellyfish for food much easier.
- Palm Leaf Hut – not only will this keep you dry in the rain, but it will also keep you cool in the Dry Season. Place this towards the center of the base near your Chiminea
- (Optional) Cutlass Supreme – this great sword can be crafted once you’ve killed a swordfish in the ocean. Once you find a swordfish spawn, mark it on your map using a trap so you can come back later. This sword is extremely helpful against the Sealnado, or any other boss that you may need to fight.
Hurricane Season – 16 Days


This season is the first real challenge of the game. During this time you’ll face strong winds that blow you and your boat all over the place. Huge waves appear that do much more damage to your boat, and the wind can uproot your crops and blow them around. Normal firepits are impossible to use due to the wind and the rain.
Lighting also strikes frequently during the storms, so you need to build a lightning rod to stop it from hurting you or your base. Although it sounds difficult, it’s not too bad once you have a few things (which I’ll cover later). A boss called the Sealnado will spawn near the end of the season, who isn’t too hard using the right technique.
You should build a stone wall somewhere close to your base. This wall can help you fight the Sealnado once he spawns, though it won’t be of any help if he spawns while you’re on the open seas. Near the wall, it’s helpful to place a Lightning Rod and Chiminea to make your boss arena more versatile. The reason you place the wall is that you can hide behind it when the Sealnado does its suck attack.
Once you get over these few annoyances, the season really is quite simple to survive. Just keep exploring the map and looking for items of importance, especially the volcano.
What you need before Monsoon Season
- Seashell Suit or Horned Helmet – these aren’t entirely essential, but they protect you from all poison damage that the Mosquitos give to you.
- Wooden Flooring – wooden flooring stops puddles from forming on top of them. You can use any sort of craftable turf, but I prefer wooden flooring. However, puddles formed next to the turf can still spread onto it, which is why you need the next item on the list.
- LOTS of Sandbags – sandbags will help to stop the spread of massive puddles around your base. You should have at least enough to put a wall of them around your base, and maybe a few more to stop any other pesky puddles.
- Armored Boat and Iron Wind – not a must, but these definitely make getting around easier. If you’re going to fight the Tiger Shark in the water, this is also needed.
Monsoon Season – 21 Days


Now that the annoying hurricanes have stopped, it’s time for everything to get flooded. Puddles appear all over the land that grow over time, and walking in them makes you get wet and lose sanity.
Any of your crafted items that are inside a puddle won’t work, so you need to do things to combat the spread of puddles. Because of the massive puddles, mosquitos start to spawn which will poison you on a single bite. The posion can be negated by wearing either a Seashell Suit or a Horned Helmet.
You should have set up your base properly to avoid flooding, which is crafted turf under everything important and sandbags surrounding the base. More sandbags should be crafted to slow the spread of puddles, though the Snakeskin clothes you crafted earlier will protect you from the wetness.
If you haven’t fought the Tiger Shark already, then you’ll definitely be fighting her in this season. This bossfight isn’t terribly hard, as you just need a simple kiting pattern to beat her. For players who decide to fight her in the water, an Armored Boat and Iron Wind is definitely recommended for that fight.
I recommend you get those accessories anyway, as they’ll keep you safer and let you explore faster. Once you’ve beaten the Tiger Shark, you absolutely must craft the Dumbrella. This amazing umbrella hat gives you 100% protection from lightning strikes and jellyfish attacks, and even shields you from the heat in the Dry Season.
Crocodocs are also much worse in this season. Not only will they come in larger hordes as the game progresses, but they spread puddles in Monsoon Season. They have a chance to shake and spread puddles, and also will always create a new puddle on death. Make sure you stay far away from your base when you fight them.
The boss, flooding, and Crocodogs are the main threats to worry about this season. If you’ve protected your base properly and crafted the right clothes, there shouldn’t be anything to worry about.
What you need before Dry Season
- Stockpiles of food – the Dry Season causes plants all over to wither and dry up, making food much harder to find. Be sure to have plenty of food saved up, because it’ll be harder to find it later on.
- Floral Shirt – the best way to help protect against heat. Pair this with the Dumbrella and you should be good to go.
- Ice Flingomatics – your plants will quickly start to wither, which is a problem if you rely on them for survival. Ice Flingomatics will rehydrate your crops so that you don’t have to worry.
- The Volcano’s location – if you hadn’t found the volcano before, it’s imperative that you find it now. Failure to find the volcano will probably guarantee the destruction of your base and/or your death.
- (Optional) Touch Stone – you’ve been through 3 seasons already, and if you haven’t found a Touch Stone yet than you should probably find at least one now. There’s high probability that you’ll die in the Dry Season, so it’s better to be safe than sorry.
Dry Season – 16 Days


After all that water, some it’s much better to have some dryness right? Wrong. This season brings a lot of heat as well as a volcano that rains giant Dragoon eggs and fiery death on everything.
Besides the volcano erupting, you’ll also need to deal with the heat of the season. This can be combated by wearing the proper clothes like the Floral Shirt and Dumbrella, as well as utilizing Endothermic Fires.
On the volcano, there’s a large shrine called the Altar of Snackrifice, which you must throw items in to appease the volcano. Doydoy Feathers are some of the best things to throw into it, as each feather will delay an eruption for 2 days.
When an eruption does occur, it’s almost always better to be on land then on the water. For eruptions on land, the best way to survive is to stand in one place and move when you see a shadow appear on you. Eruption on the water will cause large waves to form and deal massive damage to your ship, so get to land before it happens.
Also, be sure to go somewhere besides your base for an eruption. The volcano causes a huge amount of destruction to the area you’re in, so head somewhere else before it happens. The eruptions leave large lava pools all over the place, which you can remove by dropping ice into them.
Once you get over the heat and eruptions, you’ll be almost ready to have yet another mild season.
What to do before the end of the year
These are mainly just suggestions on things you can do, but they are great things to do to prepare for the next year of Shipwrecked.
- Establish mini bases on various islands – having bases all over the place will make a nomadic gameplay style even easier, and will prepare you to thrive in the upcoming year.
- Create a self-sustaining main base – your main base should have all of the essentials to survive. A good main base is one where you don’t have to go anywhere else to get the essentials.
- Beat any bosses you hadn’t before – you’ve probably killed them all by now, but if not then now’s the time to do it.
- Get the best boats and sails – craft the best sailing items you can to ensure that you have the easiest time sailing around to various places.
- Explore the rest of the world – map out the remainder of the world using your newly crafted boat and sail.
- Create Elephant Cactus traps – these fields of cacti will help you deal with the ever-increasing waves of Crocodogs.
Boss Guides


Palm Treeguard
These guys are the equivalent of Treeguards from the main Don’t Starve game. They’ll spawn randomly while you’re cutting down palm trees. The easiest way to beat them is to lead them to a campfire and light them aflame, but just know you won’t get any of their resources.
Quacken
The Quacken seems daunting, but it’s much easier than it looks. To spawn him, you must equip a Trawl Net onto your boat and head out to deep water. Collect a bunch of Coral beforehand, and have it with you when you’re ready to fight
Once you’re in deep water, drop the Coral in front of you one by one and collect it with the Trawl Net. Do this enough times and the Quacken will spawn. Initially, you’ll see its tentacles come up out of the water. Don’t bother attacking these, as they don’t help you kill the boss.
The only way to kill the Quacken is to hit its head. Avoid the large waves and tentacles, and make your way to the head. Repeatedly hit the Quacken with your weapon of choice (the Cutlass Supreme is a great option), until the Quacken moves. It’ll change location a few times, so just repeat this process until it’s dead.
Sealnado
Even though it seems hard, the Sealnado is also quite easy. Once you know it’s attack moves, a simple kiting pattern is needed to defeat it.
Like I said earlier in this guide, the Sealnado’s suck attack can be countered by going behind a wall if you’ve crafted one. This is impossible to use if you’re fighting it on the water, so I recommend fighting it on the land.
The kiting pattern to kill the Sealnado is 2 hits, then dodge. If you don’t have the wall built, then run a full screen away from it when it does the suck attack. Repeat this process until the Sealnado is defeated. Upon defeating the Sealnado, he’ll turn into his Seal form.
Killing the cute little Seal will instantly spawn Krampus, so be prepared to fight him as well. With a Cutlass Supreme, you can make short work of both the boss and Krampus.
Tiger Shark
This boss can actually spawn any time of the year, but it won’t attack the player unless it’s near its den. When you get to the Tiger Shark den, watch out for the large shadow forming below you, because that’s the Tiger Shark coming to protect her babies.
The Tiger Shark can be beaten by an easy kiting pattern of 3 hits, then dodge. It’s much harder to fight her in the water, so make your life easier and fight her on land. Afterward, if you’re heartless, you can take out her Sharkittens for some extra resources.