
If you want to be the most badass cowboy in all of the West in Red Dead Redemption 2 then you should know how to properly use Dead Eye. The game will flood you with so many enemies at every step of the way that you will have to become the best quick draw in town.
To use Dead Eye in Red Dead Redemption 2, you need to first have completed Chapter 1 – Old Friends to unlock the ability. To activate the ability you have to aim the weapon then (on PC) press the Caps Lock/Mouse scroll or (on Consoles) press the Right Analog Stick.
This will slow down the time for you to shoot at your desired targets. The ability will become better with other perks and be upgraded as you progress through the game.
Dead Eye in Red Dead Redemption 2


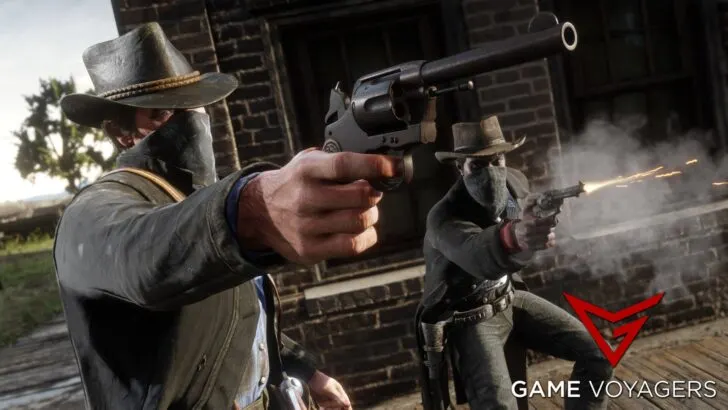
Most of the missions in RDR2 will boil down to you going up against waves of enemies. This can get annoying if it wasn’t for the Dead Eye ability in the game.
It makes you feel like a badass who can take on a whole town of outlaws without even flinching. It can also be beneficial while hunting.
The Dead Eye ability is a staple of the franchise. Once activated, it will slow down time around you for you to mark the targets and then fire a barrage of bullets to fill them with holes. It works similarly to the bullet time mechanic found in many games albeit with a few differences.
Initially, the ability will only allow you to auto-mark multiple parts of an enemy or multiple individual enemies.
With continuous use and through certain points in the story, the ability will be upgraded to add other benefits like manual target marking and the ability to see the weak points of an enemy.
Related: What Makes Red Dead Redemption 2 A Masterpiece?
How To Use Dead Eye


The Dead Eye ability will be unlocked in Chapter 1 – Old Friends. At the start, it will slow down time and anywhere on an enemy or target you move the reticule, it will place a red “x” maker automatically. Once the Dead Eye meter is exhausted or you deactivate the ability, you will fire the weapon at the marked spots.
- On Consoles, you have to first aim the weapon with the left trigger (LT/L2) and then press the Right Analog Stick (R3) to engage Dead Eye mode. Move the reticule with the Left Analog Stick onto the target to place the red markers. Once the ability is deactivated, the gun will fire at the targets.
- On PC, you have to first aim the weapon with the Right Mouse button and then press the Caps Lock or Mouse Scroll to engage Dead Eye mode. Move the reticule with the mouse onto the target to place the red markers. Once the ability is deactivated, the gun will fire at the targets.
Later when you have unlocked the upgrade to place manual markers on targets, you can do so by pressing the “X” button on the PC or the R1/RB button on Consoles.
However, be careful as you can still receive damage while the ability is active. You are not invulnerable while in the Dead Eye Mode.
Dead Eye Core and Meter


The Dead Eye ability is governed by the Dead Eye Core and Meter. It is visible on the bottom right corner of the HUD.
- The bar or Meter around the icon determines the amount of time the ability stays active. It will start to deplete once you have turned the ability on. When it’s emptied, you will automatically exit the Dead Eye Mode. You can turn off the ability manually at any time by pressing the activation button again.
- The middle icon or the Core determines the rate at which the Dead Eye meter gets filled up again. As the core gets emptied the meter will seize to replenish.


The Dead Eye meter and core are replenished by killing enemies or by using certain consumables like Chewing Tobacco or Miracle Tonic. These items are categorized in the north-western quadrant of the Items Wheel.
Related: Red Dead Redemption 2 Does Honor Matter?
Dead Eye Upgrades
The Dead Eye ability is upgraded in two ways in Red Dead Redemption 2. For ease of understanding, we will break this down into Tiers and Levels respectively.
Dead Eye Tiers


There are 5 tiers of this ability that provide additional upgrades or perks to the Dead Eye. Each of these upgrades will enrich the base ability, providing even more utility.
They are only unlocked via story progression. We have listed each upgrade along with the mission they are unlocked through in the table below:
| Tier | Mission | Ability Upgrades |
|---|---|---|
| 1 | Chapter 1, “Old Friends” | Allows players to slow down time and drag the red x target across the enemy, auto-targeting them. |
| 2 | Chapter 2, “Pouring Forth Oil IV” | Allows players to manually target enemies. |
| 3 | Chapter 4, “Urban Pleasures” | Allows players to stay in Dead Eye mode after firing shots without marking targets. |
| 4 | Chapter 5, “Fleeting Joy” | Allows the player to see the vital organs of their enemies (head and heart). |
| 5 | Chapter 6, “Goodbye, Dear Friend” | Allows the player to see the vital organs of their enemies (lungs and stomach). |
Dead Eye Levels
When you start the game, the Dead Eye Meter will be quite small and you won’t be able to use the ability for much longer. This can be seen by the available white quadrants around the core in the picture above. And as you can see from the picture, there are 10 quadrants in total i.e there are 10 levels of Dead Eye.
Each level provides an increase in the duration of the ability. These levels are primarily gained through normal gameplay and can be done anytime. It is not bound by the previously mentioned tiers or any story progression.
You will receive experience points (XP) through a variety of ways that will upgrade the Dead Eye Levels.
Dead Eye Levels – XP
The amount of XP required to reach the next level is listed below. Furthermore, The last two levels will unlock after you have completed certain tasks, also mentioned below.
- Level 1 – 0 XP, you start the game at this level
- Level 2 – 50 XP
- Level 3 – 100 XP
- Level 4 – 200 XP
- Level 5 – 350 XP
- Level 6 – 550 XP
- Level 7 – 800 XP
- Level 8 – 1100 XP
- Level 9 – Get one of the following Sets from the Trapper: Explorer, Herbalist, or Survivalist
- Level 10 – Get all three of the above-mentioned sets from the Trapper
Below is a list of some of the activities you can do that will earn you Dead Eye XP:
- Killing enemies without Dead Eye, Cooking, or Crafting – Grants 1 XP Point per action
- Find items belonging to Collections or do Chores in camp – 5 XP Points per action
- Skin or Pluck an Animal – the reward may vary from 1 to 10 XP Points per action, based on the animal type.
- Complete the Explorer, Herbalist, or Survivalist challenges – earns you 30 XP Points each.
- A relatively rare consumable, Valerian Root, also contributes to the Dead Eye upgrade.
Instead of cowering like a yellow belly, you can turn the entire screen yellow by using the Dead Eye ability and shooting some holes in your enemies’ bellies. The Dead Eye is your best friend in this game as sometimes the game overwhelms you with a crap ton of enemies on screen.
Just be vigilant in managing the Dead Eye Core and Meter. Consume items to keep them both at healthy levels and there will be no stopping you.