
7 Days to Die is all about that loot and the struggle to survive the ever-increasing threat of the 7th-day zombie horde. You need to be extra prepared for that eminent danger, and finding the best loot early on or the knowledge of centers of the best loot is the most crucial thing in this game.
Much of the best loot can be acquired with little effort if you know what you are doing, and this is where we come in. In this article, we will tell you the best locations you can target for looting and how to get to the best loot in each location as easily as you can.
Do keep in mind that these locations are for the Navezgane map. You should also craft as many Wood Frame Blocks as possible, as it will help you frame up to high-up places without much trouble of going through the entire location/POI.
1. Crack A Book Tower
 1")
 1")
Coordinates: 1777 E – 1690 S
If you see this Crack A Book tower in the distance while you are in a town or random gen then drop everything and visit this place. The best loot in this building is at the top on the roof with all the crates but you should go through this entire place and loot all the bookcases.
Now there is a way you can bypass the entire building and directly get the juicy stuff at the top with as little combat as possible. For that, you just need an axe and some Wood Frames Blocks, keep a weapon in case any unwanted zombie shows up.
From the main entrance to the building start piling up the wooden frames from the corner so that you could reach the top, this exact location for climbing is important as the place you will reach up top there will be little resistance from enemies.
 2")
 2")
Once at the top you will all the enemies are to the side and all the major loot is on a helipad away from them. Crack all the crates and loot it. Just as a sample of what you get in here:
- Tech Junkie Vol. 3
- Blunderbuss & Blunderbuss Ammo
- Barbed Wire Mod
- Cooling Mesh Mod
- Compound Crossbow Schematic
- Padded Leg Armor
In the early game, this loot can be quite useful. Going through this entire POI would be the best way to get the most out of this location as there are large caches of books in here that would be mighty helpful in the long run.
2. Cathedral
 3")
 3")
Coordinates: 1743 W – 1689 N
The Cathedral has two important centers for loot, one is the underground basement section and the other is at the top of the main tower.
 4")
 4")
For the basement section use the stairs going down from the outside of the building and you should have some sort of weapon (gun recommended) as there are a few zombies that are sleeping in this area. Use whatever weapon you have on you to clear the section of all the zombies and continue on to looting.
Here you have all of these bookcases and knowledge is power in this game early on especially. These books could teach you how to forage or how to not die by stepping on landmines etc.
 5")
 5")
 6")
 6")
For the cathedral tower loot go outside and start placing Wood Frame Blocks to reach the top easily. Climb up the side of the building with the blocks and be careful of the three vultures that are guarding this roof.
Reach the opening on top where there is a ladder that takes you to the loot, don’t forget to place blocks to reach the ladder otherwise, you will fall. On top, you will find a valuable Hardened Chest and other loot crates. Some of the items we find here are:
- AK-47 Machine Gun
- Hunting Rifle
- Candy Cane Club
- Stone Sledgehammer
- Medical Supplies like Blood Bags
- All sort of ammo
3. House On The Hill
 7")
 7")
Coordinates: 770 E – 1563 N
The House On The Hill has two loot areas, one is a hidden underground bunker-type area and the other is a library on the upper floor.
 8")
 8")
 9")
 9")
The main cache of loot in the underground section can be accessed right from the main entrance. Next to the main door to the house, you can break the floor under the balcony to reveal a hatch leading directly to the underground loot.
Don’t forget to close the door of this room otherwise the zombies in the next room might storm in. The loot here included weapons, bunch of ammo and tools acquired from:
- Hardened Chest
- Ammo Pile Medium
- Working Stiff Shipping Crate
- Weapons Bag
- Large Medical Pile
This is a pretty good cache of stuff, and depending on your game stage, this will get even better. Outside this room, there are a ton of zombies, and some are even on top of the area, so be careful. Going through the entire POI is recommended to get your hands on more loot.
 10")
 10")
 11")
 11")
The upper library section can be easily accessed by framing your way up to the window and entering it. There are usually two zombies: a harder zombie that tends to be more difficult than the others and a feral zombie (depending on the game stage the zombie might be different) so take out a powerful weapon to face them.
The zombies might be hiding behind some bookshelves and the platforms in here so be careful. This is a library with several bookcases all over and pockets of books strewn about so thoroughly check the entire area. Always put the books on top priority as mentioned above.
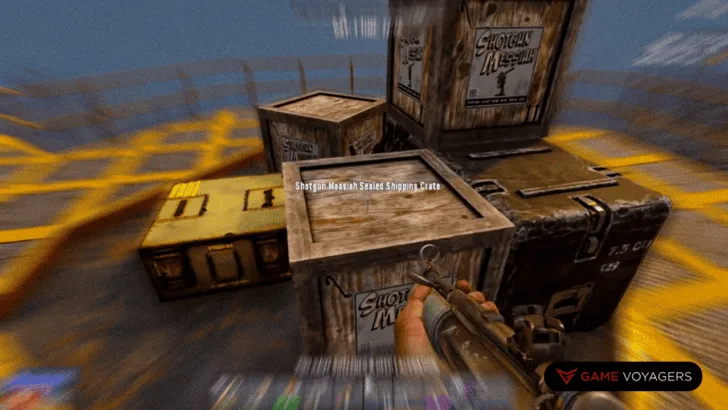
4. Shotgun Messiah Factory
 12")
 12")
Coordinates: 880 W – 497 N
 13")
 13")
 14")
 14")
The Shotgun Messiah Factory is in the wasteland and is going to be a little tougher as you will be dealing with that extra wasteland difficulties.
To get to the best loot early on you can go to the left of the front door and you will see a hole in the wall just behind the bulletproof glass (seen in the picture above), break this glass using a Pickaxe as the glass has a lot of health if you are using a weaker weapon.
After the glass is broken climb in and go towards the hole and climb the ladder and there will be a secret cache of 3 Messiah Shotgun Crate loot on top. The loot you find here will vary based on your game stage.
 15")
 15")
 16")
 16")
Now you need to frame your way up to the next floor above and use any weapon to break open the floor on top and climb up. When on top this will bring you to another Shotgun Messiah Crate, loot it and use the ladder in this room to go further up and there will be another Shotgun Messiah Crate.
Use the door in this room to exit the building and you will see that you were in a silo all along and right in front of you there will be a double silo structure on the roof of the factory which contains the primary loot cache of this location.
Circle around the silo you are on right now and you can climb another ladder to get to yet another Shotgun Messiah Crate on top. This particular silo has pretty much most of the best loot all in one pocket.
 17")
 17")
Once you have looted everything in this silo it is time to use the connecting platform to reach the roof where the main silos are.
Now you have to be quite careful as there will be zombies between you and the silos so you can fight them but if you’re not well armed you may want to consider being as stealthy as possible. Depending on your game stage there could very well be radiated zombies or cops or whites.
 18")
 18")
So either sneak or go guns blazing that is up to you. Simply make your way toward the pipe-like structure that is connected to the silos so that you can reach the ladder, you can even use frames to reach the ladder. Climb the ladder and on top there will be the motherload.
 19")
 19")
The loot here includes what we got from it (do keep in mind the loot may vary for you):
- Hardened Chest
- Many Shotgun Messiah Crates
- Munitions Box
- Weapons Bag
- Padded Chest Armor
- Padded Boots
- Tons of Ammo
- Wasteland Treasures Vol 4
- Art of Mining Vol 7
- Helmet Light Mod
- Scrap Helmet
- Pistol
- Molotov Cocktail
You should consider looting this entire facility as there is tons of other stuff you can get although it has many zombies to get through.
5. Red Mesa
 20")
 20")
Coordinates: 583 W – 1848 N
Red Mesa is quite the place to go through. We recommend exploring the whole location as you can get tons of experience from here as there are a lot of dangerous zombies like military zombies etc. As long as you have a good amount of weaponry to fight with you should be able to get through it pretty easily.
 21")
 21")
 22")
 22")
The quickest path to some of the best loot is inside the building to the left side from the main entrance. The recommended way to through here is by setting up a few wood frames with these steel openings/windows (seen in the picture).
From this platform you have built, try to kill all the zombies that are inside as it will be a lot easier than having to fight them toe to toe. Once you start shooting more zombies will approach you so clear the building from this vantage point. This will rake in quite a good sum of experience too.
When all the zombies are dead you can either climb the roof of the building and open the hatch on top to gain access, this hatch is usually locked and has a lot of health, so we recommend that you destroy the steel bars you used earlier to shoot the zombies and the stone walls around it for an easier entry.
The steel bars will have 2000 health and the stone block will have 2500 health so a total of 4500 health to destroy compared to the 7000 health of the hatch on top.
 23")
 23")
Once inside this building, go to the room on the other end and viola there is your loot room. This is a significant cache of stuff that includes:
- A massive Gun Rack with tons of guns
- Shotgun Messiah Crates
- Ammo Pile Large
- Gun Safe
- Weapons Bag
- Munitions Box
- Hardened Chest
- Tons of Ammo
- Rad Remover Mod
- Money
- Stone Spear
Reaching this room officially requires journeying through the facility which is quite dangerous but if you are specced into mining and have a decent Pickaxe then breaking those bars and walls won’t give you much trouble.
There are some bookcases in the other parts of the facility so we highly recommend that you take your time picking this place clean.
6. Water Works
 24")
 24")
Coordinates: 390 W – 474 S
The best loot in Water Works can be very easily acquired if you know what you are doing.
 25")
 25")
 26")
 26")
Just left of the main entrance in the corner there is a little tree (seen in the picture above). Cut down the tree and start digging the soil underneath the tree to reveal a hidden hatch that leads to the underground section of this facility. Ideally, you make yourself a way in and out of this hatch like a ramp for future use. Close the hatch behind you when you are climbing down in case someone wanders in.
 27")
 27")
 28")
 28")
At the bottom of this ladder you will see a bunch of spike traps, so just destroy the ones blocking your way forward and then exit this room via the door.
Right in front of the door will be the stack of loot that we were here for, don’t forget to kill the zombie sleeping next to the loot without making any noise. Yup, it is that easy!
The loot stack includes:
- Working Stiff Crate
- Hardened Chest
- Pass-N-Gas Crate
- Iron Sledgehammer Schematic
- Iron Shovel
- Mechanical Parts
- Ammo
- Leather Boots
- Ammo Pile Large
- Lab Equipment Box
- Gunpowder
- Food Pile Large
This loot is super easy to get to, just a little dig and a single kill is all you need.
7. Underground Lab
 29")
 29")
Coordinates: 28 E – 1207 S
This unassuming house hides an Underground Lab.
 30")
 30")
 31")
 31")
By standing on the exact coordinates given above you need to start digging the ground and just removing a single layer of dirt is enough to reach the entrance to the lab. Go down this ladder, through the door, and on your left will be a hole in the wall with the lab on the other side.
Get ready for some zombie resistance and try to make less noise as there are a bunch of zombies in the next room that will break the bulletproof glass and ruin your party.
 32")
 32")
This is a decent loot location with tons of medical stuff. The loot includes:
- Small Medical Pile
- Medium Medical Pile
- Pill Case
- Shamway Foods Crates
- Reinforced Chest
- Medical Supplies
- Food
- Lab Equipment Boxes
- Gunpowder
- Medical Beds
Pilfer through the stuff and get stocked up with medical supplies which is the selling point for this location. Knowing where to dig and getting into the lab without much trouble makes it even more amazing.
8. Business Strip
 33")
 33")
Coordinates: 1478 W – 1803 N
This whole Business Strip has many shops or POIs which can be looted for the good stuff. This location is near the Cathedral so you can easily loot both these locations. This area is quite open so there is a constant danger of running into or attracting stary zombies hence you have to be extra careful.
 34")
 34")
The quickest and best loot you can get to is by going through the alley in between the King O Law and Crack A Book shops and start Wood framing up to the roof of the Crack A Book store. On top of the roof, you will see the massive loot collection as seen in the picture below.
 35")
 35")
This loot includes:
- Reinforced Chest
- Weapons Bag
- Working Stiff Tool Crate
- Shamway Foods Crate
- Shotgun Messiah Crate
- Stone Sledgehammer
- Ammo
- Bunker Buster Mod
- Repair Kits
- Food
- Medical Supplies
- Ammo Pile Medium
 36")
 36")
Right across this roof, you can spot a Weapon Bag resting on some ducts. Make your way across by creating a platform out of Wood frames and loot the bag. Keep following this duct onto the neighboring roof. This roof will have a lot more loot to pillage. Be aware that there will be zombies present on this roof so take them out before looting. This section may be a little worse depending on the game stage.
 37")
 37")
 38")
 38")
The loot on this roof includes:
- Working Stiff Crates
- Reinforced Chest
- Ammo
- Stone Shovel
- Ammo Pile Medium
- Medical Supplies
That was two POIs in one go and if you properly explore and fight zombies then you can build up experience points too. There is also a third location that you must loot for the books which is the Crack A Book store itself. Try to mine your way through the wall of this store and loot as many books as you can.
9. Hospital
 39")
 39")
Coordinates: 1105 E – 609 N
The Hospital is a great place for medical supplies and if you like buying items and candies out of the vending machine as there are tons of them inside. This place is also pretty nifty for base building too.
 40")
 40")
 41")
 41")
 42")
 42")
This POI has a destroyed section on the roof (seen in the picture above), that opening is our target and where the major loot is located. So as usual we need to start framing up to this broken part. Once on top, you can sneak to the left of the hole and get all the goodies. This loot stash includes:
- Hardened Chest
- Pop-N-Pills Crates
- Pass-N-Gas Crates
- Weapons Bag
- Ammo
- Padded Gloves
- Money
- Lab Equipment Box
- Car Part Box
- Ak-47
- Beaker
- Medical Supplies
- Pill Cases
Be extra careful when looting this area as there are close to 10 to 15 zombies on the roof above this room that would make your life a living hell if alerted. We also recommend going and looting all the way through this location as there are many medical supplies to get your hands on.
10. Shooting Range
 43")
 43")
Coordinates: 657 E – 1819 N
The Shooting Range is the go-to location for everything gun and ammo related. It is rather easier than the Shotgun Messiah factory in terms of threat but that might change depending on your game stage.
 44")
 44")
The first and easier loot to get to is through the main door in front. There are some zombies that will pose some threat but they can be easily dealt with using normal weapons. This whole shop section is a loot haven and has no particular spot for stash so try to explore and grab everything here. There are some locked rooms with good loot inside so get ready to break some doors inside. The loot here includes:
- Many Gun Racks
- Tons of Ammo
- Gun Safes
- Ammo Display Cases
- Equipment Racks
- Armors
- Weapons
- Shotgun Messiah Crates
- Cardboard Boxes
- Ammo Piles
Do thoroughly search this section for the loot is really amazing here.
The next section in the Shooting Range worth checking and looting is behind the main store when you go from the outside, there will be a building with “Gunsmith” written on it. Break the locked door to gain access and clear out the zombies inside. The last garage area of this section is heavily infested by zombies so be careful.
 45")
 45")
Clear the zombies and the loot at your disposal will include:
- Cash Register
- Gun Racks
- Ammo Display Cases
- Weapon Bags
- Gun Safe
- Shotgun Messiah Crates
- Ammo Pile Large
- Reinforced Chests
- Gun Store Boxes
- Ammo
- Weapons
- Workbench
Your mileage will vary depending on your game stage and how the POI spawns but this place is an excellent spot for loot.