Doom Eternal is full of stuff to do. It is especially generous to achievement hunters with the sheer amount of Collectibles to find. But one thing that may be confusing at first is the way that the upgrade system works. There are a ton of things to upgrade and I am here to guide you through all the upgrades in Doom Eternal.
Related: All collectibles guide for Doom Eternal
How many upgrades are there?
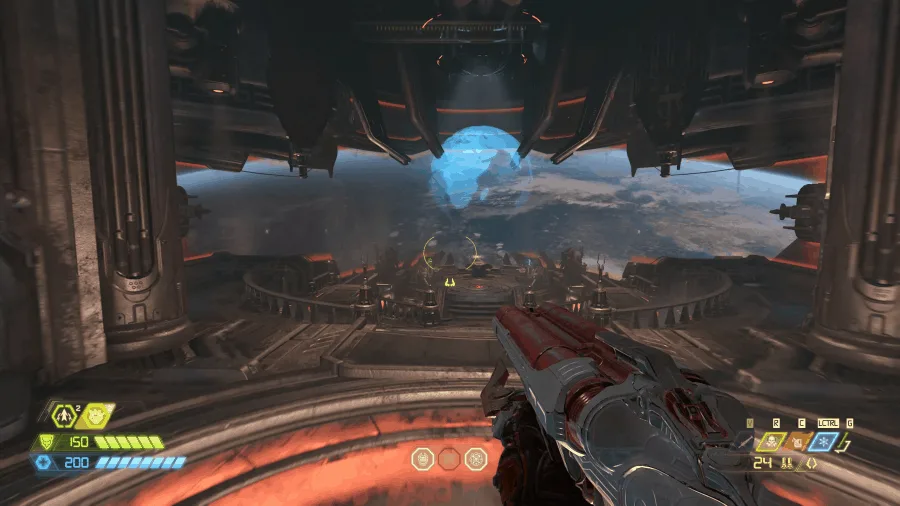
There are a ton of upgrades in the game. There are 3 upgrade types in the game and they all play an important role in helping you through the game. The 3 upgrade types are Praetor Suit upgrades, Sentinel Crystal upgrades, and Weapon upgrades. I will go over all the different sections one by one and will tell you how many of each token you will need to upgrade every item in the game.
Environment (Purple)
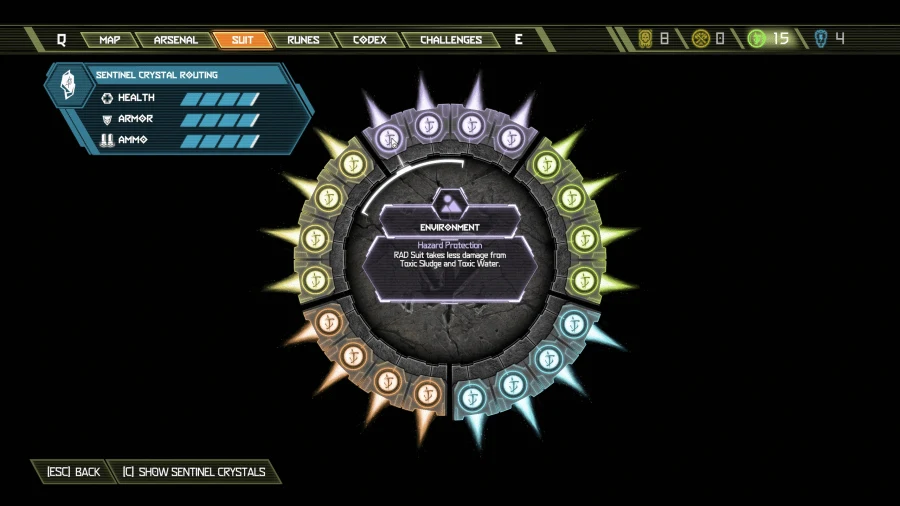
There are 4 total Environment upgrades and these are very important if you use a lot of the items scattered around the world, like explosive barrels. To upgrade this section all the way, you will need a total of 7 Praetor Suit Points, which are pretty easy to get if you are looking for all the Collectibles. Here are the 4 Environment upgrades you can get:
Hazard Protection – RAD Suit takes less damage from Toxic Sludge and Toxic Water. Costs 1 Praetor Suit Point to unlock.
Thicker Skin – Immune to damage from barrel explosions. Costs 2 Praetor Suit Points to unlock.
Regenerating Barrels – Barrels that have exploded will respawn once after a short duration. Costs 2 Praetor Suit Points to unlock.
Explosive Pinatas – Barrels will leave behind some ammo when destroyed. Costs 2 Praetor Suit Point to unlock.
Frag Grenade (Green)
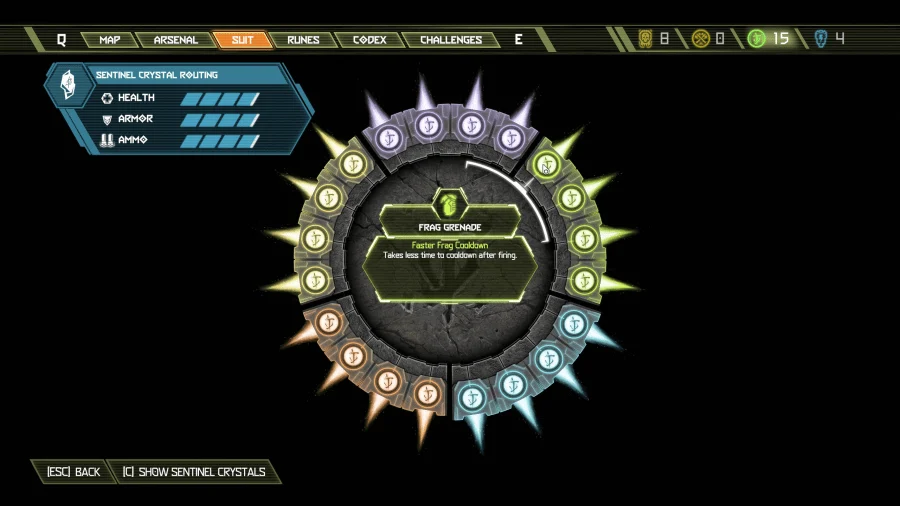
There are 4 total Frag Grenade upgrades and these are very important if you use your shoulder grenade a lot. If you don’t use it, you really should because you don’t waste anything firing them. To upgrade this section, you will need a total of 15 Praetor Suit Points, which are pretty easy to get if you are looking for all the Collectibles. Here are the 4 Frag Grenade upgrades you can get:
Faster Frag Cooldown – Takes less time to cooldown after firing. Costs 3 Praetor Suit Points to unlock.
Combustion Concussion – The grenade emits a second, larger, non-damaging explosion that Falters Demons. Costs 3 Praetor Suit Points to unlock.
Scatter Bombs – Each Demon killed by the grenade explosion spawns scatter bombs. Costs 4 Praetor Suit Points to unlock.
Frag Stock Up – Fire twice before requiring a recharge. Costs 5 Praetor Suit Points to unlock.
Ice Bomb (Blue)
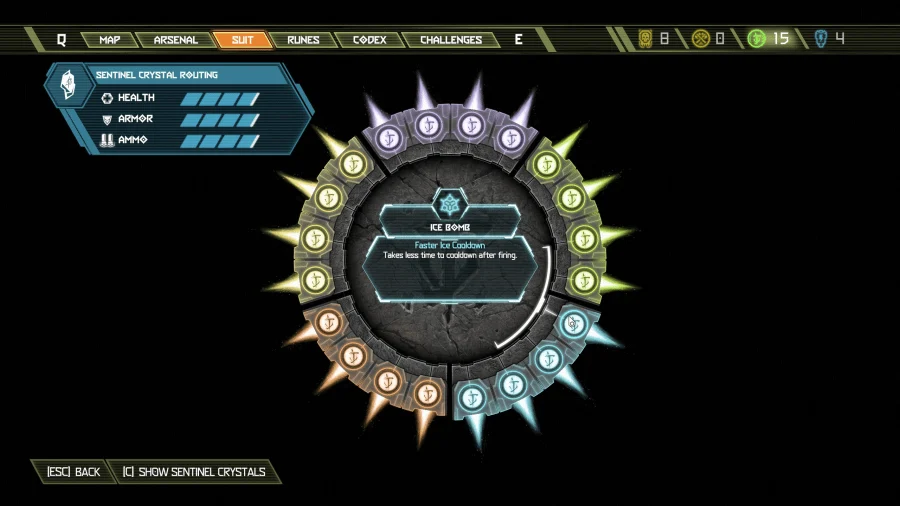
There are 4 total Ice Bomb upgrades and these are very important if you use your Ice Bomb a lot. Similar to the Frag Grenade, it is basically used the exact same way so it just depends on which one you prefer. To upgrade this section all the way, you will need a total of 15 Praetor Suit Points, which are pretty easy to get if you are looking for all the Collectibles. Here are the 4 Ice Bomb upgrades you can get:
Faster Ice Cooldown – Takes less time to cooldown after firing. Costs 3 Praetor Suit Points to unlock.
Permafrost – Demons remain frozen for longer. Costs 3 Praetor Suit Points to unlock.
Ice Drops – Damaging and killing frozen enemies will drop health. Costs 4 Praetor Suit Points to unlock.
Frost Bite – Damage dealt against a frozen Demon is increased. Costs 5 Praetor Suit Points to unlock.
Fundamentals (Orange)
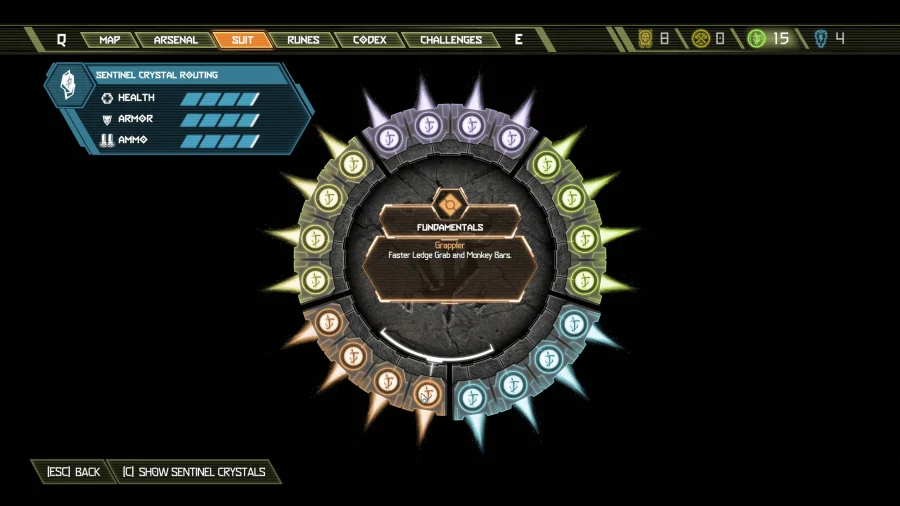
There are 4 Fundamental upgrades and these are very important for parkour and moving around the world. I would try to go for these first so you have an edge over the demons you are fighting. To upgrade this section all the way, you will need a total of 11 Praetor Suit Points, which are pretty easy to get if you are looking for all the Collectibles. Here are the 4 Fundamental upgrades you can get:
Grappler – Faster Ledge Grab and Monkey Bars. Costs 1 Praetor Suit Point to unlock.
Hot Swapper – Faster Weapon Switch and Mod Swap. Costs 2 Praetor Suit Points to unlock.
Faster Dasher – Dash refills more quickly. Costs 4 Praetor Suit Points to unlock.
Hit and Run – Dash refilled on Glory Kills. Costs 4 Praetor Suit Points to unlock.
Exploration (Yellow)
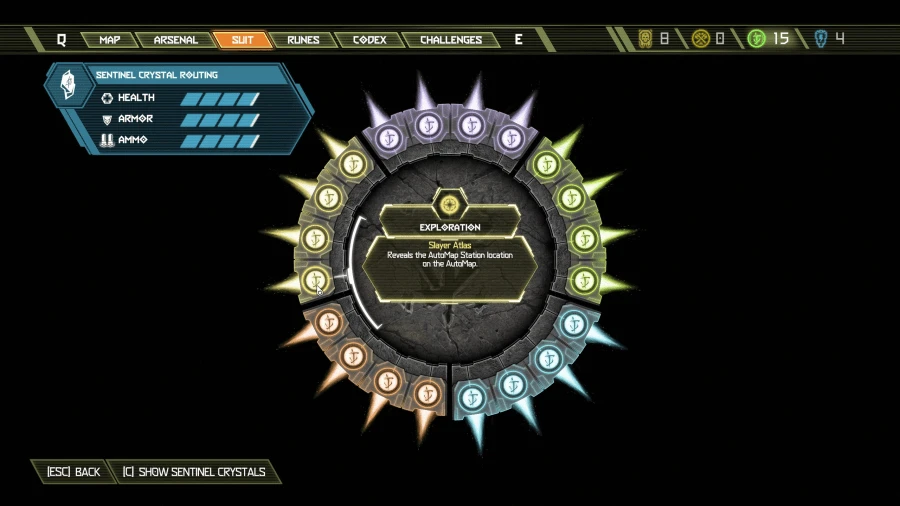
There are 4 Exploration upgrades you can get and these are very important if you are going for an all Collectibles run. If you are nor trying to find Collectibles, then this section should be ignored for a while because you won’t need it. To upgrade this section all the way, you will need a total of 7 Praetor Suit Points, which are pretty easy to get if you are looking for all the Collectibles. Here are the 4 Exploration upgrades you can get:
Slayer Atlas – Reveals the AutoMap Station location on the AutoMap. Costs 1 Praetor Suit Point to unlock.
Item Classifier – Reveals all progression items on the Dossier. Costs 1 Praetor Suit Point to unlock.
Bigger Fog Lights – Larger AutoMap reveal radius. Costs 2 Praetor Suit Points to unlock.
Item Finder – Reveals the position of all progression items on the AutoMap. Costs 3 Praetor Suit Points to unlock.
Sentinel Crystals
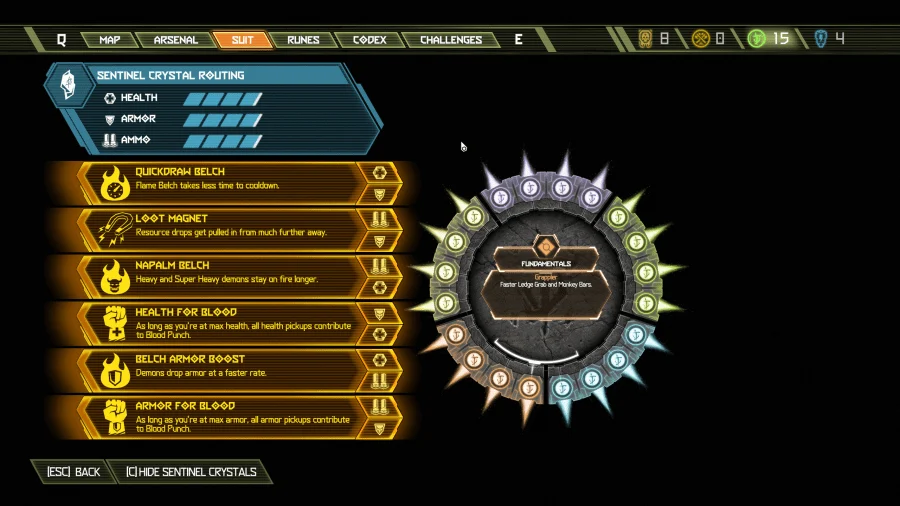
These are the most unique upgrades in the game because it works much different from the others. There are 6 bonuses in total, but the only way to unlock each one is if you find 2 Sentinel Crystals and level up the 2 upgrades, they could be health, armor, or ammo. Every 2 in the same section unlocks the upgrade associated with them. Here are all the Sentinel Crystal upgrades in the game:
Quickdraw Belch – Flame Belch takes less time to cooldown. To get this upgrade, you need 2 Sentinel Crystals and put them into 1 Health Bar and 1 Armor Bar.
Loot Magnet –Resource drops get pulled in from much further away. To get this upgrade, you need 2 Sentinel Crystals and put them into 1 Ammo Bar and 1 Armor Bar.
Napalm Belch – Heavy and Super Heavy demons stay on fire longer. To get this upgrade, you need 2 Sentinel Crystals and put them into 1 Ammo Bar and 1 Health Bar.
Health for Blood – As long as you’re at max health, all health pickups contribute to Blood Punch. To get this upgrade, you need 2 Sentinel Crystals and put them into 1 Armor Bar and 1 Health Bar.
Belch Armor Boost – Demons drop armor at a faster rate. To get this upgrade, you need 2 Sentinel Crystals and put them into 1 Health Bar and 1 Ammo Bar.
Armor for Blood – As long as you’re at max armor, all armor pickups contribute to Blood Punch. To get this upgrade, you need 2 Sentinel Crystals and put them into 1 Ammo Bar and 1 Armor Bar.
Super Shotgun
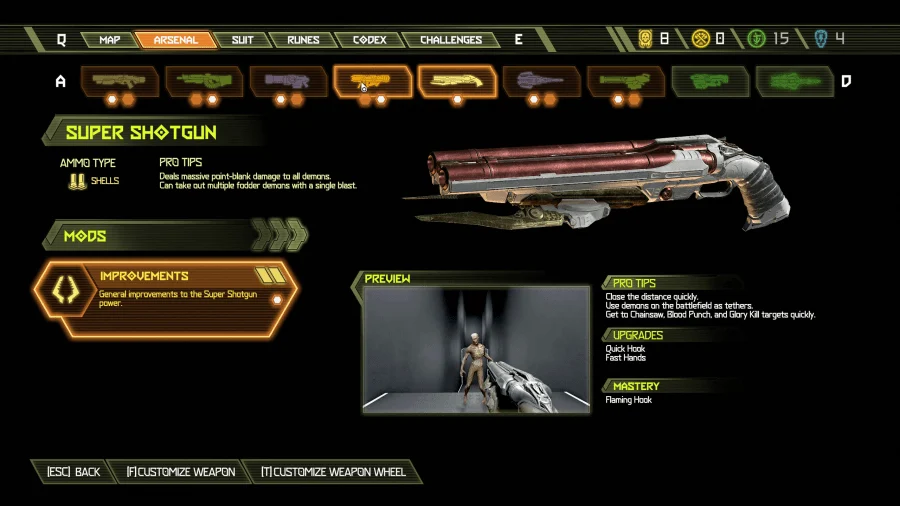
The Super Shotgun functions mostly the same as its counterpart in Doom. However, it has an additional feature in the form of the Meat Hook. This functions as a grappling hook, allowing the Doom Slayer to grapple onto enemies and drag himself towards them for a devastating close-range blast. Unlike other weapons, the Super Shotgun lacks mods. However, improvements can be made.
Improvements
Quick Hook – Meat Hook recharge time is decreased by 25%. It costs 3 Weapon Points to unlock.
Fast Hands – Super Shotgun reload speed is increased by 33%. It costs 6 Weapon Points to unlock.
Flaming Hook (Mastery) – The Meat Hook will set enemies on fire for a short time, causing them to drop armor from a Super Shotgun blast. To unlock this mastery, you must kill 50 enemies with the super shotgun while grappled onto them.
Combat Shotgun
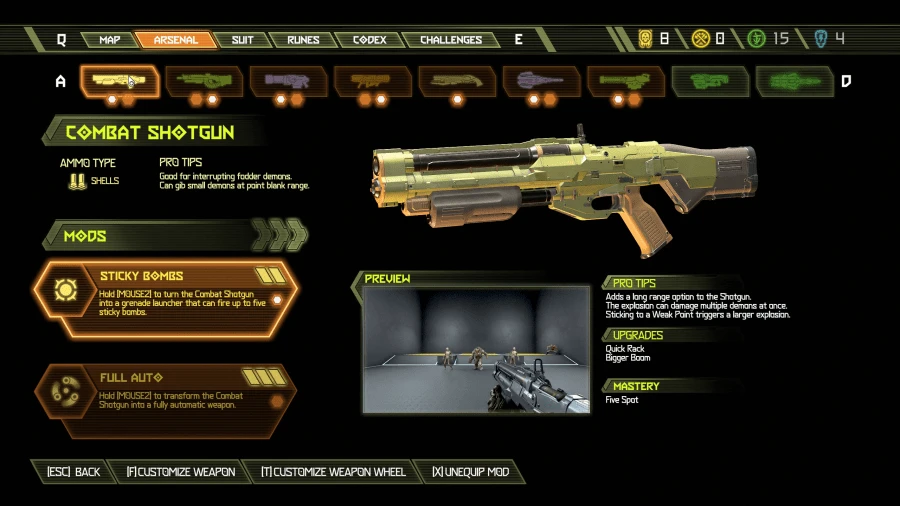
The Combat Shotgun is a returning weapon in Doom Eternal. It has modifications similar to the one in Doom 2016, except it launches up to three timed sticky grenades for the first mod (Five Spot enables up to five), and the second mod turns the shotgun into a full-blown full-auto Gatling shotgun.
Sticky Bombs
Quick Rack – Sticky Bomb reload speed is increased by 20%. It costs 3 Weapon Points to unlock.
Bigger Boom – Sticky Bomb explosion size is increased by 45%. It costs 6 Weapon Points to unlock.
Five Spot (Mastery) – Launch 5 Sticky Bombs before having to reload the mod. To unlock this mastery, you must destroy 25 Arachnotron turrets with sticky bombs.
Full Auto
Quick Recovery – Full Auto mode recovery speed is increased by 50%. It costs 1 Weapon Point to unlock.
Faster Transform – Full Auto mode transform speed is increased by 50%. It costs 3 Weapon Points to unlock.
Fast Feet – Movement speed when in Full Auto mode increased by 20%. It costs 5 Weapon Points to unlock.
Salvo Extender (Mastery) – Killing a demon with the Full Auto mod will drop shell ammo. To unlock this mastery, you must kill 15 Pinkies with Full Auto mode.
Ballista
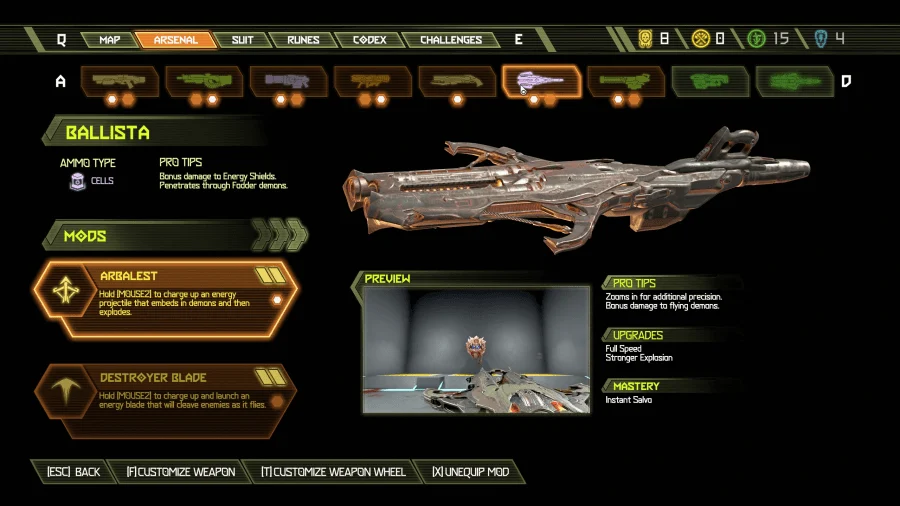
The Ballista is a weapon in Doom Eternal. It is similar to the previous game’s Gauss Cannon and runs on Energy cells. The Ballista is acquired in the Fortress of Doom after completing Doom Hunter Base: it is presented as a mission objective to get it, so it cannot be missed.
Arbalest
Full Speed – Movement speed in Arbalest mode is increased by 30%. It costs 3 Weapon Points to unlock.
Stronger Explosion – Increase the size of the Arbalest explosion by 60%. It costs 6 Weapon Points to unlock.
Instant Salvo (Mastery) – The Arbalest will start recharging instantly after a direct hit. To unlock this mastery, you must kill 20 Cacodemons with the Arbalest.
Destroyer Blade
Charging Blast – At max charge, the Destroyer mod will emit a blast wave that falters demons. It costs 3 Weapon Points to unlock.
Rapid Chains – Destroyer Blade charge time decreased by 20%. It costs 6 Weapon Points to unlock.
Incremental Blade (Mastery) – Fire Destroyer Blades before they have reached maximum width. To unlock this mastery, you must kill at least 3 enemies with the Destroyer mod, 15 times.
Plasma Rifle
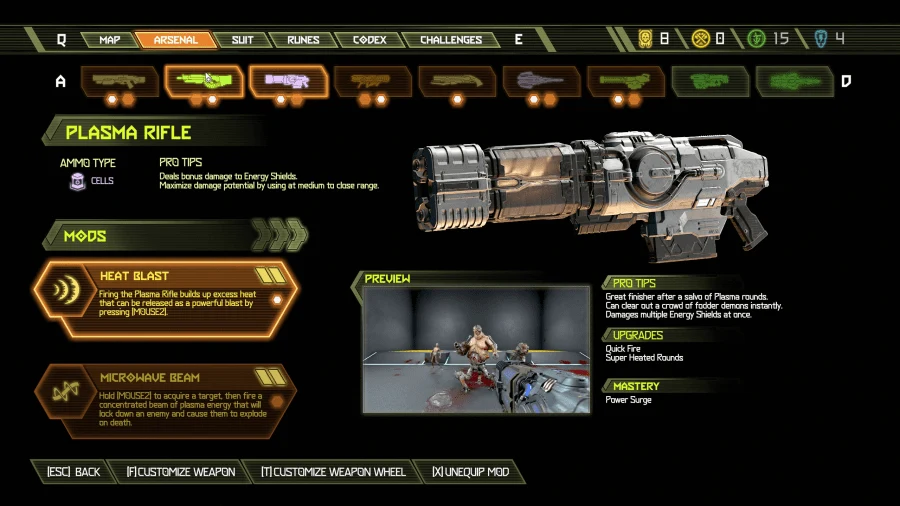
Making a return in Doom Eternal, the Plasma Rifle has undergone a redesign. The primary fire is essentially the same as before, a machine gun with slightly slower-moving projectiles that need to be led on distant targets, but is much stronger than it was before: one of its mods is an altered version of one from the previous game, while the other is entirely new.
Heat Blast
Quick Fire – Firing delay after using the Heat Blast is reduced by 25%. It costs 3 Weapon Points to unlock.
Super Heated Rounds –Heat Blast charge per shot is increased by 25%. It costs 6 Weapon Points to unlock.
Power Surge (Mastery) – After triggering a fully charged Heat Blast, plasma projectiles will have a damage boost for a short time. To unlock this mastery, you must kill 2 demons with a single Heat Blast, 30 times.
Microwave Beam
Faster Beam Charge – Microwave Beam charge time is reduced by 66%. It costs 3 Weapon Points to unlock.
Increased Range – Microwave Beam targeting range is increased by 50%. It costs 6 Weapon Points to unlock.
Concussive Blast (Mastery) – Demons that are detonated by the Microwave Beam will trigger a concussive blast that falters enemies. To unlock this mastery, you must kill at least 1 demon with the Microwave Beam, 15 times.
Heavy Cannon
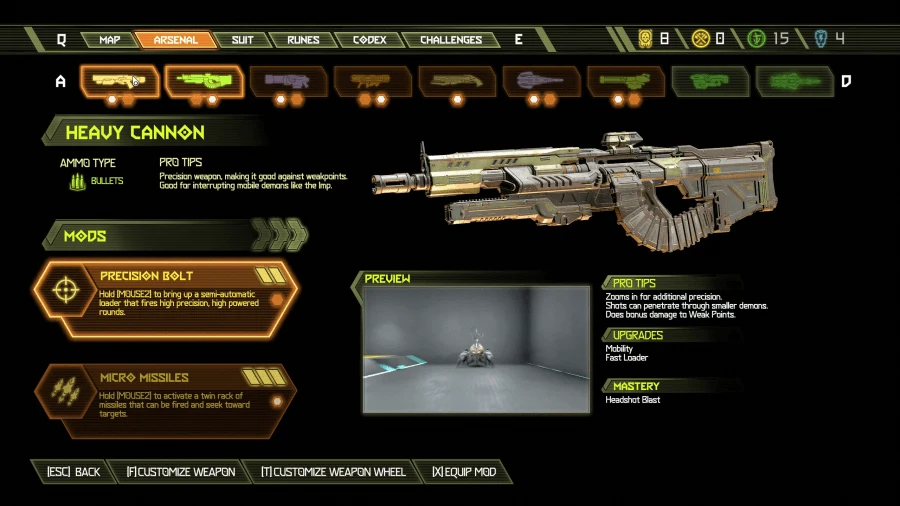
The Heavy Cannon is a weapon in Doom Eternal. It is functionally similar to the Heavy Assault Rifle seen previously in Doom (2016). As before, the modifications available are either a precision scope for long-range fire or a micro-missile launcher which launches small missiles with a narrow seeking angle: these explode with a small amount of splash damage a short time after impact.
The scope functionality has been changed somewhat since the previous game, however: it is a drastically slower single-shot mode and uses six ammunition per shot when aimed.
Precision Bolt
Mobility – Precision Bolt movement speed is increased by 15%. It costs 3 Weapon Points to unlock.
Fast Loader – Precision Bolt reload speed increased by 20%. It costs 6 Weapon Points to unlock.
Headshot Blast (Mastery) – A headshot will set off a powerful, secondary blast that deals damage to nearby demons. To unlock this mastery, you must get 75 Precision Bolt headshots.
Micro Missiles
Quick Recharger – Micro Missile reload time is decreased by 35%. It costs 1 Weapon Point to unlock.
Instant Loader – Micro Missile load time is decreased by 75%. It costs 3 Weapon Points to unlock.
Primary Charger – Kills with the Heavy Cannon will boost Micro Missile damage by 30% for 5 seconds. It costs 5 Weapon Points to unlock.
Bottomless Missiles (Mastery) – Fire Micro Missiles indefinitely without requiring a reload. To unlock this mastery, you must hit 3 enemies with a single salvo of missiles, 15 times.
Chaingun
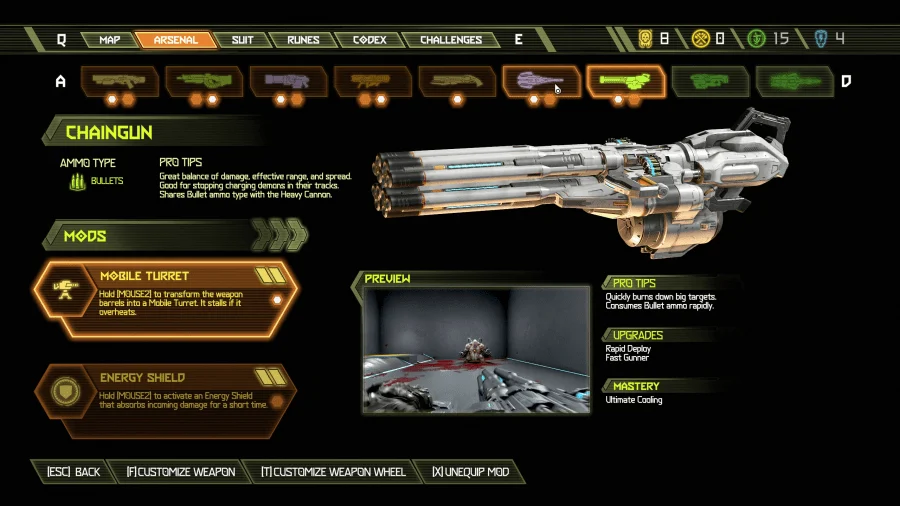
The Chaingun returns to Doom Eternal with a new look. It no longer requires a spinup time to fire at maximum speed, and it appears to use the same EMG rounds as the Pistol from Doom 2016. Its Mobile Turret mod also returns to the fray, only it has four sets of barrels for maximum firepower. It also has a “gun shield” mod that blocks projectiles.
Mobile Turret
Rapid Deploy – Mobile Turret mode transform speed is increased by 50%. It costs 3 Weapon Points to unlock.
Fast Gunner – Increased movement speed while in Mobile Turret mode. It costs 6 Weapon Points to unlock.
Ultimate Cooling (Mastery) – The Mobile Turret no longer stalls. To unlock this mastery, you must kill 5 enemies with a single turret without overheating, 10 times.
Energy Shield
Faster Recovery – Energy Shield recharge time reduced by 37.5%. It costs 3 Weapon Points to unlock.
Dash Smash – Dashing into Heavy demons will cause them to falter. It costs 6 Weapon Points to unlock.
Shield Launch (Mastery) – Dealing enough damage with the Chaingun while the Energy Shield is active will launch it forward on release. Any demons hit by this projectile will falter. To unlock this mastery, you must deal 20,000 damage while the Energy Shield is active.
Rocket Launcher
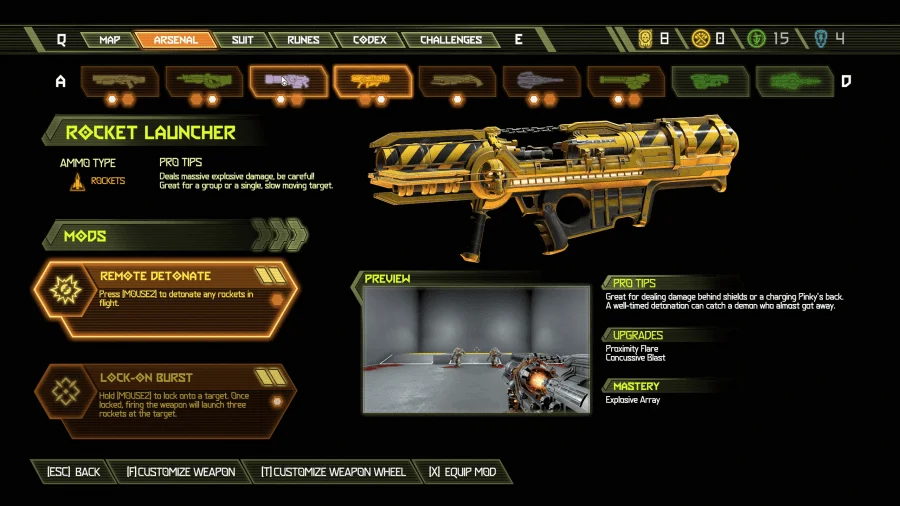
The Rocket Launcher, also called the Paingiver, is a weapon in Doom Eternal. It has been redesigned from its previous incarnation, to be based on the UAC Cultist and even the Doom Hunter’s arm cannon. Its remote-detonation mod and lock-on burst return from Doom 2016, but they appear to function differently in terms of upgrades and mastery.
Remote Detonate
Proximity Flare – Rockets will trigger a flare when they are near targets that will be damaged by the Remote Detonation. It costs 3 Weapon Points to unlock.
Concussive Blast – Remote Detonations now generate a large, non-damaging concussive blast that can interrupt demons. It costs 6 Weapon Points to unlock.
Explosive Array (Mastery) – If a rocket is detonated while the Proximity Flare is active, additional explosives will activate to create a larger area of effect. To unlock this mastery, you must kill 60 enemies while the Proximity Flare is active.
Lock-on Burst
Fast Reset – Lock-on Burst recharge time decreased by 37.5%. It costs 3 Weapon Points to unlock.
Quick Lock –Lock-on speed is increased by 50%. It costs 6 Weapon Points to unlock.
Dual Lock (Mastery) – A second lock-on target can now be acquired before firing rocket bursts. To unlock this mastery, you must kill 15 Prowler demons with the Lock-on Burst.
Conclusion
In conclusion, there are just so many upgrades in the game and it will take you a while to find and upgrade everything in the game. I would say that the first time you play the game, take the time to get everything in the game, and then you can do another play through without finding everything so you can feel accomplished.

