
Martyr Logarius is a completely missable boss in Bloodborne, found in the optional Forsaken Cainhurst Castle. This undead protector is no slouch. This boss fight was the first time I had to summon the help of a random stranger cause Logarius owned me every time we came face to face.
Now that I know his ins and outs, you don’t have to ask for assistance. I will share everything there is to this boss and we shall give this martyr the suitable swift burial he deserves.
Fighting Martyr Logarius


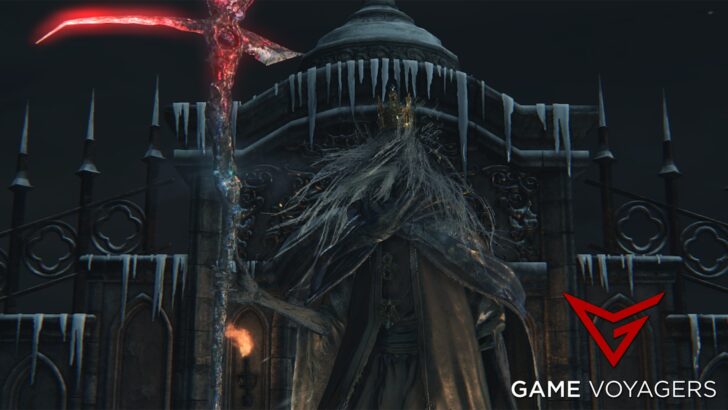
Martyr Logarius earns the right to be a proper skill check for the players in Bloodborne. His attacks are fast, demanding you to be quick on your feet. With a sword in one hand and a huge scythe in the other, which acts like a staff for casting spells, he will try to shred you into pieces.
The fight starts with him mainly casting short-range red skull spells that hit like a truck. However, when his health reaches the 70% mark he goes batshit crazy. He will let go of casting and use both his melee weapons to bring you down a peg or ten.
The fight reaches its crescendo during the second phase and you must be prepared to face the music. You need to match his aggressiveness to come out on top.
Here are some tips you can use when facing Martyr Logarius in Bloodborne:
- He is strong against all damage types so forget buffing weapons or relying on other damage types. It is a pure melee fight.
- The structures on the roof can be used to protect yourself from the skull projectiles. However, his scythe attacks have insane range and will most likely clip through the geometry and catch you regardless.
- His melee attacks in phase two can be easily staggered. You can potentially end the fight standing in place if you just parry these attacks and take advantage of the Visceral Attacks.
- Heavy weapons and charged heavy attacks will backfire for the most part. Rely on quick weapons and use a hit-and-run strategy.
- You can fall off the roof so avoid the arena’s borders at all costs.
Phase 1


The first phase of the fight is him casting spells at you. He has a few scythe attacks that can be parried but those are few and far between. You have to outmaneuver these spells to get close to him and deal some damage of your own. He also likes to distance himself from you constantly, making it a challenge to stick to him.
The small skull wave he throws at you can be dodged through, no big deal, but it is the giant melee-range skull burst that you need to be careful of. This attack comes at a moment’s notice and takes away a huge chunk of your health.
The strategy here is to roll through the smaller skulls and go to town on him until he either performs the giant skull attack or backs off. Quickly react to the attack or run to him if he dodges away and keep up the pressure.
If he goes for melee attacks then simply parry them and then move in for a Visceral Attack or dodge away if you want.
As soon as his HP is 30% gone, he will slam his scythe in the ground and transition into phase two. The transition will be accompanied by an explosion so stay clear of him.
Or the best thing to do here is to move behind him while he is busy and deal a charged heavy attack. He will be staggered and you can then perform a Visceral Attack.
Moveset
Here are all the attacks you have to look out for in phase one:
- Skull Orb: Raises his scythe to conjure a large orb and then fires it at you. The orb gradually picks up speed as it moves towards you and has light tracking.
- Reaction: He is open while he summoning the orb so attack him for that period. Dodge away as soon as he is done casting. If you are further away then run in a direction and the orb will miss you.
- Horizontal Skulls: Fire 7 skulls in a horizontal line that explodes upon impact. He might do it will standing in place or while leaping backwards.
- Reaction: Dodge through the skull and position yourself near him to deal some damage.
- Giant Skull Blast: A quick short-range skull blast.
- Reaction: Move back as soon as you see his arm juts outward.
- Scythe Combo: Slow 3 scythe swings.
- Reaction: You can interrupt this attack by attacking quickly. You can also parry this attack and move in for a Visceral Attack.
Phase 2


When he is done with the buffing or after the previously mentioned Visceral attack, he will transition into the second phase. He will become more aggressive, will only attack with his melee weapons, have new attacks, and will keep on rushing you.
His melee combos will end with a delayed wave that will increase the range of his attacks. He will start to jump in the air and perform plummeting attacks. Additionally, he will plant his sword in the ground which will continue to rain swords on you.
Since he only has melee attacks in this phase, he can be easily dealt with if your parry game is on point. You can simply fire the gun right when he is about to land his attack and drop him to the ground, opening him up for a Visceral Attack.
If you can’t do that, then it’s a matter of perfect dodging and positioning yourself near him to deal one or two hits and then begin dodging again. His flying attacks can be effortlessly maneuvered just by dodging/running towards him and he will fly over your head. The recovery after these attacks is longer and thus can be exploited with multiple hits of your own.
Also, his melee attacks are highly interruptible. If you keep attacking him while he tries to perform a combo, he will never get a chance to finish it.
When you see him plant his sword, switch your lock on to the sword and either fire your gun or attack it at close range to destroy it. This way you will never have to worry about the sword rain that follows.
Look for small openings and only go for one or two hits if you can’t sustain pressure. Don’t over comment and soon he will be defeated.
Moveset
Here are all the attacks you have to look out for in phase two:
- Transition AOE: The phase transition will be followed up with an AOE explosion.
- Reaction: Move behind him and perform a charged heavy attack followed by a Visceral Attack. This will put a stop to the AOE. Or just back off out of the range of the AOE.
- Sword Swings: He uses his sword to execute a single quick swing followed by a wave explosion.
- Reaction: Parry or dodge to the side.
- Sword Combo: Multiple quick sword slashes that end with a delayed wave explosion.
- Reaction: Parry if you can get the timing right, if not, then dodge away or move behind him.
- Jump Slam: Jumps in the air and tries to land on top of you with his sword.
- Reaction: Dodge numerous times until he lands. The recovery after this attack is longer so move in to deal some damage.
- Jump Swing: Leaps in the air and hovers for a few seconds before plummeting towards you with a massive horizontal scythe slash.
- Reaction: The tracking of this attack is abysmal. It will rarely hit you. Just move towards him and he will surely fly by over your head.
- Sword Rain: Plants his sword in the ground followed by a short AOE explosion. After a bit of delay, swords will start raining on top of you.
- Reaction: You can outrun the sword rain but the best thing to do is prioritize destroying the planted sword. A single gunshot or melee attack will eliminate it.
Rewards for Defeating Martyr Logarius


Defeating Martyr Logarius in Bloodborne will bring in 25,600 Blood Echoes and he drops the Crown of Illusions. Make sure to wear the Crown and walk to the far end of the boss’s arena where his throne is. A cutscene will play, revealing the location and the throne of Annalise, Queen of the Vilebloods.
Interacting with her will unlock the option to join the Cainhurst Vilebloods Covenant. If you want to follow Alfred’s questline then you must reveal this location to him by giving him the Unopened Summons (found on the right side of the room).