Minecraft’s sandbox allows players to go crazy and create anything their hearts and mind desire. Some creations boggle the mind and truly showcase the quality of creative liberties this game gives to its players. Some are just there for the spectacle, while others are quite practical in the game world.
One such practical creation we will be discussing here is an elevator that you can build to traverse your vertical spaces. These are perfect for multi-story mansions or creating a means for visitors to see the upper levels of your opulent creations. There are multiple ways of creating an elevator, like waterfall elevators, but we will primarily focus on realistic elevators.
Related: How to Launch Minecraft Without the Launcher
Elevator’s Base
For the foundation, the hole creates a 4×3 block hole and makes it 4 blocks deep. Make this hole below the area from which you want to enter or use the elevator.

Dig a block in the second row and replace it with an obsidian block, as seen in the picture below. This has to be in the top-middle of the hole.

Next, stand beside the obsidian block and face the 4-block side with the shorter side of the hole on your right and the longer end on your left. The exact location matters a lot here, so refer to the picture below. Now remove the single block between the wall and the obsidian block

Related: Top 20 Best Minecraft Skins To Try Out (Download Links Included)
Remove one block perimeter from the entire hole whereby the 4×3 foundation hole is now a 5×4 hole. Next stand in the hole where the shorter end of the foundation is on your left and the longer side is to the right.

Next place an upward-facing observer block on the obsidian block and another one with a gap of 2 blocks up and 1 to the left. Seen in the picture below.

Remove the block next to the hole we made earlier beside the obsidian block to create a 2-block trench and place 2 slime blocks on top of the trench, not inside the trench.


On top of these 2 slime blocks, you will be placing 2 sticky pistons. On the right slime block, you will place an upward-facing piston, and on the left slime block, you will place a downward-facing piston. Dig any temporary holes to place these in the correct way seen below.

Related: Can Minecraft Villagers Climb Ladders?
On top of the above-placed pistons, place 2 slime blocks to create the base of the elevator floor. And on top of the slime blocks place any block of your choice to create the actual elevator floor, stone block type is preferred here.


All these above steps have created the moving part of the elevator, and next, we design a functional switch for the elevator.
Elevator’s Switch
With the bottom-most observer block on your right place, a regular piston diagonally to it with its face pointing towards you, as seen in the picture below. Leave the space before the observer block with the piston touching its corner. Behind this piston, place a stone block, there should be one row of space behind this stone block and the back wall.


Create a stone block staircase shape from the back stone block of the piston placed previously. You can see the exact placement of the blocks below. A set of 3 stone blocks will create this staircase of sorts. Leave a space on top of the topmost block of the staircase and place another stone block on the ground. To create a space in the middle, you need to place a block first and then remove it later on. This new block will be placed at the ground level.

Select redstone dust and add it to the staircase stone blocks, all three of them minus the floating block.

Add a button to the floating stone block which should face the elevator floor we have previously created. Do not press the button yet otherwise, the whole elevator contraption will be rocketed into the sky and lost forever.

To stop it from flying away, we have to create the elevator’s top part to stop it and be the platform to exit to.
Related: How to Fix Minecraft Education Edition (Easy Guide)
Elevator’s Top
To create the top floor or platform, we must first decide where we want the elevator’s maximum height to be. Once decided, we can build a temporary single-block column, which will be built on top of the topmost observer block placed in the foundation.
This column has to be stacked to the desired height, and then place an obsidian stone on top of it. Remove the whole column once you have placed the obsidian stone. This obsidian stone is the barrier that will stop the elevator from drifting away essentially.
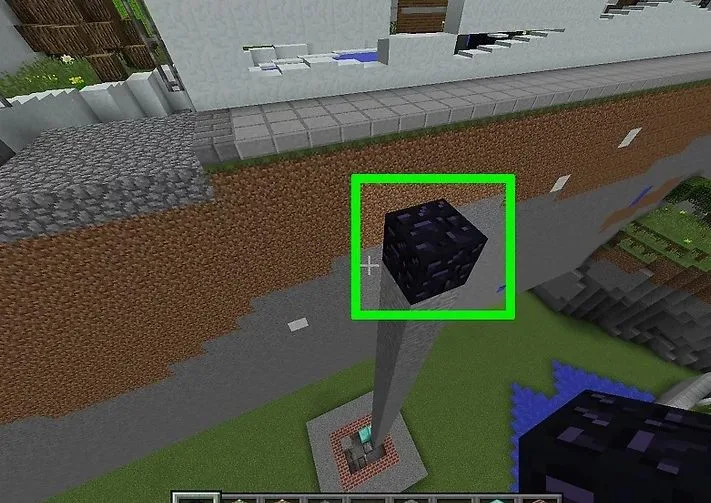
Activate the elevator from the button we have created to make it travel and stop at the floating obsidian block. From here, move to the point where the observer block’s face is directed toward you. Then place a temporary block on the right side of the top observer block and place a piston right next to it facing to the left, the exact location has seen below.
Remove the placeholder block after placing the piston, creating a floating piston.
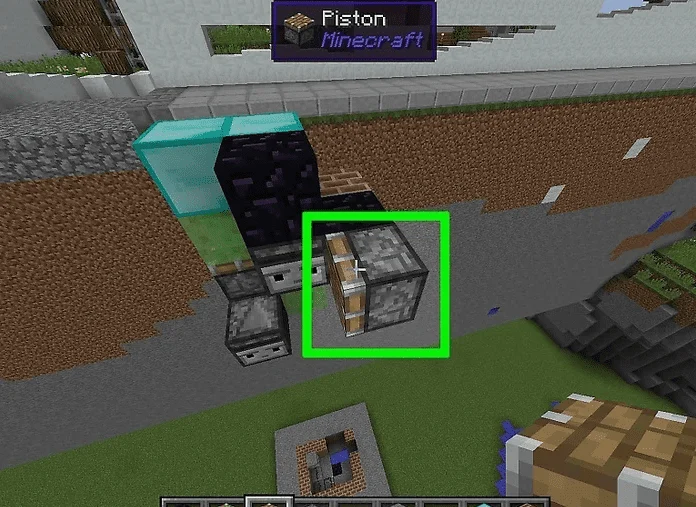
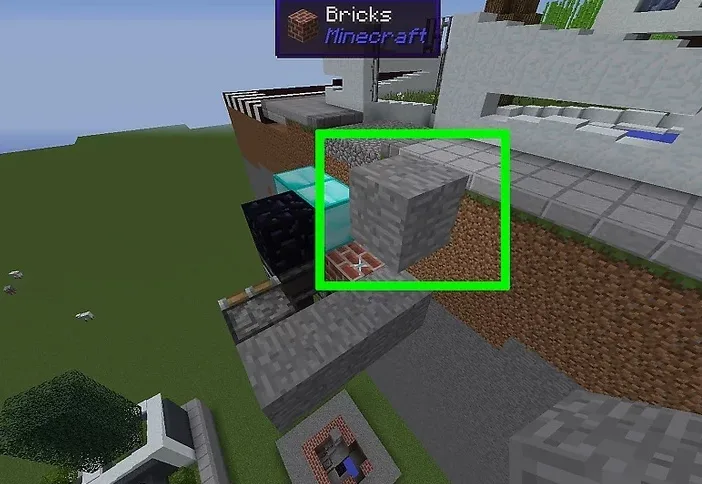
Behind the piston, place 3 stone blocks in a row. The first one should be placed behind the piston and the next 2 on its right side.
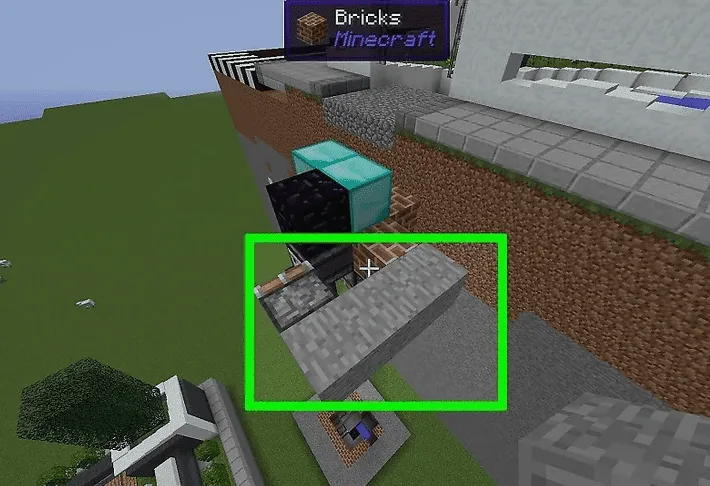
On top of the rightmost block in this row, place 2 more blocks and remove the middle one, whereby the topmost block will be floating in the air. See the picture below for exact reference.
Related: 3 Reasons Why You Need to Go to the Nether in Minecraft
On the newly created row of stone, blocks add redstone dust
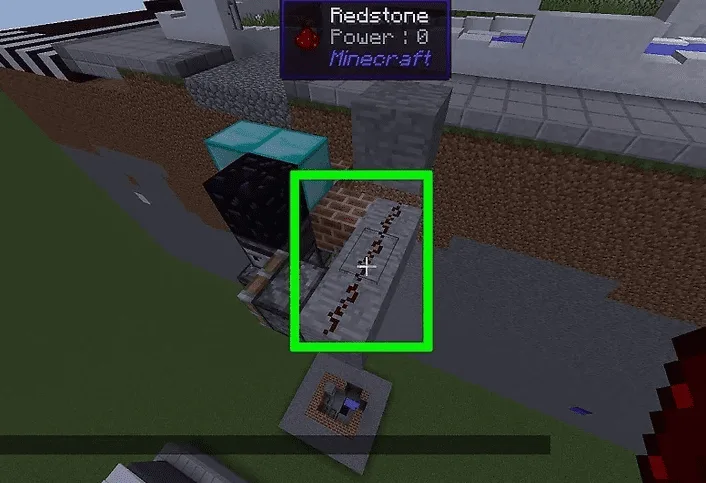
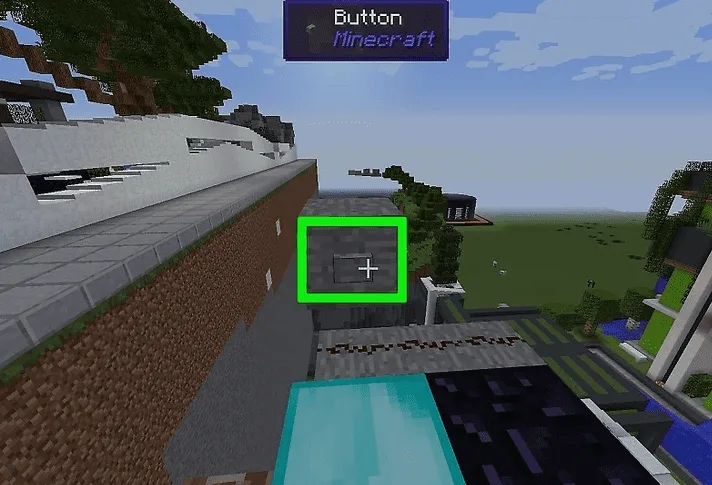
On the floating stone block, place a button that faces toward the elevator’s floor; this button will act as a down button for the elevator.
Related: Why Do Piglins Attack You in Minecraft?
With all the above steps done, you will have a functioning elevator that will travel up and down with the push of a button. With this crucial part of the elevator machinery done, you can now create the aesthetics of the elevator as you like.
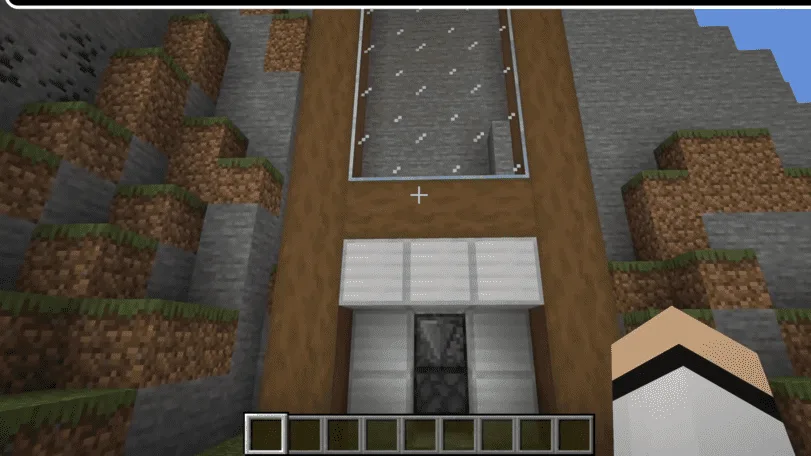
This elevator is piston-based, and there are more ways of making elevators in Minecraft. This had the most mechanical feel to it, so we liked this way better than the water-based elevators that rely on water’s swimming properties to move around.

