Steam Deck is the best portable gaming device on the market (Sorry Switch). And with Valve behind the steering wheel, the Steam Deck has been developed exceptionally well. However, with any device especially a PC, you are bound to face technical issues and the Steam Deck is not safe from that.
In this article, we will be going over the issue of Steam Deck not booting up or stuck on the starting loading screen. We have curated a list of fixes that might help you deal with this problem on your own instead of having to return the device.
If your Steam Deck is not booting, you can try a few fixes like restarting your handheld, power cycling it, applying software updates, reconnecting the battery, and a few other nifty methods.
We’ll be talking about all of the potential fixes for a Steam Deck that is not booting up in this detailed and easy-to-follow guide. So, hang tight and ride along!
Restarting the Steam Deck
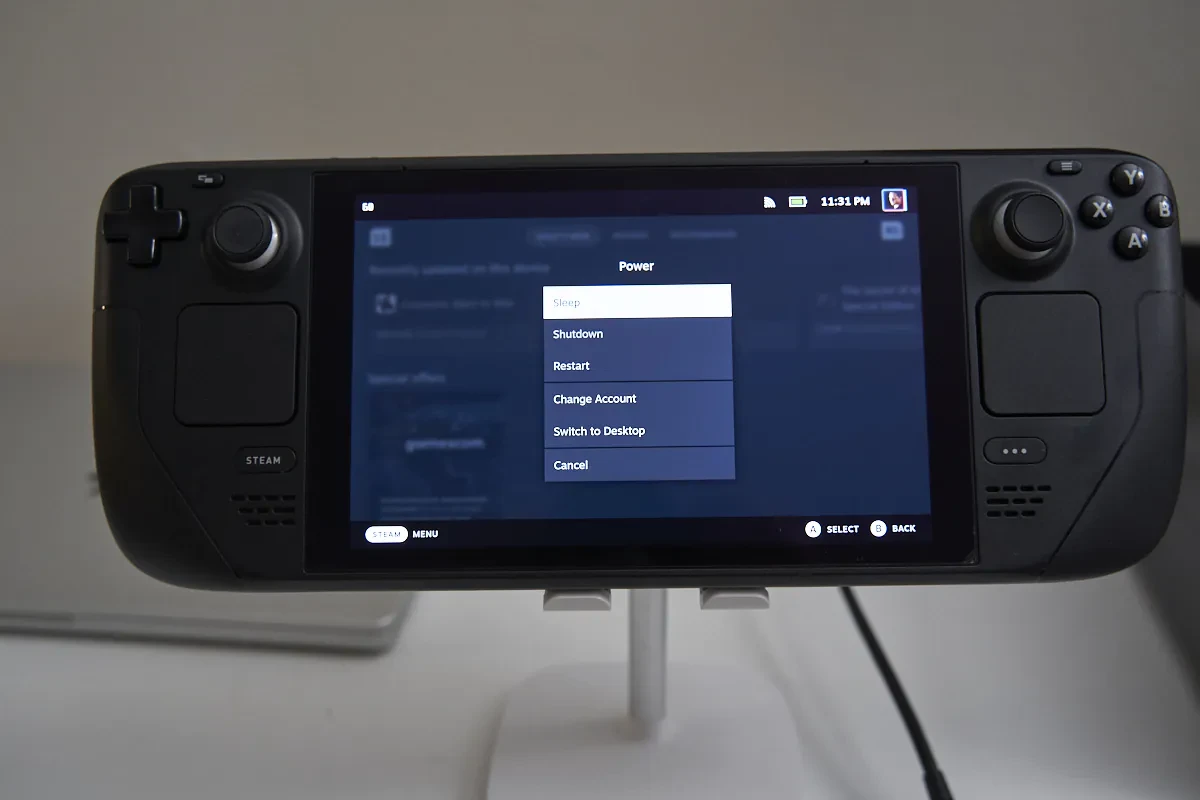
The most obvious solution for most electronics is to restart the device. This sounds fairly simple but in many cases, the device fails to load its software properly and the problem of booting shows its ugly face. Try to restart the Steam Deck in the following ways:
- Hold the Power button for 3 seconds.
- If it remains unresponsive, hold the Power button for 10 seconds and then turn on the device.
- Holding the Power button for 20 seconds works for some.
Steam Deck Not Launching Games? 4 Fixes
Power Cycle
Another restarting technique you can apply is Power Cycle. Sometimes the power delivery is messing with the Steam Deck and for that reason, the device needs to be refreshed power-wise. You cadofo this by:
- Shut down the Steam Deck using the Power Button.
- Remove all cables from the device, especially the power cable.
- Wait for 30 seconds to a minute and then plug in the charging cable.
- Start the system and it should work fine now, restart it again if the problem persists.
Software Update
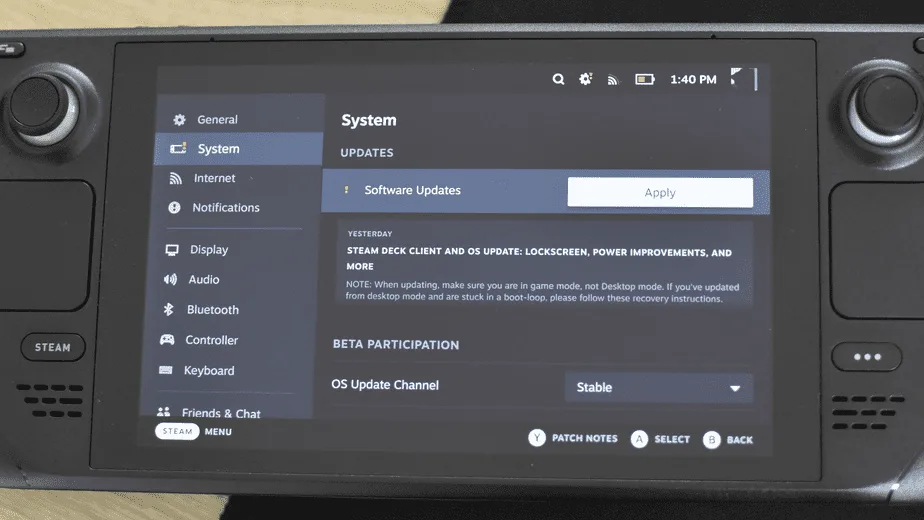
Another easy solution is having your Steam Deck always updated to the latest OS software. Valve is very vigilantly looking at all the issues being faced by the community and is constantly tweaking the software to cater to these problems. Having the latest update might save you from the trouble you are facing.
The Software Update option is inside the System tab of Settings. Update to the latest software and restart the device for an optimal experience.
Recovery
However, sometimes the latest software update is the culprit behind the boot problem. Maybe the new update wasn’t stable enough and it ends up screwing up your device. As a result, you will have to opt for the Recovery option. This will restore or rebuild your Steam Deck’s software and hopefully make things work again.
Follow the Recovery instructions given below by Valve/Steam:
- Download the recovery image here (click).
- Prepare a USB key (8GB minimum) with the recovery image:
- On Windows, we recommend using the Rufus utility. Select the recovery file and write it to your USB drive (this will format the contents of your USB drive). When it’s done, select ‘Close’ and eject the drive.
- On MacOS you can use Balena Etcher to write the recovery file to your USB drive.
- On Linux, you can also use Balena Etcher to write the recovery file to your USB drive – or if you prefer you can do this directly from the command line:
bzcat steamdeck-recovery-4.img.bz2 | sudo dd if=/dev/stdin of=/dev/sdX oflag=sync status=progress bs=128M(set /dev/sdX to the USB device you inserted)
- Use a USB-C adapter or hub to plug the boot disk in.
- Shut down your Steam Deck if it isn’t already off. Hold ‘Volume Down’ and click the Power Button – when you hear the chime, let go of the Volume Down button, and you’ll be booted into the Boot Manager.
- In the Boot Manager, boot from the ‘EFI USB Device’ (your USB key)
- The screen will go dark while it’s booting – give it a minute.
- Once booted you will be in a desktop environment, you can navigate using the trackpad and trigger.
Recovery options
In the recovery environment, there are four different options to choose from. Use whichever you find best suited for your needs. However, the full Re-image option will clean up your system completely and is likely to work the best but be aware that all your saved data will be lost hence it is crucial that you back up your files before attempting Recovery.
- Re-image Steam Deck – This performs a full factory reset – all user info, installed games, applications, or operating systems will be wiped and replaced with stock SteamOS.
- Clear local user data – This reformats the home partitions on your Steam Deck, which will remove downloaded games and all personal content stored on this Deck, including system configuration.
- Reinstall Steam OS – This will reinstall SteamOS on the Steam Deck while attempting to preserve your games and personal content.
- Recovery tools – This opens a prompt with the ability to make changes to the Steam Deck boot partition.
Boot Menu
Sometimes the Steam Deck faces trouble identifying the boot file of the OS within the system. For this issue, you need to manually access the Boot menu and select the file the system needs to utilize to boot. Follow the instructions below to apply this fix:
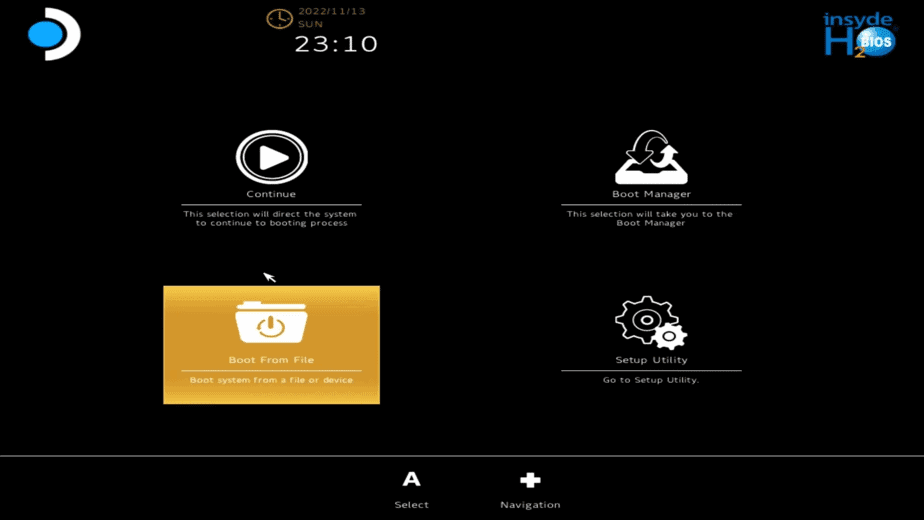
- Completely shut down the system and then turn it on by holding the Volume Up key and Power Button.
- Doing so will send you to the Boot menu (as seen in the picture above).
- Select the Boot From File option.
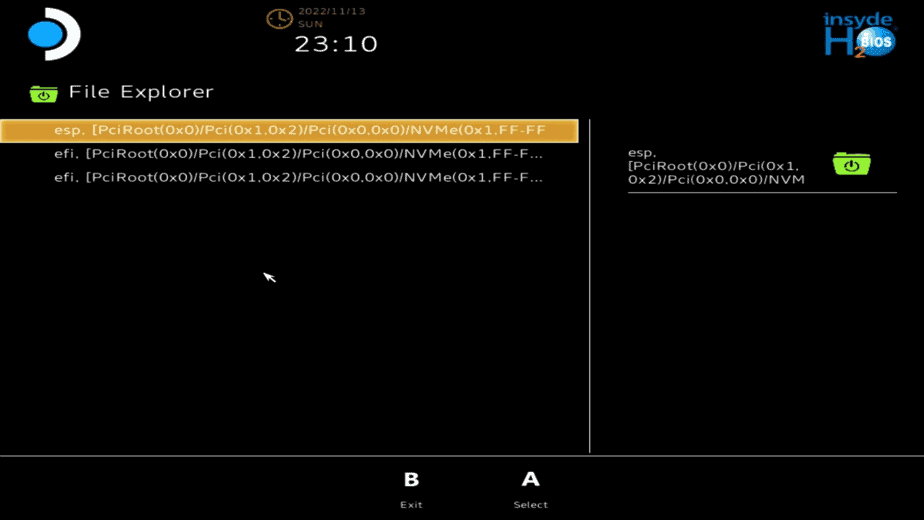
- Next, select the first .esp file in the list. Consult the picture above.
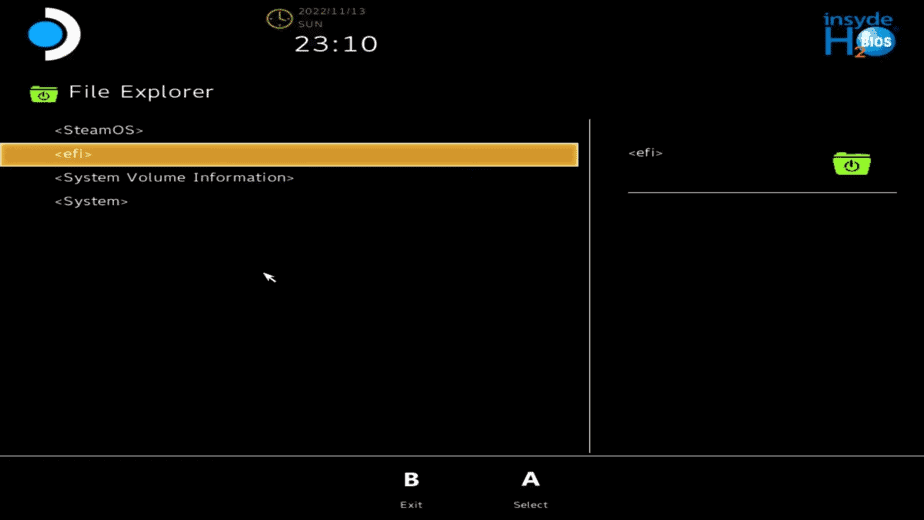
- Then go to the efi folder.
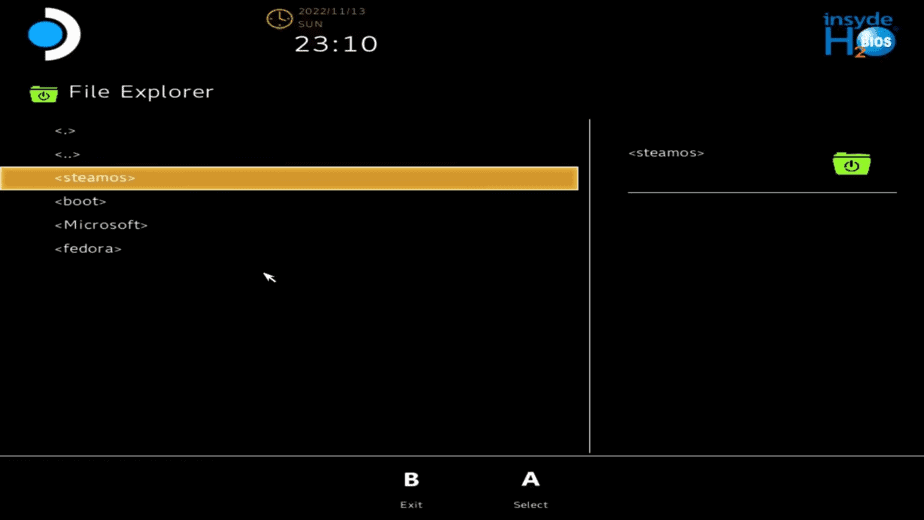
- Choose the steamos folder.
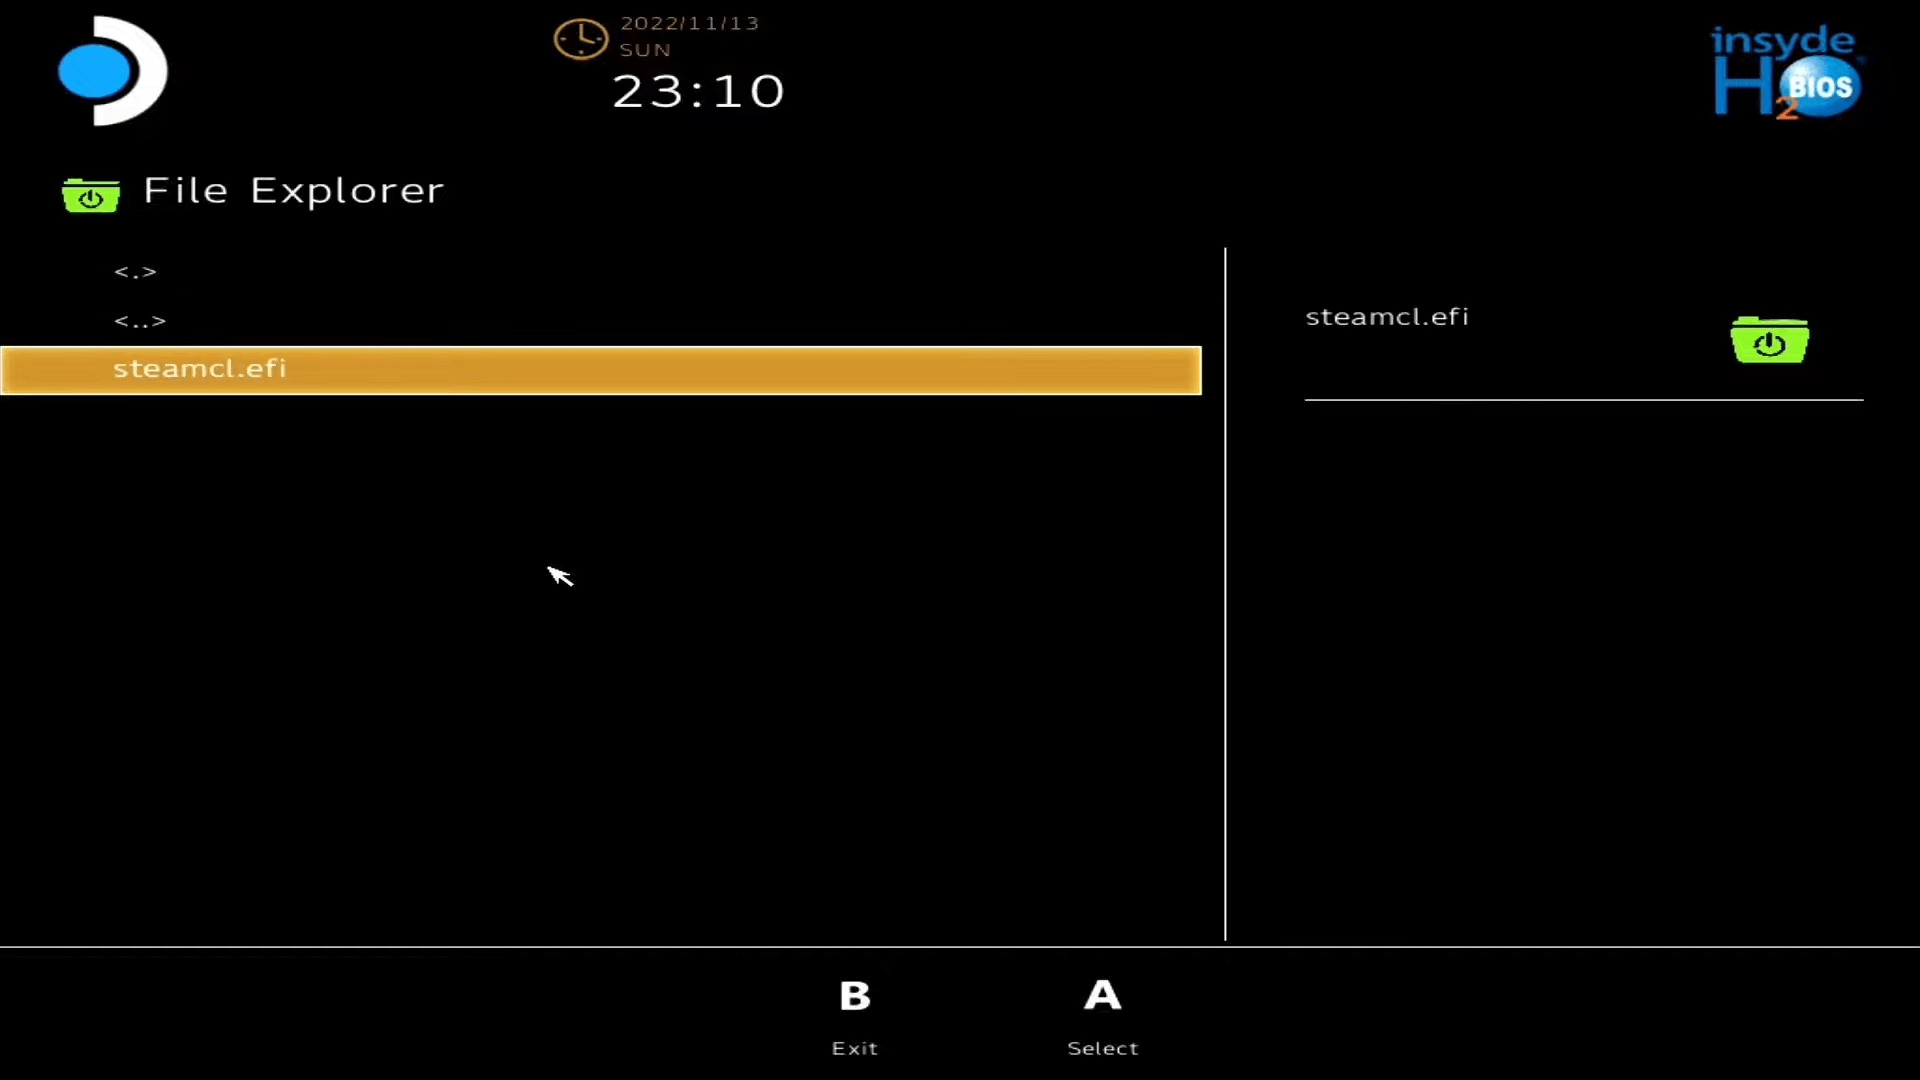
- Finally, select the steamcl.efi file within this folder and this will boot you back into the Steam OS.
OS Update Channel
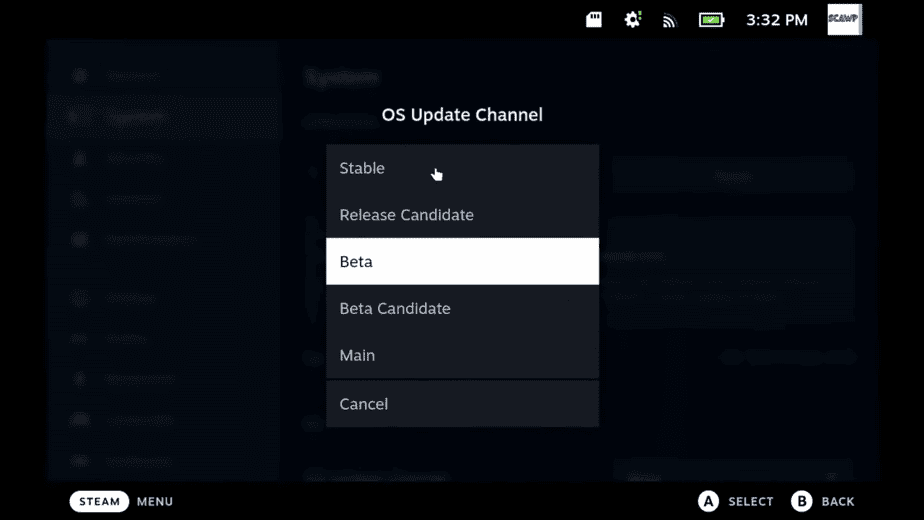
If the previous solution doesn’t fix the problem entirely then you need to play with the OS Update Channel settings. You might have to apply the aforementioned solution for accessing the Steam OS. Once you are in the main system follow the steps below to fix this:
- Go to Settings and then System.
- Under the Beta Participation heading and change your OS Update Channel from Stable to Beta or Beta to Stable. (Whichever one you aren’t currently on).
This will then rebuild the boot manager and then once you restart you will find that Steam OS is now appearing back in your boot manager.
10 Best Mods for the Steam Deck
Hardware Solution – Battery Reconnecting
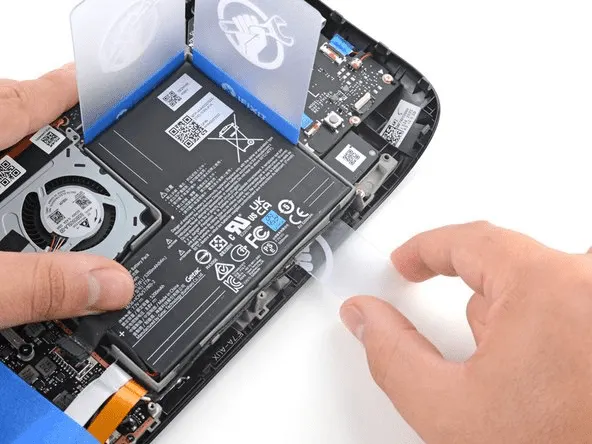
If you are down for some hardware surgery then we recommend that you disconnect and then reconnect the Battery by opening up the device. If you are not confident in your handling skills or are worried about losing your warranty then by all means skip this. But it sure does beat the hassle of sending the Steam Deck back to Valve and waiting for it.
Follow the steps below if you are interested. We have also put up a video below to help you guide through this process.
- Open up the steam deck by removing all 8 screws.
- Remove the shield screws and then the shield itself. Be careful, you have to remove the aluminum foil sticker a bit to reveal one of the screws.
- Important step. Unplug the battery cable that was previously hidden by the shield. Super easy to do with a nail and then pull it ever so slightly. It is very easy to pull. Once pulled, hold the power button for good measure, to remove any lingering electricity.
- Now simply plug the battery cable back in and you should see your power led light up for a second.
- Close everything up and start up your Steam Deck. If it won’t start right away, hold for 10 seconds until it plays the sound. Then only press once to boot it up normally and please wait a bit. If the haptic feedback on the touchpads is working but no screen is showing, then again, hard boot it down and press once to start up.
Contact the Support Team
If you are not going for the hands-on approach and the problem is still lingering even after all the solutions then you will have to contact customer support. Either get the solution directly from them over email etc. or if there is something substantially wrong then you will have to go for the RMA route and send the device to Valve and ask them to fix it.
Hopefully, one of the solutions above would make your life easier. But do not be afraid to send the system to Valve if the problem persists. It’s not only about utilizing your warranty correctly, Valve themselves have a very open customer care policy and would gladly help you out.

