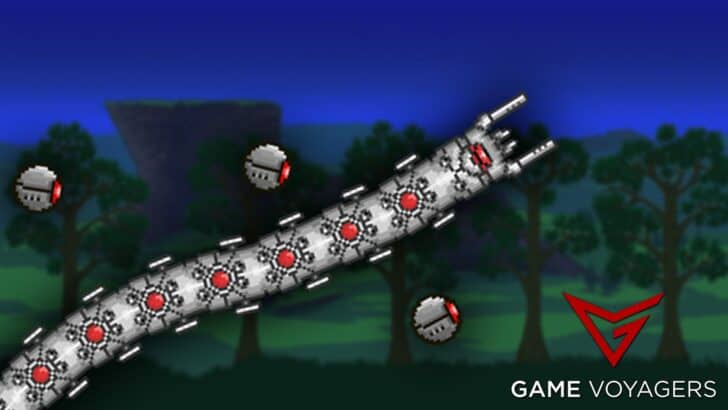
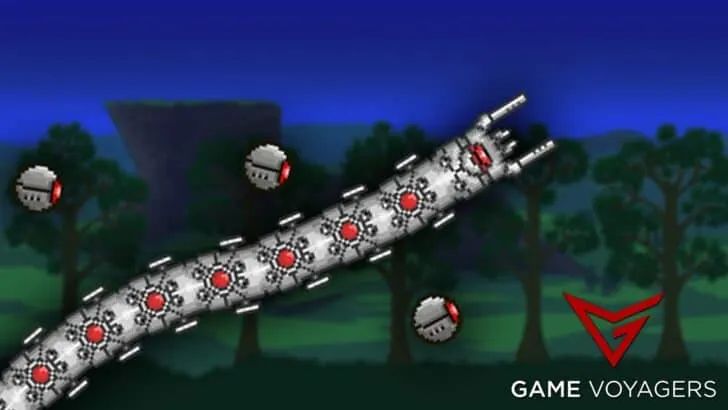
The Destroyer is an advanced mechanical boss in Terraria that emerges during Hardmode, presenting a significantly more challenging encounter compared to the Eater of Worlds. In this article, we will cover in much detail what facing this boss is like and what you should do to prepare for the fight. So get ready for the ultimate guide to beating The Destroyer in Terraria.
The Destroyer doesn’t split up like its organic counterpart. Although this boss has tons of ranged attacks in terms of lasers and probes that hunt you. The boss can be spawned manually by consuming a Mechanical Worm item. Or naturally, by destroying the Demon or Crimson Altar.
This extensive guide is going to show you some of the best ways of dealing with The Destroyer boss in Terraria, as well as the most effective character builds for the job.
How to Spawn The Destroyer?
 1")
 1")
To summon the formidable Destroyer, players can manually consume a Mechanical Worm between the hours of 7:30 PM and 4:30 AM. Alternatively, there is a 10% chance of the boss spontaneously appearing at dusk, but only after a Demon or Crimson Altar has been destroyed and if it has not yet been defeated in the current world.
In a Hardmode world where the Destroyer has not yet been conquered, all enemies (excluding statue-spawned enemies, Meteor Heads, and Old One’s Army foes) possess a minuscule 0.04% chance of dropping the Mechanical Worm item.
Additionally, this item can also be crafted using 6 Rotten Chunks or 6 Vertebra, 5 Any Iron Bar, and 6 Soul of Night. It needs to be created on a Mythril or Orichalcum Anvil.
The usage of the Mechanical Worm to summon the Destroyer is restricted to nighttime. Any attempt to utilize it during the day will prove ineffective, as neither the boss will be summoned nor the item will be consumed. It is crucial to defeat the Destroyer before dawn, as failure to do so will cause it to retreat and despawn.
How to Defeat The Destroyer?
Defeating The Destroyer in Terraria boils down to the class you are using. Some classes will find it harder to beat this boss while for others it will be a breeze. We will go over which weapons best suit the class when fighting the boss.
Melee Class Strategy
The Drippler Crippler and Dao of Pow possess the ability to inflict substantial damage across multiple sections of the boss. For swift and efficient elimination, the Fetid Baghnakhs boast incredibly high damage potential, granted you possess knockback immunity and enough attack speed to fully exploit its power.
While other swords can be useful but comparatively less potent, it is essential to have a backup plan to defend against the boss’s probes. Encouraging vertical attacks from the Destroyer proves advantageous, although all swords carry their inherent risks.
The Shadowflame Knife presents a formidable option due to its capacity to rebound off the Destroyer, striking both the boss and its probes repeatedly.
Yoyos such as Chik, Hel-Fire, Amarok, Yelets, or a Code 2 excel at swiftly and accurately damaging multiple segments of the Destroyer. When paired with a Yoyo Bag, their effectiveness increases, allowing for wide-ranging attacks and the elimination of heart-dropping Probes without direct targeting.
The Ice Sickle also deals significant damage, enabling you to maintain a safe distance from the Probes. Meanwhile, the Flying Knife boasts decent range and infinite piercing ability, albeit with lower overall damage compared to other alternatives.
The Mushroom Spear and Ghastly Glaive are powerful spears, with the Obsidian Swordfish serving as a riskier but relatively easier-to-obtain option.
While Frost armor does not apply Frostburn against the Destroyer, wearing the full set is not recommended. However, the Frost Breastplate provides significant melee and ranged bonuses, making it valuable for hybrid sets or those who do not seek a set bonus.
For an alternative to Adamantite or Titanium armor, the Crystal Assassin armor offers respectable defense, stat enhancements, and a useful dash ability that can free up a slot usually occupied by the Shield of Cthulhu.
Ranged Class Strategy
 2")
 2")
The Daedalus Stormbow proves to be an exceptional weapon when facing large bosses like the Destroyer. It is most effective when paired with Jester’s Arrows, Unholy Arrows, or Holy Arrows.
Alternatively, the Adamantite Repeater or Titanium Repeater can be utilized with these arrow types for favorable results. If you have already defeated The Twins or Skeletron Prime, the Hallowed Repeater serves as an excellent alternative.
For swift elimination, the Dart Pistol combined with Crystal Darts or the Dart Rifle combined with Cursed Darts can prove quite effective, even in Expert Mode. Utilizing a Dart Pistol with Ichor Darts can also yield positive outcomes, as the darts split into multiple projectiles, damaging multiple segments simultaneously. However, it’s important to note that the Destroyer is immune to the Ichor debuff.
The Phantom Phoenix possesses a piercing phoenix flame ability that can devastate the Destroyer faster than even the Daedalus Stormbow if a clear shot is lined up.
When you use a weapon with a fast firing rate and combine it with Crystal or Exploding Bullets, you can deal substantial damage quickly. Meteor Shot’s piercing capabilities greatly enhance its DPS, and once you’ve defeated another boss, you can utilize High-Velocity Bullets to further enhance your attacks.
The Onyx Blaster stands as the most potent gun available and should be used with Crystal Bullets, Meteor Shot, or High-Velocity Bullets.
If obtained, the Uzi also performs exceptionally well when paired with Exploding Bullets or an Endless Musket Pouch for its piercing High-Velocity Bullets.
The Gatligator, when equipped with Exploding Bullets, is effective against the Destroyer due to its ability to hit multiple segments despite the Gatligator’s inherent inaccuracy. The explosive nature of the bullets also allows for splash damage, further damaging multiple segments.
Once Skeletron Prime has been defeated, the Flamethrower can be utilized for this battle.
Dynamite can serve as a formidable weapon, dealing significant damage. Additionally, Beenades are a viable option for inflicting substantial damage to exposed segments and effortlessly eliminating the Probes.
While their base damage may be low, the bees will unleash a multitude of hits upon the Destroyer within a short period, swiftly concluding the battle. It is recommended to equip a Shark Tooth Necklace, Stinger Necklace, and Orichalcum armor for this approach.
Lining up shots when the Destroyer is approaching in a straight line with the Star Cannon can deal nearly 8000 damage due to its rapid-fire rate. If one of the other mechanical bosses has been defeated, the Super Star Shooter serves as a direct upgrade to the Star Cannon.
Among the available armors, Adamantite armor offers the greatest overall increase to all stats, although it lacks a unique set bonus. Palladium armor provides lower stat bonuses but compensates with the Rapid Healing buff, significantly enhancing natural regeneration. Hallowed armor grants the Holy Protection buff.
Mage Class Strategy
The Crystal Vile Shard stands as one of the most potent magic weapons against the Destroyer, owing to its piercing effect, long-lasting projectiles, and armor penetration. However, it should be noted that using this weapon carries some risks.
For both magic and non-magic setups, the Nimbus Rod and Clinger Staff prove highly effective against the Destroyer due to their piercing capabilities and fire-and-forget nature. By strategically utilizing these weapons, it is possible to achieve a passive DPS of around 1,000.
The Medusa Head and Life Drain are excellent choices for battling the Destroyer as they can damage multiple segments simultaneously and have a wide area of effect, making them effective against Probes as well.
The Tome of Infinite Wisdom is a fantastic option, unleashing tornadoes that deal substantial damage with infinite pierce, capable of swiftly dismantling the boss even in Master Mode. However, accessing this weapon requires defeating another mechanical boss and reaching the second tier of the Old One’s Army.
Various other magic weapons with piercing abilities can decimate the boss in no time. Notably, the Magical Harp, Golden Shower, and Shadowflame Hex Doll excel due to their piercing nature.
The Meteor Staff deals extreme damage at a rapid rate but quickly depletes mana reserves.
The Orange Zapinator proves highly useful, as its projectiles can pierce through the boss. Additionally, there is a small chance for its projectiles to deal massive damage, potentially surpassing 128,000, which exceeds the Destroyer’s health in Expert Mode.
Titanium armor is an excellent choice due to its high stats and the benefits of the Titanium Barrier or Shadow Dodge buff. Orichalcum armor, with its set bonus capable of hitting multiple segments, stands out as a particularly powerful option.
While Forbidden armor offers weaker stat bonuses, its set bonus can be effectively utilized against the Destroyer.
Summoner Class Strategy
 3")
 3")
The Firecracker and Cool Whip stand out as the top whips for this battle. The Firecracker multiplies enemy damage, while the Cool Whip features a snowflake projectile that can pierce multiple segments and hit probes. However, the Durendal surpasses both whips due to its tag damage and high direct damage against the Destroyer.
Regardless of the chosen whip, it is recommended to summon the Destroyer while airborne and whip the point where all the segments spawn. This tactic allows for massive damage to be dealt before the Destroyer fully emerges.
By combining summons with the infinite piercing of whips, a significant portion of the boss’s health can be depleted before the fight begins.
The Optic Staff and Sanguine Staff are the top minion options for this battle, while the Pirate Staff also performs exceptionally well, given that the boss primarily remains grounded.
The Blade Staff stands as another highly viable choice due to its rapid attacks, infinite piercing, and lack of I-frames, particularly when paired with the Durendal. If none of the aforementioned options are available, a Spider Staff can be utilized.
For additional damage output, employing a Queen Spider Staff or Lightning Aura Rod can contribute a modest amount of damage at no cost.
If Skeletron Prime or The Twins have been defeated first, it is possible to acquire the Ballista Cane or Lightning Aura Cane, both of which deal excellent damage to the Destroyer.
Tavernkeep armor sets combine summoning with another class, but this option only becomes available after defeating another mechanical boss. Spider armor stands as the best choice for summoners. However, if planning to use the Firecracker or Cool Whip, Obsidian armor becomes an extremely potent and powerful choice, even in Hardmode.
Other Strategies
 4")
 4")
Safe House Strategy:
These strategies involve constructing a solid-walled box in the sky, with walls covering most sides, particularly the bottom, left, and right, to effectively block the lasers from the Destroyer and probes.
It should be noted that while the probes and Destroyer can move through walls, employing a weapon capable of attacking through walls, such as the Crystal Vile Shard, proves ideal for clearing approaching probes. This weapon can be rapidly obtained in early hardmode, making it a valuable choice.
With the strategies in place to handle lasers and probes, the challenge lies in dealing damage to the Destroyer. Players can choose to engage the boss in an open area and retreat to the safe box only when in need of health recovery. Alternatively, they can attempt to damage the Destroyer while resting within the box.
Players can actively utilize persistent weapons such as the Nimbus Rod or Clinger Staff. By holding a Sky Fracture in hand, the player can maximize damage output while the sentries actively engage the enemy. Additionally, indirect fire weapons like the Daedalus Stormbow or Meteor Staff can be employed to effectively target and damage the enemy.
The player must strike a balance between slowing down the fight to ensure survival and dealing enough damage to defeat the boss before dawn arrives.
Tanking Box Strategy:
An alternative and clever method for constructing an arena involves creating a small box, incorporating a few Heart Statues wired around it, and placing honey inside. When combined with high defense, a Cross Necklace, and a Charm of Myths, this setup proves advantageous.
The damage inflicted by the Destroyer itself will be relatively low, falling below your healing potential, resulting in a remarkably easy fight. To further enhance your regeneration, you can add a few Heart Lanterns and utilize Regeneration Potions to increase your healing rate.
Run Strategy:
Crafting a bridge using Asphalt blocks and equipping a variant of the Lightning Boots allows you to easily kill the Destroyer with piercing projectiles like the Star Cannon or its upgrade, the Super Star Shooter.
This occurs because the character outpaces the Destroyer on asphalt blocks, leveraging the advantage to eliminate the boss effectively.
What are the Difficulty Differences?
 5")
 5")
The boss has different stats depending on the difficulty and the phase it is in. These differences are as follows:
Classic Mode
In Classic Mode The Destroyer in Terraria has the following stats:
- Damage (Head): 70
- Damage (Body): 44-55
- Damage (Tail): 40
- HP: 80000
- Defense: Head=0, Body=30, and Tail=35
- Knockback Resistance: 100%
- Immune to all Debuffs
The Destroyer, like most worm enemies, spawns coiled up and swiftly uncoils, moving towards the player. It relentlessly pursues the player from any distance. Leaping from the ground, it endeavors to ram into the player.
When fully in the air, its mobility is limited, necessitating blocks or platforms to “burrow” through. Additionally, it employs the tactic of surrounding the player, particularly if the player is in close proximity to the ground.
It unleashes Death Lasers from its segments. It releases flying Probes from its body, which discharge Pink Lasers.
Whenever a segment sustains damage, there is a 4% chance that it will release a Probe. The Probes fly toward the player, attempting to maintain distance while intermittently moving within melee range. Their shots exhibit moderate accuracy, reliably hitting a stationary player.
Unlike the Destroyer, Probes do not return to the main body and will despawn if the player strays too far away or perishes. Even after defeating the Destroyer, the Probes do not perish hence they need to be killed.
It is worth noting that the Destroyer remains a single entity and does not split into multiple segments. Its segments share a unified health pool. Similar to other worms, the Destroyer is more vulnerable to attacks that inflict damage across multiple segments simultaneously.
Expert Mode
In Expert Mode The Destroyer in Terraria has the following stats:
- Damage (Head): 280
- Damage (Body): 72-93
- Damage (Tail): 68
- HP: 120000
- Defense: Head=0, Body=30, and Tail=35
- Knockback Resistance: 100%
- Immune to all Debuffs
The Destroyer intensifies the damage numbers of all its attacks, posing a considerable threat. It becomes crucial to avoid contact with its head, which has the potential to inflict immense damage, capable of reducing players from full health to zero in just two hits. Apart from that, the Expert mode does not introduce any unique mechanics.
Master Mode
In Master Mode The Destroyer in Terraria has the following stats:
- Damage (Head): 420
- Damage (Body): 108-140
- Damage (Tail): 102
- HP: 153000
- Defense: Head=0, Body=30, and Tail=35
- Knockback Resistance: 100%
- Immune to all Debuffs
Avoiding a direct hit from the head becomes paramount, especially since it has the ability to swiftly deplete the health of an individual from a full 400 health to zero in a single strike, particularly if their defense is between 0 and 19. Apart from that, the HP is significantly amplified.
Is The Destroyer Harder Solo or With Friends?
Fighting The Destroyer solo in Terraria poses a greater challenge compared to facing it with friends. The increased difficulty stems from several factors. Firstly, the boss’s health scales based on the number of players present, meaning it will have significantly more HP when confronted alone. This can prolong the battle and require more sustained damage output.
Additionally, The Destroyer’s attacks can be overwhelming for a single player to handle, especially considering its ability to fire Death Lasers and release Probes simultaneously. With friends, the workload can be distributed, allowing for better coordination, shared resources, and the potential for specialized roles.
Communication and teamwork become valuable assets, providing opportunities for strategic planning and execution. Overall, while The Destroyer can still pose a challenge when facing it with friends, the collaborative effort and combined strengths make the encounter more manageable compared to taking it on solo.
What are the Rewards for Defeating The Destroyer?
 6")
 6")
The rewards for defeating The Destroyer in Terraria differ according to the difficulty. The majority of rewards are the same for all difficulties except a few and sometimes the drop rates increase at higher difficulties. We will highlight all these rewards and changes below:
Classic Mode Rewards
| Reward | Quantity | Drop Rate % |
|---|---|---|
| Gold Coins | 12 | 100% |
| Soul of Might | 25-40 | 100% |
| Hallowed Bar | 15-30 | 100% |
| Horned God Robe | 1 | 14.29% |
| Greater Healing Potion | 5-15 | 100% |
| Destroyer Mask | 1 | 14.29% |
| Destroyer Trophy | 1 | 10% |
Expert Mode Rewards
| Reward | Quantity | Drop Rate % |
|---|---|---|
| Gold Coins | 30 | 100% |
| Treasure Bag | 1 | 100% |
| Mechanical Wagon Piece | 1 | 100% |
| Hallowed Bar | 20-35 | 100% |
| Extra Gold Coin | 12 | 100% |
Master Mode Rewards
| Reward | Quantity | Drop Rate % |
|---|---|---|
| Deactivated Probe | 1 | 25% |
| Destroyer Relic | 1 | 100% |
There you go, this was the ultimate guide to beating The Destroyer in Terraria. The Destroyer is the mechanical rendition of the Eater of Worlds and functions similarly to its biological brother. With proper tracking of where it might pop up during the fight, the fight can become an easy matter.