
The forces of darkness are plentiful throughout the many domains of Terraria, but the bosses reign supreme. However, the bosses don’t exactly stack up by the order that you will meet them, so we’ve got all the Terraria bosses ranked by difficulty so you can see how your sharpshooting matches up.
The developers did great, making the initial boss King Slime the easiest and the final boss Moon Lord the most difficult at the end, but each of the 19 main bosses in Terraria has the timing and abilities to make a straightforward ranking difficult.
So, we have gone out to provide all the reasoning for our rankings, complete with different tiers and tips for finding the bosses and dealing with them once you meet them.
19. King Slime


He will appear randomly, and you might never see him, but the slime king can be forced out in several ways. Either kill 150 slimes in a slime rain, or you can craft a Slime Crown. Fighting King Slime isn’t too difficult because he is relatively slow, and most attacks can be dodged easily.
He isn’t very dangerous even on the most formidable difficulties, especially when you can keep him at the range. He has no ranged attacks and is pretty much restricted to the ground with his movements. King Slime is also quickly taken advantage of with fire-type damage, one of the most common you will find early.
The main challenges with King Slime come with all of the little slimes he spawns. He can also teleport around and surprise players when he jumps exceptionally high. However, even at the most formidable difficulties, he is countered by laying out ropes over top of him and jumping between them.
You can walk around over the top of him at a certain height, ignoring his damage completely. This nets him into the relatively free category and likely the spot as the easiest boss in the game.
18. Golem


The final boss of the Jungle Temple can only be found within the said temple. It can only be defeated after you beat Plantera even though there are exploits to fight him first. You need to use a Lizard Power Cell at the Lizard Altar to fight him.
As long as you have a power cell in your inventory, you can use your open-door command on the altar to gain access. Defeating the Golem causes the Cultist to spawn at the dungeon entrance on all the updated platforms.
Despite being found relatively late into the game, the Golem boss is one of the easiest ones you will face. His attacks are easy to dodge, and he is instead ground-restricted, similar to King Slime. He has plenty of issues hitting players who can move in and out at an adept rate.
Finally, he can’t move through blocks and is very slow. You will have to watch out because his attacks scale up as the fight gets longer, and he has to be fought in a pretty closed-off area. His most challenging attack comes when he detaches his head, and it will move through walls while rapidly shooting at the player.
17. Lunatic Cultist


As said, this boss will spawn at the entrance to the dungeon after you have defeated Golem. The four cultists will spawn outside the door. You will need to have destroyed your dungeon entrance. This boss isn’t too difficult because of his low life and his vulnerability when summoning his decoys.
It is also pretty easy to spot where the real Cultist is. He can be hard to target due to his small size, and he fills up the battlefield with hundreds of projectiles that can be hard to dodge. You also want to watch out as he becomes more dangerous each time you hit a decoy. When you fight this boss, you should be too strong for him to be in much trouble.
16. Eater of Worlds


The Eater of Worlds is the second boss you don’t have to fight. However, if you are looking for a fight, you can spawn him in two ways. He will be summoned in the Corruption for every third Shadow Orb you break using a hammer or explosives.
You can also make him appear by making Worm Food at a Demon Altar by combining 30 Vile Powder and 15 Rotten Chunks. When fighting the Eater of Worlds, you want to use piercing attacks and aim for the head. His head has low health and will briefly stop whenever a charge is destroyed.
He also has relatively low damage, which helps to put him in this tier. Some classes, like melee, can face tank him. You have to watch out for his ranged attack, though; he is well-protected against explosive damage.
His deadliest move is his head attack, and perhaps the most challenging part about the fight is that individual segments will attack you as you start breaking him apart. On more formidable difficulties using an up-and-down dodging pattern can be helpful.
15. Deerclops


The Deerclops can be summoned in the Snow biome using the Deer Thing item. It is crafted from 3 Flinx Fur, 5 Demonite Ore or Crimtane Ore, and a Lens. You can also find him naturally at midnight during a Blizzard if you have 9 defenses or 200 health.
He has a few ice-based attacks that you need to be careful of. He will smash the ground and send an ice spike wave toward you or throw ice spikes at you from a distance. Every so often, he will roar, and if you are caught in the radius, you will receive a Slow debuff.
Staying away or over from him is not an option as he will summon Shadow Hands to slap your clever self. If you are 30 tiles away from him he will become immune to all attacks.
Be sure to have 300+ health when facing him. Clear a flat area to fight him and having two layers of platforms built above him will provide enough distance to take on this one-eyed freak. (not more than 30 tiles since you won’t be able to fight him when he is immune).
You can use 50 to 60 Explosive Bunnies in a box to lay a trap for Deerclops before summoning. Once he is spawned, the trap’s damage can kill him instantly.
14. Brain of Cthulu


The Crimson variant of the Eater of Worlds, the Brain of Cthulhu is a boss you can skip if you don’t want to fight it. It does have plenty of useful drops, though, and can be spawned in the Crimson world by breaking Crimson Hearts. Just as before, every third heart will make it appear.
You can also summon the brain by combining 30 Vicious Powder and 15 Vertebrae to make a Bloody Spine at a Crimson Altar. This guy and his minions will hound you down in the fight, but with circular movements and a little bit of patience, he is relatively easy.
His creepers are susceptible to piercing attacks, and during his second phase, the brain is weak to knock back. His creepers also drop hearts at a high rate, which helps though they can often overwhelm the player.
This brain boss and his creepers use many debuffs; the second phase is sometimes tricky to handle. This boss is right on the edge of pushing into the next tier.
13. Eye of Cthulu


You can often find this boss before King Slime, but you are guaranteed to see it because it will come and find you. Once you reach 200 hit points, there will be a 1 in 3 chance that he will come chasing after you each night.
It can also be manually summoned with a Suspicious Looking Eye or be crafted with five lenses at a Demon Altar. As for fighting the eye of Cthulhu, he is easy to dodge in his first phase, and the many servants he has following around are very weak. However, those servants can be very annoying, and he can fly.
He flies decently fast, especially on the more formidable difficulties, has powerful dashes, and can even become somewhat unforgettable while dashing in his third phase. The tactics for defeating this boss are simple: you want to run away fast if you can.
As long as you have free space to run away in a straight line and range damage to hit the boss as you move, the Eye of Cthulhu can be taken down quickly. Even once he starts moving around diagonally, dodging isn’t an issue as long as you move at a decent pace.
12. Queen Slime


One of the two newest bosses added to the game, this boss is spawned using a Gelatin Crystal in the Hallow and is an entirely optional hard mode encounter. The crystal can be found in the Underground Hallow.
This boss’s first form is similar to the fight with King Slime, but she gets much more difficult in her second phase. Queen Slime is outfitted with wings that make her much harder to dodge than her more ground-locked partner.
11. Queen Bee


This boss is found by destroying the larva that you will find inside the hives within the Underground Jungle region. The Queen Bee must be summoned in the Jungle biome.
She can also be called with the Abeemination item crafted from 5 Honey Blocks created with 1 Stinger, 5 Hive Blocks, and 1 Bottled Honey (3DS players have additional rules here).
You can counter her deadly attacks with a Bezoar when fighting this boss. Her mini bee allies are also pretty weak, and she becomes static while spawning the bees. However, the bees are rather annoying, and the Queen Bee herself uses swift attacks as she starts to charge and shoots her stingers.
She can also be dangerous because accidentally breaking the larva can cause her to spawn, making surprise intense moments. This boss isn’t too hard to take care of with multiple floors to fight on, but her speed and strength when you find her help her grab this difficulty tier. This bee can also move up a level if you don’t prep enough.
10. Skeletron


You can only summon and fight this boss at night, and he is one you will fight pretty much guaranteed during your progression. It is required that you defeat him to get into the dungeon. You can do this by cursing the older man at the dungeon’s entrance.
Alternatively, he can be summoned by using the Clothier Voodoo Doll. This is a rare drop found after defeating him, which allows you to kill the Clothier NPC and fight again. When it comes to fighting the mighty Skeletron, he isn’t too tricky but much more vital than most of the bosses you’ve faced, save Queen Bee.
His homing skull attack is relatively easy to dodge, and he becomes pretty slow once he starts spinning. He is also frail to the bee weapons you’ve probably found.
However, you should watch out for his spinning attack because it can be lethal if caught up in it. He inflicts slows and debuffs and is very dangerous when both his hands are up. You will also want to fight him at night as he becomes a Dungeon Guardian at dawn.
9. Skeletron Prime


You can force this boss to spawn with the summoning item Mechanical Skull. It is a rare drop found off of enemies as well. For crafting the Mechanical Skull, you will want to collect 30 Bones, 5 Iron Bars, or Light Bars plus 3 Souls of Night and 3 Souls of Light. You can craft it at your Mithril or Talcum Anvil.
This boss is similar to the first time you fought him, except now he has four arms instead of two. Though he will be one of the first bosses, you can use the Daedalus Storm bow plus Holy Arrows combo to make it easy, and his attacks are pretty easy to dodge.
Killing his Prime Laser first makes him pretty easy, and standing on platforms far away from blocks will help nullify the Prime Cannon. This boss has high life and has to be fought at night as he becomes a Dungeon Guardian at dawn. He also has the same deadly spinning head attack to watch out for, but dealing with the five different parts one by one will eventually make him comfortable.
8. The Destroyer


This boss’s summoning item is Mechanical Worm and can be found as a rare drop from enemies. Crafting the Mechanical Worm using 6 Rotten Chunks or 6 Vertebrae plus 5 Iron or Lead Bars plus Souls of Night using a Mithril or Talcum Anvil is possible.
The Destroyer, a more challenging version of the Eater of Worlds boss, suffers from the Storm bow Holy Arrows combination. He spawns in a cramped area, making shooting him and dealing lots of damage easy.
You will want to aim for the head as it has less defense than the body. Watch out for its dangerous head attack and the many annoying probes that it spawns. This boss is mostly more challenging than the other version because of the high damage that its probes inflict.
7. The Twins


These guys can be spawned using the summoning item Mechanical Eye, which becomes a rare drop once you reach hard mode. If you are trying to craft the Mechanical Eye, you will need your Mithril or Talcum Anvil along with 3 Lens, 5 Iron or Lead Bars, and 6 Souls of Light.
There is plenty of debate about how hard this boss is to fight. As long as you tolerate it and try to defeat the Twins 1 by 1, the fight becomes much more comfortable. However, we gave it a higher tier difficulty because of how fighting this boss can be like fighting two bosses simultaneously, especially if you mess up and get them on either side of you.
The first phase of this boss is relatively easy, but the second phase can be deadly. They have a high damage output, and their combination of melee and range can sometimes be overwhelming, especially on more significant difficulties.
6. Wall of Flesh


The last boss you will face off with before hard mode is found in the Underworld biome. You must throw a Guide Voodoo Doll into the lava to make him spawn. You can get these by killing the flying demons carrying voodoo dolls in their legs.
Your Guide NPC must be alive for the voodoo doll to activate. He can be spawned infinitely, and defeating him will turn your world into Hard mode. Watch out when you kill the demons because you could accidentally generate them.
Fighting this boss can be a bit of a challenge. It is pretty slow initially, and aiming for the eyes will have a more significant effect than hitting the mouth. Using your bee weapons will also help here.
As the fight progresses, his damage will scale up, and his speed and the many different attacks he throws at you, so you want to keep your distance as much as possible.
It doesn’t help to reach you from a great distance and continuously spawns minions to keep you distracted. You especially want to watch out for getting grabbed and pulled in.
5. Plantera


You won’t be given access to a fight with Plantera until you have defeated each of the preceding three mechanical bosses. Once you have done that, you can find Plantera by heading to the Underground Jungle biome and seeking out one of her pink bulbs within the Underground Jungle.
They will grow slowly, one at a time, after the mechanical bosses are defeated. Eventually, there will be many, and defeating Plantera grants access to new things like gear, NPCs, and more formidable enemies. Corruption and Hallow will also spread more slowly. Plantera has no summoning items.
This boss deserves its tier, as it is one of the most challenging bosses you will face in the game. Your best method of dealing with this boss will be moving around it circularly. It is also relatively slow, especially in its first phase, while the second phase is somewhat susceptible to the Storm Bow Holy Arrows combo we’ve mentioned.
You will have to watch out for its high speed and high variance of attacks as it uses multiple different methods to attack you. Dodging the annoying thorn balls while watching out for Plantera’s tentacles makes this fight rather tricky. You also want to watch out for getting too far from the Jungle, as this boss will become enraged and attack faster.
4. Duke Fishron


This boss can be fought anytime once you have entered Hard mode. He is only here because this is usually when you want to fight him. Duke Fishron can be spawned anytime by casting a Fishing Rod into the Ocean with a Truffle Worm as bait.
These can be found within the Underground Mushroom biome; you will need a Bug Net to catch them. They can be challenging to see and are also difficult to spot. If you have the worm in your inventory, casting your rod will make this optional boss spawn.
When fighting this boss, he struggles with vertical movements and will stop moving when changing form or casting special abilities. He is difficult because his attacks scale up as the fight progresses, and he has a very high damage output.
He becomes almost unforgettable during his third phase, filling the battlefield with many Sharkrons and Sharknadoes. You will also want to watch out as he becomes enraged if you move too far from the Ocean.
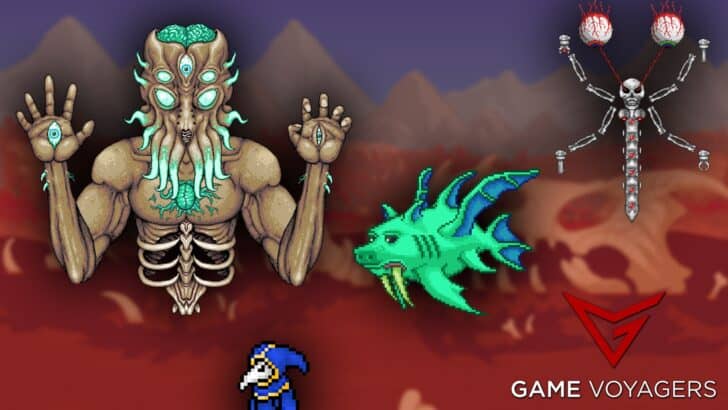
3. Mechdusa


The Mechdusa is a hidden boss and is a fusion of the three Mechanical bosses i.e., the Twins, The Destroyer, and Skeletron Prime. To summon this boss, you need to follow some complex steps.
You must have the Mechanical Eye, Mechanical Skull, and Mechanical Worm items on you. Then create a new world with this seed; “getfixedboi“. Use a Mythril Anvil or Orichalcum Anvil to combine the previous three items and create Ocram’s Razor. Use this item to summon the boss.
It has all the attacks of the aforementioned mechanical bosses and has the highest HP of any boss in the game. You are essentially fighting all three bosses at the same time and will have to slowly take out each while being wary of the incoming barrage of attacks.
Defeating it will reward you treasure from the respective boss and also the Waffle Iron, a new weapon from the 1.4.4 update.
2. Empress of Light


The other recent addition is one of the most challenging bosses the game has ever known. This optional post-Plantera boss can be fought by killing a Prismatic Lacewing in the Hallow biome. They spawn at night between 7:30 PM and 12:00 AM. You will want to move as fast as possible for this fight because the Empress has an extensive array of attacks that will test your concentration.
On top of the numerous projectiles to spot, most of her attacks do plenty of damage. Finally, the Empress is one of the tackiest enemies you will fight in the game, making her especially monstrous on the more formidable difficulties.
1. Moon Lord


It appears automatically after you have defeated the four Lunar Pillars, also known as the Celestial Towers. You can also spawn this boss by crafting the Celestial Sigil.
You will need a good number of the four fragments you can find by defeating the Lunar Pillars to prepare this item. This can take a while, so you will want to be prepared to beat him on your first attempt if you can.
The last boss is also the toughest though he is not impossible. His Phantasmal Deathray is easy to dodge, and killing his eyes simultaneously can make the fight much easier. He also has difficulty dealing with fast-flying mounts.
You will want to watch out because he has a too-high damage output and increased health to match. He also has numerous attacks that can quickly overwhelm the player and abilities that will prevent lifestyle.