Within this detailed guide, we’ll be discussing everything you need to know about Xbox 360 emulation on your Steam Deck to enjoy an incredible library of games.
- Enter Desktop Mode on your Steam Deck
- Install Windows OS on your Steam Deck
- Download the latest Xenia Canary build from Xenia’s official website
- Add the Xenia Canary Emulator as a Non-Steam Game to your Steam Account
- You can now Launch your Xenia Emulator from the Steam Deck Game Mode.
- Make sure to Configure your Xenia Emulator to your specifications.
- Download and Select an Xbox 360 Rom to play and Enjoy the game
Each of these steps requires understanding how emulators work and the Steam operating system works. If you’re confused about any of the steps mentioned above or require further guidance, keep reading the article to learn more.
Guide to Xbox 360 Emulation on the Steam Deck
The Xbox 360 was a console that dominated an entire era of gaming. The console was one of the greatest successes for Microsoft gaming, and essentially established a standard for consoles to come in the future. This was done by the innovative Kinect feature of the console, and its long list of amazing games.
If you’re looking to emulate the Xbox 360 on your Steam Deck then you will need to download and install the Xenia Emulator, which is an Xbox 360 emulator that has been made to work for Windows OS, and other operating systems such as Linux as well.
Xenia is probably the best Xbox 360 emulator on the market right now because it allows you to play a large catalog of Xbox 360 games without much hassle. Moreover, the Xenia Canary build has the best stability of any other experimental Xbox 360 emulator on the internet right now.
As you can probably tell, we’re impressed with the Xenia emulator. But what do we need to run it? And is it as easy to get it installed as other emulators such as the Dolphin or PS2 emulators?
How to Download and Install the Xenia Emulator
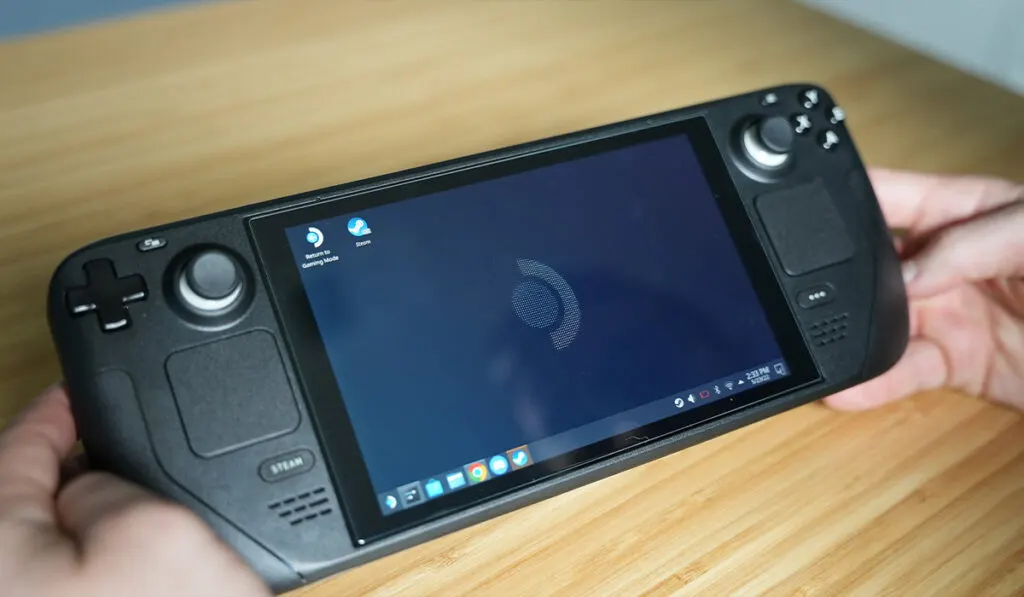
Before you can begin playing Xbox 360 games on your Steam Deck, you must download the emulator onto it. You can do this by first switching your Steam Deck from Game Mode to Desktop Mode, as you will then have access to more applications that replicate a Windows experience.
Switch your Steam Deck from Game Mode to Desktop Mode

- Boot up your Steam Deck, and you should automatically start in Gaming Mode
- Hold Down the Power Button, whilst you’re still in Gaming Mode
- You will notice that a Menu pops up at the center of the screen
- Navigate to and Select the “Switch to Desktop Mode” option from the Menu
- Your screen should now be set to Loading
- Upon Completion of the Loading process, you should now be able to access Desktop Mode
Install Windows OS on Your Steam Deck
Currently, two ways exist to ensure Xenia is downloadable onto your Steam Deck. The first is by downloading it through EmuDeck. Which is additional software that you can download and it downloads a compatible version for your Steam Deck. The other method is to download Windows and install Xenia Canary directly.
The problem with the former method is that regardless of the enhanced compatibility of the EmuDeck, the Xenia build that it downloads for your Steam Deck simply does not run as well as it does for the Windows OS. In some cases, the FPS speed is so abysmally low that the entire emulator becomes unplayable.
This is why we recommend downloading Windows OS onto your Steam Deck and installing Xenia manually through their official website. This will provide you with greater choice when it comes to available builds for Xenia, and will also give you overall better performance and experience.
Steps
Follow these steps to install Windows Operating System onto your Steam Deck:
- To easily switch between Steam OS and Windows OS make a Bootable Windows USB Drive or Micro SD Card
- Jack your Bootable USB drive into your Steam Deck
- Ensure that the Steam Deck is turned off
- Press and Hold Down the Power Button of your Steam Deck
- Select the USB drive or SD card
- Your Steam Deck will Boot into Windows
- The On-screen prompts should help you complete a Windows Setup
- When Windows Desktop appears to navigate to Start > Settings > System > Display
- Select Display Orientation > Landscape, and Accept the change.
- Open Windows Edge and Navigate to the Steam deck Windows Resources page
- Download the APU driver, Wi-FI driver, Bluetooth driver, SD card reader driver, and audio drivers
- Make sure to Install all the drivers mentioned above onto your Steam Deck.
There you go, you should now be able to not only use the Windows OS but also freely switch between the Windows OS and the Steam OS based on your preference and liking. This should vastly help you in running Xenia, but it can also be useful for running other Windows-specific applications.
Download and Install Xenia Canary on Your Steam Deck
Now that you have Windows OS on your system, getting the Xenia emulator is quite easy. We’ll detail all the steps you need to take to get the emulator and begin using it within this section. Make sure that you have an active internet connection, however, because you will have to do a few downloads.
- Open an internet browser on your Steam Deck
- Enter this link into the address bar to head to Xenia’s Official Page
- Once you’re on their official page you need to navigate to the Downloads section
- The Download section can be found on the Menu on the left-hand side.
- Click on the blue highlighted System Requirements
- It will lead you to a Quickstart guide for Xenia
- Simply scroll down to the Where do I download Xenia section
- Click on the blue highlighted link for Xenia Canary
- Find the saved file in your storage and Decompress the file
You now have access to the Xenia Canary build which should provide you with the best performance and most optimized rendering of Xbox 360 games. What’s brilliant about the Xenia Canary, unlike other emulators, is that it does not require any additional files or BIOS to work.
Add Xenia Canary as a Non-Steam Game on Your Steam Deck
- Make sure you are in Desktop Mode.
- Open up the Steam Application – Not in Game Mode.
- Navigate and Select the Games option on the Menu at the top
- Click the option “Add a Non-Steam Game” from the drop-down Menu.
- Check the Box in front of the Xenia Canary Emulator
- Finally, Click the Add to program button at the end.
And voila! That’s all you need to do to get your Xenia Emulator to be a part of your Steam Library and to be available on your Steam Deck’s Gaming Mode. Now you will not have to deal with any hassle while trying to play your favorite Xbox 360 games.
How to Get Games For Xbox 360 on Your Steam Deck?
At this point, you will simply be required to fetch some ripped game files to run them on the emulator itself. Doing this step manually is quite a hassle. Thankfully, there are many websites that allow you to download ROMs, and it just takes a quick search to find them.
How to Install DLCs For Your Games on Xenia Canary
- Identify what the Game Title ID is. This can be identified by running the game in Xenia
- Locate your DLC Content folder from your removable storage.

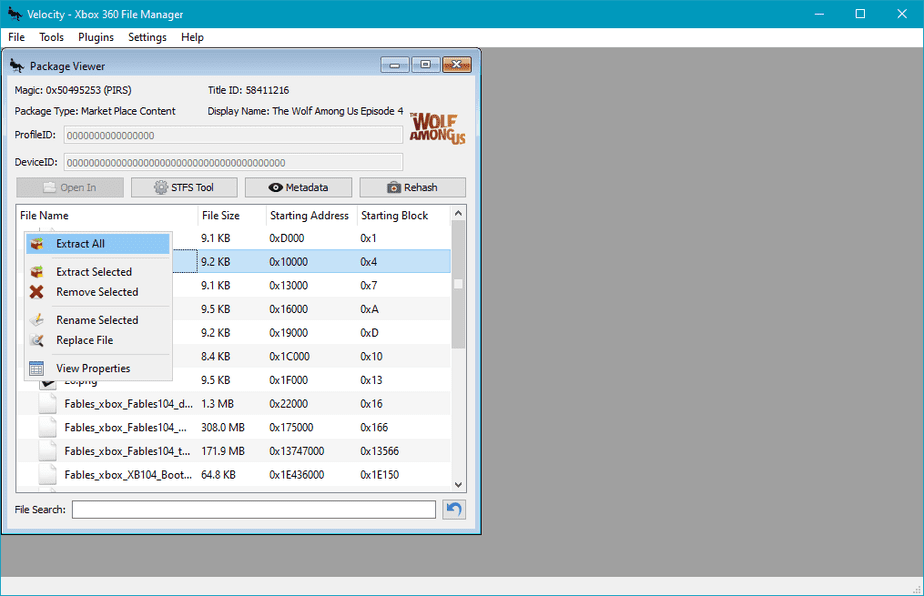
- Download Velocity from here.
- Open Velocity and navigate the Top menu File > Open >Packages.
- Extract the content packages
Documents\Xenia\TitleID\00000002and their corresponding folder names.

It’s often quite difficult to get your emulators to work exactly how you want the top, but Xenia makes things a lot easier for consumers because they do all the heavy lifting for you regarding tracking down accurate console files and BIOS.
However, it cannot be ignored that right now Xenia isn’t perfect. Especially because as you try to play it on the Steam Deck it inevitably runs into issues with the Linux-based Steam OS, and thus requires a Windows OS to be installed to run effectively.
Nonetheless, the software is incredibly useful for anyone wanting to go back and play the legendary titles that made Xbox 360 the household name that it is nowadays. We hope this guide has been useful to you. See ya next time! Ciao.

