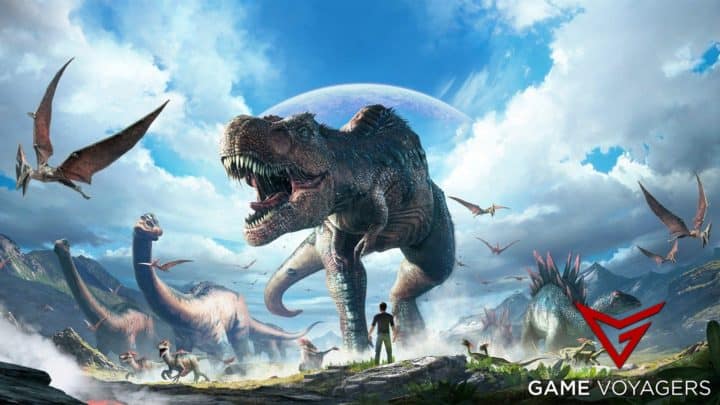

ARK: Survival Evolved is a very hardcore survival game and with a prehistoric theme the grind to survive and the danger of those huge dinosaurs is ever-present. The game is massive and provides a large sandbox for players to indulge in all kinds of activities but the fact that everything is very slow-paced on the official servers makes this game a tough sell for players who are more interested in a fast-paced experience.
However, if you are going for a single-player playthrough of this game then you have a lot of control at your disposal to change every inch of this game, making it a very fun and fast experience. There are an extensive set of settings in this game that you can play around with and we will be showing you the best set of these settings to select for the best single-player experience.
There are many settings to go through so buckle up and enjoy.
Related: Why is the Sky Red in Ark: Survival Evolved?
Best Single Player Settings In ARK
If you are playing ARKalone and want to experience the most fun while doing that without being bogged down by the many tedious mechanics of the game. As a survival game, Ark has many settings in place in the official servers that slow down progression for consistent pacing but if you are playing the game alone on singleplayer then these settings can get a bit boring. Luckily Ark has a slew of settings options from which you can tweak the whole game and make it fast-paced and exciting.
 1")
 1")
The best settings to use for Ark singleplayer are:
General Settings Tab
- Difficulty Level: Keep it at 1. It means that the quality of the loot drops are going to be the best and the dinos are going to be at maximum level.
- Dino Damage: Keep it 1. This is the default setting no need to change it.
- Player Damage: 2 Keep it at 2.05. This lets you start the game doing a little extra damage so you can easily kill starting creatures without much hassle.
- Structure Damage: Keep it 1. This is the default setting no need to change it.
- Player Resistance: Keep it at 0.4. This lets you absorb more damage and survive the initial encounters with various creatures. Not get killed by those dumb Dodos.
- Dino Resistance: Keep it at 0.7.
- Structure Resistance: Keep it at 0.55. The makes structures a little bit stronger.
- XP Multiplier: Keep it at 1.85. This provides a little boost to acquiring XP to get things going at the start and not be hindered by the grind.
- Dino Turret Damage: Keep it at 0.7. This is the default setting no need to change it.
- Structure Damage Repair Cooldown: Keep it at 25. Keep this lower for quicker cooldowns.
- Dino Harvesting Damage: Keep it at 2.5. This is going to increase the resource collection while riding on the back of dinosaurs. More resources from your dinos.
- Harvest Amount: Keep it at 1.85. This means that you will be getting almost two times the scaling for all of your harvestings.
- Player Character Water Drain: Keep it at 0.5. To lower the need to drink water constantly.
- Player Character Food Drain: Keep it at 0.35. To lower the need to eat food constantly.
- Player Character Stamina Drain: Keep it at 0.35. Turning it down will free you from the worry of running out of stamina quickly.
- Dino Character Stamina Drain: Keep it at 0.5. When you get your first dino you don’t want to have to worry about it starving to death immediately and it is a little bit tougher and a little bit faster.
- Player Character Health Recovery: Keep it at 1.85. Higher values cause player characters to heal faster.
- Dino Character Health Recovery: Keep it at 2.0. When it says faster it’s not instant, it’s just that you eat a little bit faster and the health raises a little bit faster which is good because you can take more hits because we have a higher resistance meaning you can have more fun with battles as strikes aren’t going to kill you in one shot.
- Player Harvesting Damage: Keep it at 2.7. This is going to increase the resource collection while you are on foot. More resources from when you are not on a dino.
- Dino Count: Keep it at 1. This is to have as many dinos spawned in as possible.
Related: Why is the Sun So Bright in Ark: Survival Evolved?
There are other check box settings in the General tab that you can enable or disable according to your preference. The combination we went for are:
- Allow Third Person Camera: Enabled. Sometimes you like to switch between third person and first person and it just depends on you.
- Enable Global Chat: Disabled.
- Enable Proximity Text Chat: Disabled.
- Notify Player Left: Disabled.
- Notify Player Joined: Enabled.
- Admin Logging: Disabled.
- Enable Crosshair: Enabled. Enable the crosshair is important as it helps with aiming. But if you don’t like it you can turn it off.
- Force No HUD: Disabled.
- Disable Loot Crates: Disabled.
- Hardcore Mode: Disabled.
- PvE Mode: Disabled. Because then you can’t kill your dinos when you are breeding.
- Disable Friendly Fire: Disabled.
- Show Map Player Location: Enabled. To see yourself on the map.
- No Tributes Downloads: Disabled.
- No Survivors Downloads: Disabled.
- No Items Downloads: Disabled.
- No Dinos Downloads: Disabled.
- Maximum Difficulty: Enabled. This forces the max dinosaur level to 150.
- Enable PvP Gamma: Enabled.
- Use Singleplayer Settings: Enabled. As you are playing single-player you would want the game to have a little bit faster-paced survival experience.
- Use Corpse Locator: Enabled.
- Disable Structure Placement Collision: Enabled. This will allow you to place structures easily in different locations like mountains.
- Allow Multiple Platform Floors: Enabled. This means that you can build pretty crazy structures on your platform saddles.
- Allow Unlimited Respec: Enabled.
- Disable Dino Taming: Disabled.
- Disable Dino Riding: Disabled.
- Show Creative Mode: Enabled.
- Allow Flyer Speed Leveling: Disabled.
Advanced Settings Tab
 2")
 2")
- Allow PvE Timer: Disabled.
- Allow PvE Use System Time: Disabled.
- Prevent Tribe Alliances: Disabled.
- PvE Allow Tribe War: Enabled.
- PvE Allow Tribe War Cancel: Disabled.
- Disable PvE Gamma: Disabled.
- Allow Cave Building PvE: Enabled.
- Allow Flyer Carry PvE: Enabled.
- Enable Extra Structure Prevention Volumes: Disabled.
- Disable Structure Decay PvE: Disabled.
- Disable Dino Decay PvE: Disabled.
- PvE Structure Decay Period: Keep it at 1.0.
- PvE Dino Decay Period: Keep it at 1.0.
- Auto PvE Start Time Seconds: Keep it at 4320.
- Auto PvE Stop Time Seconds: Keep it at 4320.
- Prevent Diseases: Disabled.
- Non-Permanent Diseases: Enabled.
- Force Allow Cave Fliers: Enabled. So that you don’t want to be in a situation where you can’t fly if you want to. It is up to your preference.
- PvP Dino Decay: Disabled.
- Override Structure Platform Prevention: Enabled.
- Increase PvP Respawn Interval: Enabled.
- Offline Raid Protection: Disabled.
- Offline Raid Protection Logoff Period: Keep it at 0.01.
- Inc PvP Respawn Interval Check Period: Keep it at 300.
- Inc PvP Respawn Interval Multiplier: Keep it at 1.7.
- Inc PvP Respawn Interval Base: Keep it at 59.99.
- PvP Zone Structure Damage: Keep it at 6.
- Structure Prevent Resource Radius Multiplier: Keep it at 0.25.
Related: How to Keep Dinos Unconscious in Ark: Survival Evolved
World Settings
 3")
 3")
Some of these settings have a major impact on breeding, imprinting, and taming so they will be discussed in detail in the dedicated section below.
- Disable Imprint Dino Buff: Disabled.
- Allow Anyone Baby Imprint Cuddle: Disabled.
- Poop Interval: Keep it at 2.0. To make sure that you always have poop for fertilizer when you are first starting out.
- Lay Egg Interval: Keep it at 0.01. With this setting, the dinosaurs will lay unfertilized eggs like it’s their job which means that kibble is going to be a lot faster and you will have very quick egg collecting.
- Harvest Health: Keep it at 5. To increase the amount of damage that these harvest items can withstand before being destroyed.
- Resources Respawn Period: Keep it at 0.5. For resources to respawn quicker.
- Baby Cuddle Lose Imprint Quality Speed Multiplier: Keep it at 0.999.
- Baby Imprinting Stat Scale Multiplier: Keep it at 2.0.
- Day Cycle Speed: Keep it at 0.7. This means that the entire day and night are going to go slower.
- Day Time Speed: Keep it at 1.0.
- Night Time Speed: Keep it at 1.0.
- Spoiling Time: Keep it at 1.5.
- Item Decomposition Time: Keep it at 2.0.
- Corpse Decomposition Time: Keep it at 2.0. This is so that you are not worried about dying and mad dashing back to your corpse to get your stuff back.
- No Resource Radius – Player: Keep it at 3.0. This is a multiplier that influences how far away from the structures will the resources regrow.
- Crop Growth Speed: Keep it at 9.0. This is to ensure that if you plant something it grows as fast as possible. Ideal for situations where you want a specific crop to grow quickly and become available for taming a dinosaur.
- Crop Decay Speed: Keep it at 6.0. Having this setting turned up means that the crops will last longer. For example, carrots don’t get spoiled in five minutes instead it takes them 25 minutes with this setting.
Leveling Settings
 4")
 4")
This section is all about our levels and our dinos and how they work together. Keep all the settings in the Wild Dino Stats Per Level and Tamed Dino Stats Per Level at 1.0, no need to change these. The changes have to be made in the following section:
Tamed Dinos Add Per Level
- Health: Keep it at 2.0. This here is a multiplier that changes the amount of health gained by tamed dinos per point invested as a percentage of the default setting.
- Stamina: Keep it at 2.0.
- Torpidity: Keep it at 1.0.
- Oxygen: Keep it at 1.0.
- Food: Keep it at 1.0.
- Water: Keep it at 1.0.
- Temp: Keep it at 1.0.
- Weight: Keep it at 6.0. As we have changed all of the settings to harvest a lot more items which means our dinosaurs will get heavier quicker so we need to change and increase the weight of all of our dinos.
- Damage: Keep it at 2.0.
- Speed: Keep it at 2.0.
- Temp Fort: Keep it at 1.0.
Related: How to Keep Baby Dinos Alive in Ark: Survival Evolved
Tamed Dinos Stats Affinity
This section will dictate when the dinosaurs are tamed and how much of that taming effectiveness is going to go into those stats.
- Health: Keep it at 1.5.
- Stamina: Keep it at 1.5.
- Torpidity: Keep it at 1.0.
- Oxygen: Keep it at 1.0.
- Food: Keep it at 1.0.
- Water: Keep it at 1.0.
- Temp: Keep it at 1.0.
- Weight: Keep it at 4.0.
- Damage: Keep it at 1.5.
- Speed: Keep it at 1.5.
- Temp Fort: Keep it at 1.0.
With these settings in place, the dinos are stronger overall. You are never going to worry about weight, damage, speed, health, and stamina. This makes it a lot more fun for breeding and boss fights.
Player Stats Per Level
These are the most important settings for the player as they affect how much your stat will change when you put a level into it.
 5")
 5")
- Health: Keep it at 4.0.
- Stamina: Keep it at 4.0.
- Torpidity: Keep it at 4.0.
- Oxygen: Keep it at 4.0.
- Food: Keep it at 4.0.
- Water: Keep it at 4.0.
- Temp: Keep it at 4.0.
- Weight: Keep it at 6.0.
- Damage: Keep it at 4.0.
- Speed: Keep it at 4.0.
- Temp Fort: Keep it at 4.0.
Experience Multipliers
- Generic: Keep it at 1.5.
- Kill: Keep it at 1.5.
- Harvest: Keep it at 1.5.
- Craft: Keep it at 1.5.
- Special: Keep it at 1.5.
Miscellaneous Settings
- Max Players In Tribe: 0.
- Player Max Experience Points: 0.
- Dino Max Experience Points: 0.
- Flyer Platform Unaligned Basing: Disabled.
- Passive Def Hurt Riderless Dinos: Disabled.
- Only Allow Specified Engrams: Enabled.
- Show Floating Damage Text: Enabled. Up to your preference.
- Allow Custom Recipes: Enabled. If you want to make your own boosted recipes then enable this.
- Allow Raid Dino Feeding: Disabled.
- Raid Dino Food Drain Multiplier: Keep it at 1.0.
- Custom Recipe Effectiveness: Keep it at 1.0.
- Custom Recipe Skill Factor: Keep it at 1.0.
- Crafting Skill Bonus Multiplier: Keep it at 5.0.
- Supply Crate Loot Quality: Keep it at 2.0.
- Fishing Loot Quality: Keep it at 2.0.
- Fuel Consumption Interval Multiplier: Keep it at 3.364.
- Increase Platform Structure Limit: Keep it at 5.0.
Related: Why is Your Map Blurry in Ark: Survival Evolved?
Best Breeding, Imprinting and Taming Settings
 6")
 6")
The Breeding and Imprinting settings in Ark are found in the single-player settings under the Advanced tab and to be precise they will be under World Settings heading. There are a lot of settings here to mess around with but the ones that specifically affect breeding and imprinting are a few which we will list down below along with the actual setting to select:
- Mating Interval: Adjusting this setting means that you’re going to be adjusting the time in between each round of breeding so the lower this number will be the lower the amount of time in between each round of mating.
- Keep this setting at 0.007. This basically is going to give you just a couple of minutes in between each round of mating.
- Egg Hatch Speed: This number dictates the speed of the time it takes for an egg to hatch. So a higher number here will essentially decrease the time for an egg to hatch by that percentage.
- Keep this setting at 11 to 12. Doing this will result in just a couple of minutes for every egg to hatch. Larger eggs hatch in 2 to 3 mins while smaller ones will hatch in a minute and a half.
- Baby Mature Speed: This is going to change the speed of maturity which also changes how many imprints are needed so for example the higher this number is the faster the baby is going to grow up.
- Keep this setting at 10. If you have the Single Player Settings option in the General tab unchecked then for smaller dinos this setting needs to be 150 and for larger dinosaurs, you need to change the setting to 999.
- Baby Food Consumption Speed: This setting impacts the rate at which the baby dinosaur needs to eat food. The higher this number is the lower the speed at which baby dinos eat their food.
- Keep this setting somewhere around 2 or 1.898. With the maturing speed setting changed it doesn’t matter how fast the baby is eating because the baby is going to grow up faster than it’s fed. It’s not going to run out of food because it’s growing at such a rapid rate.
- Baby Cuddle Interval Multiplier: This setting governs how often baby dinosaurs require imprinting.
- Keep this setting at 0.1. Going with this number we assure that after every 8 minutes the growing dino baby is going to need one imprint of 100.
The key to Imprinting is balancing it with these particular settings in mind because the creature is going to raise up before eight minutes is up. As long as you are paying attention you’re not going to have any problem and in just one round one imprint 100.
Related: 10 Best Stats to Level in Ark: Survival Evolved
The Baby Cuddle Grace Period and Baby Cuddle Lose Imprint Quality Speed settings doesn’t really matter, for as long as you have the upper settings in place in 8 to 15 minutes you have a fully grown dino and you’re only going to need to imprint it once.
As a bonus the Baby Imprinting Stat Scale Multiplier setting is going to be how much of a boost to your stats you get from imprinting. You can always raise that up a little bit or get crazy with it if you want.
 7")
 7")
For Taming settings you need to go into the General tab and change the Taming Speed to 10. Doing so will let you tame high-level herbivores with ten or so berries and high-level carnivores with just a couple of pieces of prime meat. Another setting for taming is Dino Character Food Drain: Keep it at 2.0. This is important for Taming because you would want dinos to get hungrier faster and the more you feed them the faster they get tamed.
These are the best settings you can opt for in a single-player Ark session. These settings are designed to minimize the hassle of the grind and keep things fast-paced and interesting. You can tweak some of the settings to your preference while the rest are tried and tested settings that will provide the best solo experience in Ark.