
Harrower Dervla is two Colossal Bosses packed in one, with her second phase, Unbroken Promise counting as a new boss. This boss is optional if you want but is necessary to overcome if you are going for the Umbral Ending. If you are aware of any knight-type bosses in souls-like then there is nothing that will surprise you in the boss fight.
In this article, we will go over what the boss’s moves are and some tips and tricks on how to defeat him.
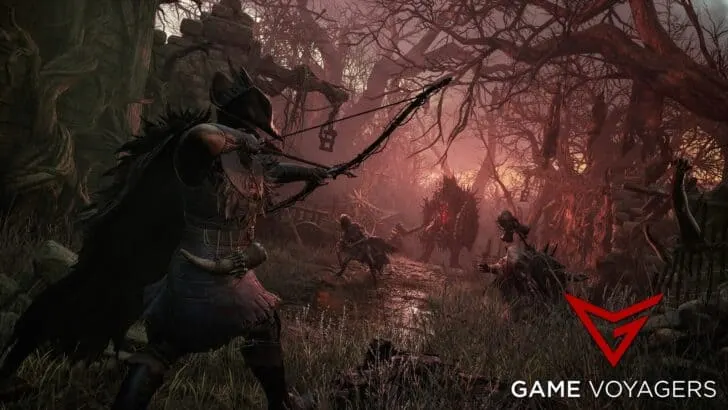
Fighting Harrower Dervla and Unbroken Promise


The battle against Harrower Dervla is essentially two boss fights in one. You must first finish off Dervla and then take on her second phase Unbroken Promise. Only then will you be rewarded. Both of these bosses have separate health bars.
The fight against Harrower Dervla and Unbroken Promise in Lords of the Fallen can be made easy if you prepare for it and know the following:
- Her attacks deal magic damage so bring Magic Wards with you to dampen them.
- Any ranged weapon or spell works great for this fight. You can stand at the far edges of the arena and hurl your preferred mode of attack.
- Use the pillars in the arena to protect yourself from the arrows.
- You can summon Pieta or Kukajin to fight alongside you. Pieta is better for her healing capabilities and Holy spells and damage.
- Her purple attacks deal significant Wither damage even if you block them. For this reason, parrying is recommended. You can also wear Wither-resistant armor, and carry items that protect you against Wither damage.
- Both the phases’ sword attacks are susceptible to parry, so capitalize on this. The following Grievous Attack will finish the fight before you know it.
Harrower Dervla


Dervla is a typical knight boss with a giant sword that she likes to thrash you with. Her attacks are highly telegraphed and are easily blockable and parried, leaving her open to a devastating Grievous Attack. Her crossbows also come out occasionally during this phase.
When her health reaches the 50% mark, her sword will start to glow purple, dealing more damage, and the crossbow gets a boost too. The arrows from the bow cause explosions when they land on the ground.
The shackled girl at the altar also sends out projectiles that move slowly towards you. These projectiles can be heard a mile away hence easier to dodge.
Her attacks have longer recovery times so take each opportunity to get up to her and punish.
Moveset
Here are all of Harrower Dervla’s attacks and the right way of maneuvering them:
- Sword Swing: A simple single sword attack.
- Reaction: Parry this attack or just block it if you are not confident at parrying.
- Lunge: Lunges at you from a distance with a melee attack.
- Reaction: The ideal reaction is parry or just block. You can also dodge to the sides.
- Overhead Strike: She holds her sword up and plummets it towards you.
- Reaction: Parry, block, or dodge to the sides.
- Crossbow Shot: Shoots out an arrow when you are at range.
- Reaction: Side dodge.
- Double Shot: Shoots the crossbow twice in a row.
- Reaction: Keep dodging to the sides until she stops firing.
- Arrow Cone: Fires 5 arrows in a single shot in a cone pattern.
- Reaction: Try to position yourself between the safe passage of two arrows.
- Leap Shot: She quickly jumps up and fires multiple arrows on the ground where you stand. When she is in purple mode, these arrows will explode after some delay.
- Reaction: Roll out of the area where they land.
- Combo: Fires the crossbow and follows it up with a melee attack.
- Reaction: Every time she shoots a single arrow, there is a chance for the melee strike. Always be prepared for this attack throughout the fight. Block or dodge into the attack to close in on her and counterattack.
- Shackled Girl Projectiles: The altar at the end of the arena will throw a couple of projectiles at you.
- Reaction: These projectiles are slow and have a distinct sound. Move out of the way when you hear them getting close.
Unbroken Promise


After you deal with Dervla, a cutscene will play where the tiny girl merges with Dervla’s body to bring forth the second phase/boss, Unbroken Promise.
This boss will use Dervla’s giant sword for its attacks while also using its other empty hand to slash at you. The sword attacks also send out waves that deal Wither damage. Most of these attacks are easy to parry. She won’t use the crossbow in this phase.
Around the 30 to 50% HP mark, she summons two giant nails in the seconds phase that hover next to her. These nails will occasionally float above you, trying to smash you. The nails also perform an AOE barrier around the boss.
When she becomes stationary, with the nail barrier spinning around her, she will try to heal. This is the right time to throw everything you got at her. Don’t allow her to heal. You can either dodge through the barrier and lay into her with melee attacks or start lobbing spells/ranged attacks at her.
Moveset
Here are all of Unbroken Promise’s attacks and the right way of maneuvering them:
Phase 1:
- Melee Attacks: She has a couple of melee sword attacks that send out a wave of magic.
- Reaction: Stay close to her to avoid the projectile. You should block or even parry these attacks to build up stagger.
- Sword Thrust AOE: Thrusts the sword into the ground with an explosion at the end after a delay.
- Reaction: Move out of the radius quickly. The attack and blast can be blocked but deals unnecessary Wither damage.
- Claw Smash: Uses her claw to smash you into the ground.
- Reaction: This attack can lay you flat on the ground so dodge away at all cost.
- Slash: She uses her claw to swipe at you. This attack can come out after every attack so be careful.
- Reaction: Can be parried or blocked. The delivery is fast so dodge away will protect you in most instances.
Phase 2:
- Slash Wave: Fires off a wave after a sword slash.
- Reaction: Dodge to the side of the waves to ignore it. Block or parry if you are in the sword’s range.
- Floating Nails: The giant nails will stay suspended on top of you and strike down multiple times.
- Reaction: Keep running until this attack expires and the nails retreat to the boss.
- Nail Strikes: Sends out the nails to attack you from range multiple times.
- Reaction: Run to the sides or dodge at the right time to avoid these strikes.
- Orbiting Nails: The nails will spin around the boss for a few seconds, hurting anyone who steps in their path.
- Reaction: Move out of the nail orbit ASAP.
- Nail Projectile: Sends a single nail towards you. The nail will explode after a delay.
- Reaction: Dodge to the side and wait for the explosion to end. Take this time to move into the boss and deal damage.
- Nail Burrow: The nails dig into the arena’s floor and burst out towards you.
- Reaction: Track the nails’ movement and dodge when they are about to launch at you.
Rewards
Here are all the rewards for defeating Harrower Dervla in Lords of the Fallen. Do keep in mind that you need to defeat Unbroken Promise before you get the goodies. Just defeating Harrower Dervla won’t give you anything:
- x1 Vestige Seed
- x8 Umbral Scouring
- x1 Harrower Dervla’s Rosary
- x1 Dark Crusader’s Call
- x1 Ammunition Satchel
Revisit the boss location and Soulflay the Stigma left behind to get your hands on the Remembrance of the Unbroken Promise and 2 Umbral Scouring. Take the Remembrance to Molhu to unlock these items in his shop:
- Harrower Dervla’s Sword
- Harrower Dervla’s Crossbow
- Harrower Gauntlets
- Harrower Armour
- Harrower Helm
- Harrower Leggings
- Martyr’s Shackles
- Martyrdom
- Barrage of Echoes
Harrower Dervla and Unbroken Promise are relatively easier bosses in Lords of the Fallen due to their incredibly telegraphed attacks. You will have her attacks down within a few deaths and then it’s smooth sailing.