
By etching Caryll runes into their minds, hunters can attain wondrous strength. For the player, it means the difference between a face roll boss fight or a blood-curdling nightmare.
Before using Caryll runes in Bloodborne, you must obtain the rune workshop tool. Once you do, return to the Hunter’s Dream, and bring it to the memory altar by Gehrman. Interact with the altar, and you will be able to equip up to three memory runes and a Covenant rune, provided you have them in your inventory.
How to Get the Rune Workshop Tool in Bloodborne


You find the tool you need to use runes in Bloodborne by Hemwick Charnel Lane. You must go through the area until you reach the fight with the Witches of Hemwick. The fight is one of the easiest in the game, so you shouldn’t have trouble defeating them.
Once defeated, you can find the tool in the Witch’s Abode, which is in a room accessible by taking the staircase near the lamp that spawned after slaying the boss.
What Should I Spend Insight On In Bloodborne?
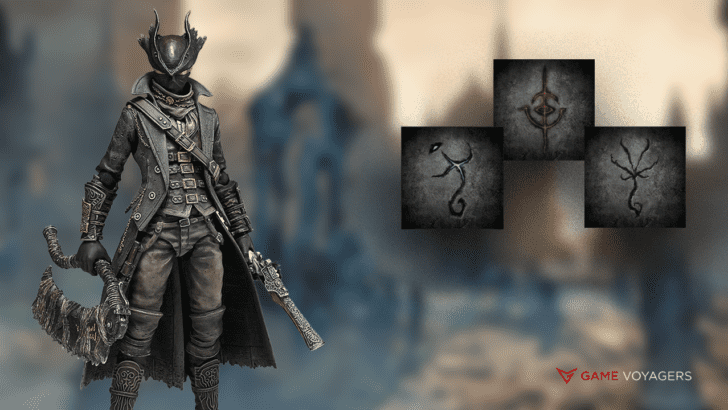
All Caryll Runes and Their Locations
Below are all the Caryll Runes in Bloodborne, their effects, locations, and the builds/scenarios that benefit most from each Rune.
Anti-Clockwise Metamorphosis


- Variations and Effects:
- Tier 1: Boosts Max Stamina +10%
- Tier 2: Boosts Max Stamina +15%
- Tier 3: Boosts Max Stamina +20%
- Locations:
- Tier 1 is found on a corpse behind two celestial mobs in the Forbidden Woods.
Build or Use Case:
This rune is utilized by builds that rely on heavy weapons. Heavy weapons consume higher stamina hence the more stamina you have the easier will it be to dodge incoming attacks or perform more attacks.
Arcane Lake


- Variations and Effects:
- Tier 1: Arcane DMG Reduction +5%
- Tier 2: Arcane DMG Reduction +7%
- Tier 3: Arcane DMG Reduction +10%
- Locations:
- Tier 1 is found on a corpse in Yahar’gul, Unseen Village near the skeleton slug shooters, behind one of the burning corpses on the left wall leading down to the boss area.
Build or Use Case:
Defensive builds. You can take way more punishment from arcane/magic attacks. Useful only against enemies who have more arcane-based attacks.
Beast


- Variations and Effects:
- Tier 1: Temp. boost to transform +20
- Tier 2: Temp. boost to transform +50
- Tier 3: Temp. boost to transform +100
- Locations:
- Tier 1 is dropped by a creature (a weaker variety of Beast-possessed Soul) at the bottom of the Healing Church Workshop tower.
Build or Use Case:
Beasthood Builds. If your build relies on beasthood to dish out more damage then having this rune on you will give you a headstart on filling the meter.
Blood Rapture


- Variations and Effects:
- Tier 1: Visceral ATKs restore HP +200
- Tier 2: Visceral ATKs restore HP +250
- Tier 3: Visceral ATKs restore HP +300
- Locations:
- Tier 1 is dropped by the Shadow of Yharnam boss.
Build or Use Case:
Infinite Ammo builds. You can keep restoring health and using the extra HP to restore Quicksilver bullets.
Visceral Attack builds. If your build is centered around utilizing the Visceral attack then equip this rune to get some health out of the action as well.
Clawmark


- Variations and Effects:
- Tier 1: Strengthens Visceral attack ATK +10%
- Tier 2: Strengthens Visceral attack ATK +20%
- Tier 3: Strengthens Visceral attack ATK +30%
- Locations:
- Tier 1 is dropped by the Beast Claw NPC in Nightmare Yahar’Gul, Unseen Village after killing Rom, the Vacuous Spider.
Build or Use Case:
Visceral Attack builds. Add more damage to the focal point of these builds. You will be taking out enemies easily with this rune equipped with this particular style of build.
Are You Supposed To Die At The Beginning Of Bloodborne?
Clear Deep Sea


- Variations and Effects:
- Tier 1: Add Slow Poison resistance RES +100
- Tier 2: Add Slow Poison resistance RES +200
- Tier 3: Add Slow Poison resistance RES +300
- Locations:
- Tier 1 is found in Forbidden Woods behind the giant tombstone near the snakeheads.
Build or Use Case:
Utilize this rune when you are going up against a slow poison-dealing enemy/boss or areas where the ground is covered in this kind of poison. It will help you survive this infliction.
Clockwise Metamorphosis


- Variations and Effects:
- Tier 1: Boosts Max HP +5%
- Tier 2: Boosts Max HP +10%
- Tier 3: Boosts Max HP +15%
- Locations:
- Tier 1 is found in Forbidden Woods.
Build or Use Case:
Tank or Survivability builds. Having more HP will ensure you withstand more punishment.
Communion


- Variations and Effects:
- Tier 1: Max vials held UP +1
- Tier 2: Max vials held UP +2
- Tier 3: Max vials held UP +3
- Tier 4: Max vials held UP +4
- Tier 5: Max vials held UP +5
- Locations:
- Tier 1 is found in Cathedral Ward; in a chest directly through the door on your right. This door only opens after you have killed the Blood-starved Beast.
Build or Use Case:
Healing builds. Since you can carry more Blood vials, you can heal more regularly without the worry of running out.
Ammo builds. With more healing by your side, you use the temporary bullet mechanic to replenish bullets.
Deep Sea


- Variations and Effects:
- Tier 1: Add Frenzy resistance RES +100
- Tier 2: Add Frenzy resistance RES +200
- Tier 3: Add Frenzy resistance RES +300
- Locations:
- Tier 1 is found in Lower Hintertomb Root Chalice – Chalice Glyph: kfwgav9g (Layer 3), Treasure in, bonus area before layer boss.
Build or Use Case:
Useful against enemies that induce frenzy. Looking at those pesky Winter Lanterns will be made easier.
Dissipating Lake


- Variations and Effects:
- Tier 1: Bolt DMG Reduction +5%
- Tier 2: Bolt DMG Reduction +7%
- Tier 3: Bolt DMG Reduction +10%
- Locations:
- Tier 1 is found in Forbidden Woods, in a creek under some huge entangled roots near a pig. At the bottom of the final elevator shortcut, go down the path of stairs and take a left turn at the sparkling pond, then follow the creek.
Build or Use Case:
Useful against bosses and enemies that deal bolt or electrical damage. Bolt-specific defensive builds.
Eye


- Variations and Effects:
- Tier 1: More items from fallen enemies (Item Discovery +50)
- Tier 2: More items from fallen enemies (Item Discovery +70)
- Tier 3: More items from fallen enemies (Item Discovery +100)
- Locations:
- Tier 1 is obtained in Nightmare of Mensis. Spawn at the first lamp and go directly northeast past the yetis and you will find it on a corpse next to the Mergo’s Loft: Base Lamp. You can also spawn at the Mergo’s Loft: Base Lamp if you have it unlocked and run back towards the yetis and pick it up.
Build or Use Case:
If you want to get more items to drop from dead enemies then equip this rune. If you are looking for a particular item that randomly drops from specific enemies then this will increase your chances. Blood Vial farming can also be made easy with this one.
Fading Lake


- Variations and Effects:
- Tier 1: Fire DMG Reduction +5%
- Tier 2: Fire DMG Reduction +7%
- Tier 3: Fire DMG Reduction +10%
- Locations:
- Tier 1 is found in Nightmare Frontier, slightly past where Chime Maiden is, after climbing a narrow cliff.
Build or Use Case:
Useful against bosses and enemies that deal fire damage. Fire-specific defensive builds.
Is Bloodborne or Dark Souls Harder? 9 Reasons
Formless Oedon


- Variations and Effects:
- Tier 1: Max QuickSilver bullets held UP +1
- Tier 2: Max QuickSilver bullets held UP +2
- Tier 3: Max QuickSilver bullets held UP +3
- Tier 4: Max QuickSilver bullets held UP +4
- Tier 5: Max QuickSilver bullets held UP +5
- Locations:
- Unlock Iosefka’s Clinic as a safe haven and send the young Yharnam girl there. Enter the clinic through the back entrance via the Forbidden Woods and one of the Celestial Mobs will drop this rune.
Build or Use Case:
Infinite Ammo builds. The more ammo you have the more you will be able to use your guns or spells.
Arcane/Magic builds. Having more bullets will allow you to use expensive arcane/magic spells without the worry of running out.
Great Deep Sea


- Variations and Effects:
- Tier 1: Add all types of resistance RES +50
- Tier 2: Add all types of resistance RES +100
- Tier 3: Add all types of resistance RES +150
- Locations:
- Tier 1 is found randomly in Lower Hintertomb Root Chalice
- Tier 2 is found in Nightmare Frontier, the poison swamp before the boss door.
Build or Use Case:
This rune will increase all resistances so it is more in line with defensive builds but use it in situations where you have to face some resistance-based element like poisons or frenzy.
Great Lake


- Variations and Effects:
- Tier 1: All DMG reduction +3%
- Tier 2: All DMG reduction +4%
- Tier 3: All DMG reduction +5%
- Locations:
- Tier 1 is found randomly in Lower Hintertomb Root Chalice
- Tier 2 is found in Upper Cathedral Ward, take a right turn at the top of the stairs above the Lamp.
Build or Use Case:
Defensive builds. All types of incoming damage will be reduced hence use it in general combat situations where you are either not sure what enemies you will face or several enemies of different damage types.
Guidance


- Variations and Effects:
- Tier 1: Rally Potential +10%
- Tier 2: Rally Potential +20%
- Tier 3: Rally Potential +30%
- Locations:
- Tier 1 is dropped by Carrion Crow on the top floors of the Research Hall.
Build or Use Case:
Healing builds. More health will be recovered to the orange HP bar right after you are hit. Only recommended for aggressive players though.
Heir


- Variations and Effects:
- Tier 1: More Blood Echoes gained from Visceral ATKs (+20%)
- Tier 2: More Blood Echoes gained from Visceral ATKs (+40%)
- Tier 3: More Blood Echoes gained from Visceral ATKs (+60%)
- Locations:
- Tier 1 is acquired through the encounter with Henryk and Eileen the Crow in the Tomb of Oedon. Defeat Henryk together with Eileen the Crow and receive the rune. If Eileen the Crow dies during the encounter you need to defeat the hunter to receive the rune.
Build or Use Case:
Blood Echo Farming Builds. Use one or stack multiple tiers of this rune to accumulate tons of Blood Echo for all your leveling-up needs or buy anything from the shops. A good farming spot and these runes can generate ridiculous amounts of this currency.
Visceral Attack Builds. You can equip this rune to your visceral attack build to make some money when executing this devastating attack.
Lake


- Variations and Effects:
- Tier 1: Physical DMG reduction +3%
- Tier 2: Physical DMG reduction +5%
- Tier 3: Physical DMG reduction +7%
- Locations:
- From the lamp at Hemwick Charnel Lane you need to go straight until you reach an iron door use the path on the right to reach the other side of the door. Then go straight again until you reach the end of the path and you see some kind of ocean. There will be a corpse on a small ledge with the Lake rune. You will find the Tier 1 rune here.
Build or Use Case:
Defensive Builds. This rune will allow you to take lesser physical damage. You can survive many encounters with hard-hitting enemies in Yharnam. Perfect for all your tanky needs.
Moon


- Variations and Effects:
- Tier 1: More echoes from slain enemies (+10%)
- Tier 2: More echoes from slain enemies (+20%)
- Tier 3: More echoes from slain enemies (+30%)
- Locations:
- Tier 1 is found in Hypogean Gaol between 2 of the Snatchers near your lantern.
Build or Use Case:
Blood Echo Farming Builds. All defeated enemies will reward you with more blood echoes with this rune on. Utilize it to fill your bank.
Oedon Writhe


- Variations and Effects:
- Tier 1: Visceral ATKs grant QuickSilver bullets +1
- Tier 2: Visceral ATKs grant QuickSilver bullets +2
- Tier 3: Visceral ATKs grant QuickSilver bullets +3
- Locations:
- Tier 1 is obtained by killing Adella the Nun at Hypogean Gaol or sending her to Oedon’s Chapel and killing her there.
Build or Use Case:
Infinite Ammo Builds. If you keep running out of bullets while playing then this rune can replenish them on the fly. Perfect for builds that prioritize gun usage or use arcane spells.
Stunning Deep Sea


- Variations and Effects:
- Tier 1: Add Rapid Poison resistance RES +100
- Tier 2: Add Rapid Poison resistance RES +200
- Tier 3: Add Rapid Poison resistance RES +300
- Locations:
- Tier 1 is found in the Lower Hintertomb Root Chalice dungeon. Glyph: qmu2iuhk (layer 1 loot room directly before the boss) First bonus room.
Build or Use Case:
Utilize this rune when you are going up against a rapid poison-dealing enemy/boss or areas where the ground is covered in this kind of poison. It will help you survive this infliction.
How To Put Down A Summon Sign In Bloodborne?
Corruption (Covenant Rune)


- Effects:
- Continuous healing near death +1 (i.e. lower than 12.5% HP)
- Locations:
- Found in the secret area after killing Martyr Logarius at Cainhurst Castle. Wear the Crown of Illusions near the throne to gain access to the hidden room.
Build or Use Case:
Used to join the Cainhurst Vilebloods Covenant. It is more useful for its clan purposes, but the effect on the other hand is not that worthwhile.
Hunter (Covenant Rune)


- Effects:
- Increases stamina recovery speed by 10%
- Locations:
- Earned by completing the Eileen the Crow questline.
Build or Use Case:
Used to join the Hunter Covenant. An all-around perfect rune for any build. The stamina recovery boost can be beneficial for pulling off more attacks with little delay or defensively for quick evading.
Impurity (Covenant Rune)


- Effects:
- Increases max health by 2% while in co-op
- Locations:
- Join The League via its leader Valtr in Forbidden Woods. In the hut to the right of the first lamp, that acts as a shortcut.
Build or Use Case:
Used to join The League Faction. If you are into PvE and Co-op then this rune can provide a helpful boost to your health. Great since your health is lowered when you are summoned in other players’ worlds.
Milkweed (Covenant Rune)


- Effects:
- Slight increase in Item Discovery
- Transforms character into a celestial Kin type of creature
- Locations:
- Received from Saint Adeline in the Research Hall after finishing her quest line.
Build or Use Case:
Used to join the Lumenwood Kin Covenant. On top of the extra items you can get, this rune with the Kos Parasite weapon will completely transform your character into a hideous mushroom head monster. It will add new/unique attacks to the weapon and change other animations as well. Gimmicky but cool.
Beast’s Embrace (Covenant Rune)


- Effects:
- Transforms character into a ghastly Beast type of creature
- Locations:
- Rewarded after defeating Laurence, The First Vicar.
Build or Use Case:
It transforms the player into The Ghastly Beast. Perfect if your build utilizes the beasthood mechanic in the game. Use it in tandem with the Beast Claw weapon and you will become a vicious werewolf. It will add attacks and animations to the weapon and the way your character moves.
Radiance (Covenant Rune)


- Effects:
- Increases HP recovery from Blood Vials.
- Locations:
- If you revisit the statue in Cathedral Ward, outside the entrance to Old Yharnam where you first meet Alfred (after he has killed Annalise), you’ll find his inexplicably dead body with the rune. This rune can also be attained by killing Alfred after he has killed Annalise
Build or Use Case:
Used to join the Executioners Covenant. Adds more healing power to each Blood Vial. Perfect for any kind of character.
Can You Unequip Runes in Bloodborne


If you’ve equipped a rune in Bloodborne and later decided you didn’t want the gifts it bestowed upon you, then you have the option of unequipping it. The process is incredibly simple. Return to the memory altar in the Hunter’s Dream (the same one you equipped the rune at). Interact with it, and click on the rune in its equipped slot.
The rune will be taken off, and you can equip another one in its place. So now return to the hunt, good hunter, blessed with the knowledge of how to use Caryll runes in Bloodborne.