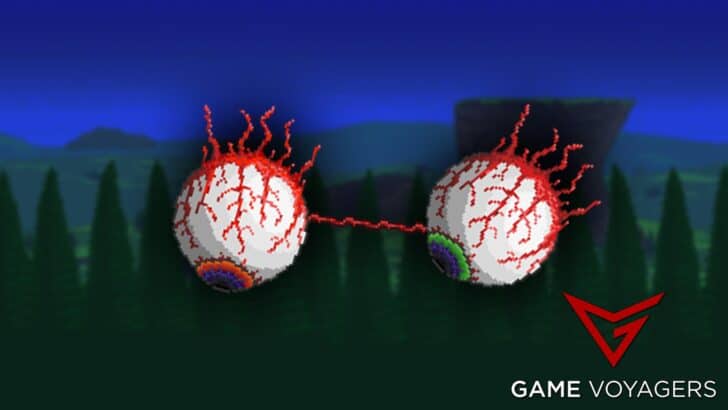

The Twins are one of the three mechanical hardmode bosses in Terraria. They are essentially an advanced form of the Eye of Cthulhu. In this article, we will cover in much detail what facing this boss is like and what you should do to prepare for the fight. So get ready for the ultimate guide to beating The Twins in Terraria.
The Twins in Terraria is a relentless pair of bosses. Not only are they two separate entities, but they both also have second phases that considerably increase the challenge of the fight. The boss can be summoned using a Mechanical Eye item only during the night or by destroying the Demon or Crimson Altar.
This detailed guide is going to tell you about the best strategies and character builds for swiftly defeating The Twins in Terraria.
How to Spawn The Twins?
 1")
 1")
In Terraria, the Twins can be summoned manually during the night (i.e. 7:30 PM to 4:30 AM) by using a Mechanical Eye. Additionally, there is a 10% chance for them to spawn naturally at dusk after destroying a Demon or Crimson Altar, but only if they haven’t been defeated in the current world before.
In a Hardmode world where the Twins remain undefeated, there is a 0.04% chance for all enemies to drop a Mechanical Eye item. However, this does not apply to enemies spawned from statues, Meteor Heads, or enemies from the Old One’s Army event.
On the flip side, the Mechanical Eye can be crafted manually using 3 Lens, 5 Any Iron Bars, and 6 Soul of Light. You need to craft it at a Mythril or Orichalcum Anvil crafting station.
The Mechanical Eye can only be used at night. Using this item during the day will not spawn The Twins nor consume it.
The Twins must be killed before dawn, otherwise, they flee and despawn.
How to Defeat The Twins?
Defeating The Twins in Terraria boils down to the class you are using. Some classes will find it harder to beat this boss while for others it will be a breeze. We will go over which weapons best suit the class when fighting the boss.
Melee Class Strategy
The Shadowflame Knife exhibits rapid firing speed and high damage output per dagger. It possesses the unique ability to inflict Shadowflame, a debuff that deals 15 damage per second, surpassing all other available debuffs. If aimed skillfully, it can strike both eyes simultaneously.
For those equipped with a Yoyo Bag, the Amarok Yoyos prove to be quite useful. Once a mechanical boss has been vanquished, the Yelets combined with the Yoyo Bag becomes a remarkably potent choice.
While the Bananarang may pose a challenge to acquire, its performance is outstanding. As an alternative, if The Destroyer has already been conquered, Light Discs can serve as a viable option.
The Ice Sickle can also be utilized effectively. Since Spazmatism often positions itself behind the player, continuously shooting the piercing projectile in the opposite direction will strike it multiple times, resulting in significant damage.
Should Duke Fishron have been defeated, employing the Flairon in battle renders the fight trivial.
For an overall boost to all statistics, the Adamantite armor stands as the most advantageous choice. Melee users can enhance their damage output and defense without sacrificing any vital attributes by substituting the Frost Breastplate.
Palladium armor offers lower stat bonuses, yet the Rapid Healing buff it provides significantly boosts natural regeneration.
Ranged Class Strategy
For players who have yet to defeat a mechanical boss, the Adamantite or Titanium Repeaters paired with Holy Arrows or Ichor Arrows are excellent choices. Once a mechanical boss has been vanquished, the Hallowed Repeater or Phantom Phoenix are recommended options.
Guns such as the Megashark, Uzi, Gatligator, and Clockwork Assault Rifle can prove highly effective when coupled with Ichor, Crystal, or Cursed Bullets.
It’s wise to keep an Endless Musket Pouch and Endless Quiver on hand to ensure a backup supply of ammunition in case special arrows run out.
The Daedalus Stormbow is an exceptional bow, particularly when combined with Holy Arrows. It becomes even more potent with the addition of a Magic Quiver and its upgrades, allowing players to swiftly defeat any of The Twins.
The Sharanga, when used with Wooden Arrows, proves to be incredibly useful as it transforms them into Spectral Arrows.
The Dart Rifle/Dart Pistol with Crystal Darts or Ichor Darts is a highly effective weapon, especially the former, which can hit both Twins simultaneously.
The Onyx Blaster paired with Exploding Bullets forms a formidable combination, dealing over 250 damage per hit.
If Duke Fishron has already been conquered, employing the Tsunami makes the fight considerably easier.
Orichalcum armor boasts an impressively high critical strike chance, and its set bonus allows for hitting both eyes simultaneously. As an alternative to Hardmode ore sets, the Crystal Assassin armor offers respectable defense and stat boosts, making it a viable choice.
Mage Class Strategy
 2")
 2")
The Crystal Serpent stands as one of the most potent weapons available to mages in the early stages of Hardmode. The Crystal Storm and Sky Fracture also prove to be exceptionally powerful options.
If at least one other mechanical boss has been vanquished, the left-click attack of the Tome of Infinite Wisdom deals significant damage. Once a mechanical boss has been defeated, the Unholy Trident becomes a formidable choice, particularly when aimed accurately.
The Spirit Flame’s homing capabilities and high damage output enable users to consistently deal damage. Despite its limited range, the Shadowflame Hex Doll can also be quite strong. The Nimbus Rod’s rainclouds persist for 1 minute, adding additional DPS.
The Golden Shower inflicts the Ichor debuff, reducing the defense of The Twins. It can serve as a substitute for Ichor Bullets, Ichor Arrows, and Flask of Ichor for other classes, allowing them to utilize more potent ammunition or flasks. However, this requires the player to continuously reapply the debuff.
If Duke Fishron has already been bested, employing the Razorblade Typhoon brings the fight to a swift conclusion. The Bubble Gun, another drop from Duke Fishron, can easily defeat Spazmatism but struggles against Retinazer.
Hallowed armor becomes an excellent choice for those who have defeated a mechanical boss. The Holy Protection buff enables players to dodge incoming attacks. Alternatively, Titanium armor offers a defensive option to the Adamantite Armor, with the Titanium Barrier/Shadow Dodge buff greatly enhancing survivability.
Summoner Class Strategy
The Sanguine Staff proves to be a decent choice, thanks to its impeccable tracking and high base damage. However, the Blade Staff can surpass it significantly, especially with whips that deal summon tag damage.
In the absence of an arena, the Spider Staff is not an optimal choice for this fight, as the spiders may struggle to reach the Twins. However, by creating an arena filled with walls, the spiders can latch onto the Twins while they change forms, inflicting substantial damage in the hundreds.
The Firecracker enhances the damage output of minions, particularly those with high base damage like the Sanguine Staff. On the other hand, the Cool Whip works better in conjunction with the Blade Staff due to its tag damage. The Jungle Fury buff from the Snapthorn increases whip speed, resulting in additional DPS.
If a mechanical boss has already been defeated, the Durendal serves as a powerful choice, especially when combined with other whips, making it a potent weapon. Similarly, the Ballista Cane becomes a formidable choice when facing the Twins.
The Queen Spider Staff sentry provides extra DPS without contributing to the minion count.
For summoners who do not frequently use whips, the Spider armor stands as the best choice. Alternatively, Obsidian Armor offers strong bonuses and high minion damage, with increased whip range and speed that can potentially surpass the Spider Armor in performance.
Other Strategies
 3")
 3")
Wrecking Retinazer:
To execute this strategy, begin by focusing on defeating Spazmatism before turning your attention to Retinazer. Once Spazmatism is defeated, transition Retinazer into its second form. Proceed by entering a small box made of solid blocks, ensuring it is small in size.
Within this confined space, use Summons (preferably while wearing summon armor), the Meteor Staff, or the Daedalus Stormbow (preferably enhanced with Holy Arrows and accompanied by the Magic Quiver or its upgrades) to swiftly eliminate Retinazer. Rest assured, as Retinazer does not charge in its second form and its laser attacks cannot penetrate blocks, you will be completely protected within your shelter, free from harm.
Unicorn Strategy:
A useful tactic involves creating a Skybridge and utilizing a Blessed Apple along with a yoyo (preferably equipped with a Yoyo Bag) or a long-range weapon.
By running with the Unicorn mount and casting the yoyo behind you, significant damage can be dealt while minimizing the risk of getting hit, as the Unicorn boasts a slightly higher speed.
However, it’s important to exercise caution, as employing this strategy may result in The Twins despawning if you run away too quickly.
Minecart Strategy:
An advantageous strategy applicable to all classes involves utilizing a minecart track that extends over a significant distance. To ensure flexibility on shorter tracks, both ends can be hammered, allowing the minecart to travel in both directions without sacrificing speed.
By taking advantage of the minecart’s superior speed compared to The Twins, players can use long-range weapons such as a Repeater or a Yoyo (equipped with a Yoyo Bag) to inflict damage from a relatively safe distance.
It is important to note, however, that excessive speed while utilizing this strategy may result in The Twins despawning, so caution should be exercised accordingly.
Sentry Farming:
Upon acquiring the Tier 2 equipment sold by the Tavernkeep, defeating The Twins becomes notably easier. Optimal results can be achieved by donning the Squire armor and utilizing the Ballista Cane. The armor provides high defense and health regeneration, while the Ballista Panic! buff doubles the firing rate.
When constructing your arena, prioritize the use of platforms to maximize the firing opportunities for your Ballistas. Ensure that Heart Lanterns and Campfires are set up to maximize health regeneration. Equipping a reliable pair of Wings, the Cobalt Shield or its upgrades, and either the Lightning Boots, Frostspark Boots, or Terraspark Boots is recommended for superior mobility. The inclusion of a Summoner Emblem will significantly expedite the fight. Keep a few Greater Healing Potions on hand for healing in tight situations.
Once the Twins are summoned, adopt a kiting strategy around your Ballistas, periodically enduring damage, preferably from Retinazer’s laser to minimize its impact. With the best possible Modifiers on your gear and all relevant buffs active, the Twins will succumb within two to three minutes.
If you find yourself sustaining excessive damage and requiring more frequent healing, consider swapping out the Summoner Emblem for a Charm of Myths to increase healing frequency.
Slimy Saddle Strategy:
Executing a strategy where The Twins are kept close to the ground and repeatedly bounced upon using a Slimy Saddle proves highly effective. This approach can be enhanced further by combining it with the Meteor Staff, which allows you to summon meteors to rain down upon the eye you are currently bouncing on.
What are the Difficulty Differences?
 4")
 4")
These are two separate bosses with different stats depending on the difficulty and the phase it is in. These differences are as follows:
Classic Mode
In Classic Mode The Twins in Terraria has the following stats:
| Stats | Retinazer First Phase | Retinazer Second Phase | Spazmatism First Phase | Spazmatism Second Phase |
|---|---|---|---|---|
| Damage | 40-45 | 36-67 | 50 | 60-75 |
| HP | 20000 | 20000 | 23000 | 23000 |
| Defense | 10 | 20 | 10 | 28 |
| Knockback Resistance | 100% | 100% | 100% | 100% |
| Immunity | Poisoned Confused | Poisoned Confused | Poisoned Confused | Poisoned Confused |
| Debuff | – | – | Cursed Inferno (69% chance to inflict for 2-3 secs) | Cursed Inferno (69% chance to inflict for 2-3 secs) |
There are two eyes (bosses) in this fight and each eye has two distinct phases once their health is lowered to a certain point.
First phase:
Retinazer, the eyeball with the red iris, unleashes purple Eye Lasers that travel at high speed. It typically positions itself diagonally above the player, attempting to maintain this aerial advantage.
Spazmatism, the eyeball with the green iris, fires medium-velocity balls of Cursed Flame. These projectiles have a 68.75% chance of inflicting the Cursed Inferno debuff for a duration of 2-3 seconds. Spazmatism usually positions itself horizontally in line with the player, maintaining this parallel alignment.
Both eyes follow a pattern of alternating between their signature ranged attacks and charging attacks, similar to the Eye of Cthulhu. Retinazer charges four times, covering greater distances but with longer intervals between charges.
On the other hand, Spazmatism executes ten charges characterized by short bursts of high velocity, although these cover shorter distances.
Second phase:
When either of the eyes’ health drops below 40%, it undergoes a transformation by spinning and shedding its outer layer, revealing its true mechanical form.
Retinazer transforms into a mechanical eye with a laser cannon protruding from its pupil. It exclusively fires red Death Laser projectiles, abandoning its previous attempts to ram the player or maintain a diagonal alignment. The frequency and damage of its laser shots increase, and it intermittently launches quick barrages of lasers that inflict significantly less damage.
As Retinazer sustains more damage, the intensity and frequency of these barrages escalate, eventually reaching a non-stop onslaught. During barrages, Retinazer aligns horizontally with the player, not unlike Spazmatism in the first phase. When not barraging, Retinazer typically aligns itself vertically with the player.
Spazmatism transforms into a mechanical mouth that relentlessly pursues the player. It alternates between charging at the player six times with enhanced speed and range, and expelling Eye Fire from its mouth in the form of a continuous stream of Cursed Flames while gradually closing in on the player for approximately seven seconds. This fiery stream also carries a 68.75% chance of inflicting the Cursed Inferno debuff for 2-3 seconds. Spazmatism no longer aligns itself horizontally with the player.
Expert Mode
In Expert Mode The Twins in Terraria has the following stats:
| Stats | Retinazer First Phase | Retinazer Second Phase | Spazmatism First Phase | Spazmatism Second Phase |
|---|---|---|---|---|
| Damage | 76 | 68-114 | 85-88 | 108-127 |
| HP | 30000 | 30000 | 34500 | 34500 |
| Defense | 10 | 20 | 10 | 28 |
| Knockback Resistance | 100% | 100% | 100% | 100% |
| Immunity | Poisoned Confused | Poisoned Confused | Poisoned Confused | Poisoned Confused |
| Debuff | – | – | Cursed Inferno (69% chance to inflict for 4-6 secs) | Cursed Inferno (69% chance to inflict for 4-6 secs) |
During Expert Mode, Retinazer’s laser attacks intensify, firing at a faster rate, and its charging attacks cover greater distances as its health diminishes. Spazmatism’s flames become even more formidable, inflicting the Cursed Inferno debuff for twice the usual duration. Additionally, Spazmatism charges at an accelerated speed in its second form, increasing the speed and intensity of its assault.
Everything else stays relatively the same other than higher damage and HP.
Master Mode
In Master Mode The Twins in Terraria has the following stats:
| Stats | Retinazer First Phase | Retinazer Second Phase | Spazmatism First Phase | Spazmatism Second Phase |
|---|---|---|---|---|
| Damage | 114 | 102-171 | 127-132 | 162-190 |
| HP | 38250 | 38250 | 43987 | 43987 |
| Defense | 10 | 20 | 10 | 28 |
| Knockback Resistance | 100% | 100% | 100% | 100% |
| Immunity | Poisoned Confused | Poisoned Confused | Poisoned Confused | Poisoned Confused |
| Debuff | – | – | Cursed Inferno (69% chance to inflict for 5-7.5 secs) | Cursed Inferno (69% chance to inflict for 5-7.5 secs) |
The boss’s behavior stays the same as in Expert Mode although the Cursed Inferno debuffs it inflicts stays active for longer. The overall health and damage numbers are also much higher in this difficulty mode.
Is The Twins Harder Solo or With Friends?
In general, battling The Twins with friends can make the encounter somewhat easier due to the increased firepower and coordination that multiple players bring to the fight. With more players, you can distribute roles and utilize different strategies to take down each eye efficiently.
In a multiplayer scenario, you can assign specific roles, such as a tank to draw aggro, dedicated damage dealers, and supportive players who focus on healing and providing buffs. This division of tasks can greatly enhance your chances of success and make the fight more manageable.
On the other hand, facing The Twins solo requires you to handle both eyes and their attacks by yourself. This can make the battle more challenging as you need to deal with the increased damage output and individual behaviors of both eyes simultaneously. It requires careful positioning, dodging, and managing your resources effectively.
What are the Rewards for Defeating The Twins?
 5")
 5")
The rewards for defeating The Twins in Terraria differ according to the difficulty. The majority of rewards are the same for all difficulties except a few and sometimes the drop rates increase at higher difficulties. We will highlight all these rewards and changes below:
Classic Mode Rewards
| Reward | Quantity | Drop Rate % |
|---|---|---|
| Gold Coins | 12 | 100% |
| Soul of Sight | 25-40 | 100% |
| Hallowed Bar | 15-30 | 100% |
| Horned God Boots (Old gen version only) | 1 | 14.29% |
| Greater Healing Potion | 5-15 | 100% |
| Twin Mask | 1 | 14.29% |
| Retinazer Trophy | 1 | 10% |
| Spazmatism Trophy | 1 | 10% |
Expert Mode Rewards
| Reward | Quantity | Drop Rate % |
|---|---|---|
| Gold Coins | 30 | 100% |
| Treasure Bag | 1 | 100% |
| Mechanical Wheel Piece | 1 | 100% |
| Hallowed Bar | 20-35 | 100% |
| Extra Gold Coin | 12 | 100% |
Master Mode Rewards
| Reward | Quantity | Drop Rate % |
|---|---|---|
| Pair of Eyeballs | 1 | 25% |
| Twins Relic | 1 | 100% |
There you go; this was the ultimate guide to beating The Twins in Terraria. The difficulty you chose and the class you play will greatly impact your experience, and hopefully, our guide will have pointed you in the right direction.