
The Wall of Flesh is the final pre-hardmode boss in Terraria. Defeating it will transition the world to a hardmode with better loot and harder enemy encounter. In this article, we will cover in much detail what facing this boss is like and what you should do to prepare for the fight. So get ready for the ultimate guide to beating Wall of Flesh in Terraria.
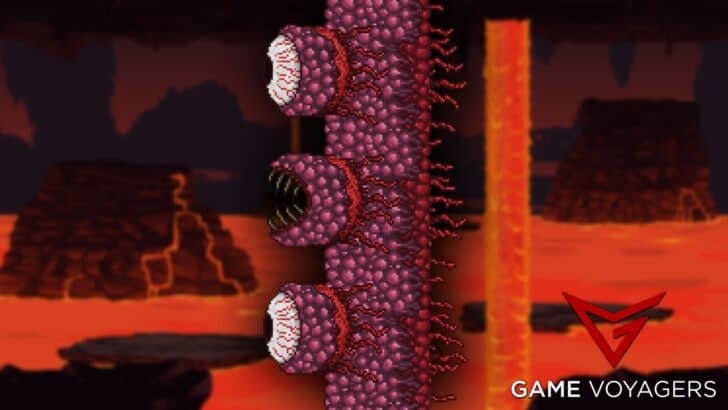
The Wall of Flesh takes up the entire verticality of the screen and relentlessly chases the player. Furthermore, difficulty arises since you have to escape the pursuing boss, all the while dodging any obstacles in the treacherous Underworld level. The boss is summoned by throwing the Guide Voodoo Doll into the lava in the Underworld (the Guide needs to be alive).
This detailed boss guide will teach you some of the best strategies and builds for taking on the Wall of Flesh in Terraria.
How to Spawn Wall of Flesh?
 1")
 1")
When a Guide Voodoo Doll is dropped into the lava in the Underworld, it summons the Wall of Flesh in Terraria 75 blocks away from all visible players. This can only occur if the Guide is alive and killed by the destruction of the doll. If the doll is dropped into lava outside of the Underworld or if the Guide is already dead, no summoning takes place and the Voodoo Doll is simply destroyed without any effect.
In the Desktop, Console, and Mobile versions of the game, an alternative method exists to summon the Wall of Flesh in Terraria. By allowing the Guide to be killed while in contact with lava in the Underworld, regardless of the cause of death (player, enemy, or environment), the Wall of Flesh will be summoned.
Furthermore, in the case of a Mediumcore player who possesses a Guide Voodoo Doll in their inventory and dies in lava in the Underworld while the Guide is alive, the Wall of Flesh is automatically summoned.
How to Defeat Wall of Flesh?
Defeating Wall of Flesh in Terraria boils down to the class you are using. Some classes will find it harder to beat this boss while for others it will be a breeze. We will go over which weapons best suit the class when fighting the boss.
Melee Class Strategy
In the Desktop, Console, and Mobile versions, the Night’s Edge is an excellent choice for the fight against the Wall of Flesh. It possesses additional range and a wide-area attack, making it highly effective. When the eyes and mouth of the Wall are close together, the Night’s Edge can damage all three simultaneously.
For players using the Old-gen console and Nintendo 3DS versions, the Falcon Blade is the most efficient sword for this battle. It has an auto-swing feature and doesn’t cause the player to turn around based on their facing direction.
This allows for smooth and effective attacks. The Falcon Blade’s arc-like swing can harm the Wall of Flesh while keeping the Hungry at bay unless they approach from below.
The Starfury boasts the longest range among pre-Hardmode melee weapons, making it a safe and reliable option for the fight, especially in Master Mode. Its piercing effect allows it to damage both the Wall Mouth and Eyes, as well as the Hungry.
Additionally, Starfury’s projectiles can reach and attack enemies even when off-screen. However, caution should be exercised as its projectiles may become stuck in the ceiling if the area is not adequately cleared.
The Sunfury is a melee weapon that pierces enemies at a medium range, making it highly effective against both the Hungry and the Wall of Flesh. On Desktop, Console, and Mobile versions, it has the added advantage of preventing the Hungry from making contact with the player. However, on higher difficulties, it is possible to be overwhelmed by the Hungry, restricting movement and escape from the Wall.
To maximize bee damage against the Hungry and the Wall of Flesh, the Bee Keeper can be utilized. Its bees not only harm the Hungry but also damage the Wall itself, making it a strategic weapon choice.
While the Dark Lance boasts high DPS compared to other melee weapons at a similar progression point, it is less efficient against the Hungry due to their small hitboxes. However, towards the end of the fight, the Dark Lance can prove to be more effective.
For yo-yo enthusiasts, the Hive-Five is the optimal choice for this battle. The bees released by the yo-yo provide additional damage against the Hungry, aiding in their defeat.
In terms of armor, the Molten Armor offers the highest defense and melee damage bonuses, making it a formidable choice. Crimson Armor provides a noticeable boost to HP regeneration and a slight increase in damage, making it ideal for a more defensive playstyle. Shadow Armor, with its extra melee speed, can also prove to be useful in the fight.
Ranged Class Strategy
 2")
 2")
The Hellwing Bow stands as the most potent bow due to its rapid-fire capability and projectiles that pierce through enemies. It proves advantageous as it only requires Wooden Arrows for its bat projectiles, which are easily obtainable. The Bee’s Knees shares similar properties but falls short in overall strength.
When paired with Jester’s Arrows, the Molten Fury performs exceptionally well, delivering efficient damage output.
For those relying on guns, the Phoenix Blaster takes the crown as the best available option. However, the Minishark remains a viable alternative. Maximizing their effectiveness can be achieved by using Meteor Shots. Another potent gun is the Pew-matic Horn, although it doesn’t benefit from Meteor Shot’s piercing capabilities.
Though ammunition may be challenging to obtain, the Star Cannon proves to be an immensely efficient weapon due to its impressive stats and piercing abilities. It can swiftly annihilate the Wall of Flesh within seconds.
To tackle the Hungry, the Molotov Cocktail can be utilized. The residual fire left behind by the cocktails inflicts additional damage to the Wall. These are recommended for players who may lack accuracy in throwing explosives.
The Beenade is arguably the most effective weapon against the Wall of Flesh. Its consistent and rapid damage affects all parts of the boss, including the Hungry, and can be unleashed from a considerable distance.
Explosives like Grenades can also work effectively, swiftly eliminating the Hungry. Dynamite can be utilized with practice, although the timing is crucial. It’s important to note that most explosive usage of this kind may cause significant environmental damage.
Although expensive, the Holy Hand Grenade presents a formidable option. Its extreme area-of-effect damage can swiftly dispatch the Hungry and strike multiple parts of the Wall.
In terms of armor, the Necro Armor reigns supreme as the optimal choice for Rangers. If a Gi is available, it can replace the Necro Breastplate to gain increased damage and movement speed, sacrificing the Necro set bonus, which has no significant combat effect as it only impacts ammo consumption.
Mage Class Strategy
The Demon Scythe proves to be one of the most formidable weapons against the Wall of Flesh. Its projectiles have the ability to strike the Wall and the Hungries multiple times per hit, resulting in significant damage.
For powerful magical attacks, the Book of Skulls is an excellent choice. It boasts high base damage and can hit a target three times before vanishing, maximizing its effectiveness.
The Water Bolt also stands as an extremely efficient weapon, capable of hitting all three body parts of the Wall with a single cast. By shooting it into the ceiling to create ricochets, its impact is multiplied.
When paired with Meteor armor, the Space Gun becomes an exceptionally efficient combination. It’s rapid-fire capability and piercing effect make it a force to be reckoned with.
The Gray Zapinator is a great option due to its immensely powerful ×10 damage attack. Furthermore, it benefits from the Meteor armor’s set bonus, amplifying its destructive potential.
The Bee Gun excels against the Wall, dealing massive damage while also providing the advantage of eliminating the Hungry without requiring precise aim.
In terms of magic armor, the Jungle Armor and Meteor Armor reign supreme as the strongest options available at this stage of the game. Alternatively, the Wizard set, consisting of a Wizard Hat, offers potent magical abilities, although it provides lower defense with only 4 points.
Summoner Class Strategy
The Vampire Frog Staff and Imp Staff stand as the most potent summoning weapons, thanks to their rapid attack rates. They unleash a flurry of summons, making them ideal for the battle against the Wall of Flesh.
For summoners who wield whips, the Snapthorn or Spinal Tap prove to be the best choices. These whips can not only target and damage the Hungry but also have the ability to redirect summon attacks. It’s crucial to retarget the eyes or mouth of the Wall to focus the summon’s attacks effectively.
Summoners have the option of equipping Bee Armor for an additional minion slot or opting for Obsidian Armor for the beneficial whip buffs. The choice between these armors depends on personal preference and playstyle.
Other Strategies
 3")
 3")
Pressure Plate Pummeling:
To utilize the advantage of being able to jump over Boulders, it is recommended to strategically set up a few at the start of the run.
Wire them to a Pressure Plate along the course so that when you step on the pressure plate, the Wall of Flesh will be struck by these Boulders. However, it is crucial to exercise caution as mistiming your jump can prove fatal due to the high damage inflicted by Boulders.
Alternatively, for even greater damage, you can employ explosives such as Dynamite. Similar to the boulder setup, you can utilize these explosives in a similar manner by placing them strategically and triggering their explosion when the Wall of Flesh is in range. This tactic can significantly amplify the damage inflicted on the boss.
Tunnel Strategy:
Construct a tunnel that is 3-7 blocks in height to prevent the Wall of Flesh from utilizing its laser eye attack, as it cannot shoot through solid blocks. To aid in health regeneration, equip a complete set of Crimson armor and strategically place Campfires every 20 blocks along the tunnel. These Campfires will provide health regeneration bonuses.
For offensive capabilities, the Diamond Staff serves as a reliable weapon of choice. However, if multiple players are participating, the Ruby Staff can also be effective. If you plan to face the Wall of Flesh alone, it is recommended to equip either Molten armor or Shadow/Crimson armor for increased survivability and damage output.
Boulder Statues Autofarm Strategy:
An alternative strategy involves creating a self-sustaining farm that can defeat the Wall of Flesh without the player’s direct involvement in the Underworld. This method utilizes Boulder Statues to eliminate the boss repeatedly.
To implement this strategy, begin by constructing a house for the Guide at the Underworld’s edge. Utilize Timers to actuate blocks, causing the Guide to fall into the lava every 20 seconds. Ensure that the actuated blocks have lava beneath them while maintaining a solid floor to prevent the Guide from spawning elsewhere.
Place a Pressure Plate in the lava to detect when the Guide falls into it. Additionally, consider incorporating other traps to expedite the Guide’s demise if they possess high Defense.
Once the Guide’s house is set up, proceed to place Boulder Statues. Since the Wall of Flesh gains speed when damaged, arrange the Boulder Statues with varying spacing: 10 statues with a space of 2 blocks, 5 statues with a space of 4, and 10 statues with a space of 6.
This configuration should defeat the boss consistently in Classic Mode. The Wall of Flesh will be perpetually eliminated, allowing the farm to continue running while you engage in other activities. Collect the drops from the farm at your convenience.
Potions Instead of Bridge:
To eliminate the tedium of building a bridge for the Wall of Flesh in Terraria fight, you can employ a clever strategy utilizing specific potions. By combining Water Walking Potion, Obsidian Skin Potion, and Featherfall Potion, or alternatively using Terraspark Boots, you can traverse the surface of the lava and navigate obstacles effortlessly, rendering the bridge unnecessary.
To implement this approach, it is advisable to commence from the edge of the world. Prior to engaging the Wall of Flesh, it is recommended to conduct a preliminary run without the boss to identify and clear any potential obstructions that may hinder your run.
By utilizing the aforementioned potions or Terraspark Boots, you can confidently walk on top of the lava, utilizing the Featherfall effect to gracefully jump over any obstacles along the way. This method allows you to bypass the bridge-building process entirely and streamline your progression during the Wall of Flesh fight.
What are the Difficulty Differences?
 4")
 4")
The boss has different stats depending on the difficulty and the phase it is in. These differences are as follows:
Classic Mode
In Classic Mode the Wall of Flesh in Terraria has the following stats:
- Damage: 50
- HP: 8000
- Defense: 12
- Knockback Resistance: 100%
- Immune to On Fire!, Hellfire, and Confused
- Consistently inflicts Horrified Debuff when the player is within 900 blocks from the boss.
- Consistently inflicts The Tongue Debuff when the player is within 900 blocks behind the boss.
The Wall of Flesh, an imposing boss, dominates the entire vertical screen upon its arrival. Once summoned, it steadily advances across the map in a single direction, necessitating constant movement from the player throughout the encounter.
In addition to this challenge, players must navigate the usual hazards present in the treacherous Underworld. It is imperative to defeat the Wall of Flesh before it reaches the opposite end of the map, as its despawning would result in the demise of all players in the Underworld.
Upon the Wall of Flesh’s appearance, all players within a range of 900 blocks in the Underworld will suffer the Horrified debuff. This debuff remains active until either the player or the Wall of Flesh perishes.
Should a player succumb to defeat and return to the battle, they will once again be afflicted with the debuff. While under its influence, players are unable to escape the battle.
Attempts to flee by using a Magic/Ice Mirror, Recall Potion, Teleporter, or by venturing far ahead of the Wall and abandoning the area will result in instant death. Exiting the game and re-entering the world allows for escape but causes the Wall of Flesh to despawn.
Any endeavor to leave the Underworld or position oneself behind the Wall of Flesh will incur The Tongue debuff. When triggered, a tendril ensnares the player, rapidly drawing them into the Wall of Flesh’s menacing mouth at speeds reaching 56 mph.
The tendril bypasses obstructions, inflicting significant damage upon the player. While afflicted by this debuff, players are rendered immobile and unable to utilize items.
As the Wall of Flesh’s health diminishes, its movement speed escalates. At critically low health levels, it can reach speeds of up to 17 mph.
The Wall of Flesh features smaller mouths known as The Hungry, connected by elongated veins, which relentlessly pursue and harm players. As the primary body of the Wall of Flesh sustains damage, The Hungry becomes more formidable, inflicting greater harm and gaining resistance to attacks.
Once sufficiently injured, they detach and swiftly converge on players. In Classic Mode, The Hungry will always drop a Heart upon their demise.
The Wall of Flesh’s eyes fires lethal lasers. As its health wanes, these lasers intensify in damage, frequency, and velocity. Additionally, the Wall of Flesh occasionally releases Leeches from its mouth, which pursues players. These Leeches, when vanquished, also drop Hearts without exception.
Expert Mode
In Expert Mode the Wall of Flesh in Terraria has the following stats:
- Damage: 150
- HP: 11200
- Defense: 18
- Knockback Resistance: 100%
- Immune to On Fire!, Hellfire, and Confused
- Consistently inflicts Horrified Debuff when the player is within 900 blocks from the boss.
- Consistently inflicts The Tongue Debuff when the player is within 900 blocks behind the boss.
In Expert Mode, the notorious Tongue debuff inflicts a substantial 50 damage per second to the player. The Wall of Flesh’s acceleration during its lower health stages is heightened, reaching speeds of up to 41 mph in this challenging mode.
As the Wall of Flesh’s health diminishes in Expert Mode, the rate at which it ensnares players with the Tongue debuff becomes even swifter.
In Expert Mode, The Hungry possess a mere 20% chance of dropping Hearts upon defeat, and they continuously respawn as long as the Wall of Flesh remains alive. Similarly, the Leeches have a 20% chance to drop Hearts in this difficulty as well. Furthermore, the Wall of Flesh exhibits augmented overall health and damage in Expert Mode.
Master Mode
In Master Mode the Wall of Flesh in Terraria has the following stats:
- Damage: 225
- HP: 14280
- Defense: 18
- Knockback Resistance: 100%
- Immune to On Fire!, Hellfire, and Confused
- Consistently inflicts Horrified Debuff when the player is within 900 blocks from the boss.
- Consistently inflicts The Tongue Debuff when the player is within 900 blocks behind the boss.
The boss’s behavior stays the same as in Expert Mode but with added HP and damage numbers.
Is Wall of Flesh Harder Solo or With Friends?
Fighting the Wall of Flesh in Terraria, solo can be more challenging due to several factors. First, you have to handle all aspects of the battle yourself, including dealing damage, dodging attacks, and managing your resources effectively.
You have complete control over the pace and strategy of the fight, but it also means that any mistakes or shortcomings solely rest on your shoulders. Additionally, the Wall of Flesh’s health scales based on the number of players, so it will have less health in a solo encounter.
Facing the Wall of Flesh with friends can make the fight easier in some ways. Having multiple players allows for better coordination and division of roles, such as one player focusing on dealing damage while another focuses on evasion and support. This can result in higher overall DPS and more efficient use of resources.
Additionally, with more players, there are more opportunities for crowd control and the ability to revive fallen teammates. However, the Wall of Flesh will have increased health based on the number of players present, so the fight may take longer.
What are the Rewards for Defeating Wall of Flesh?
 5")
 5")
The rewards for defeating Wall of Flesh in Terraria differ according to the difficulty. The majority of rewards are the same for all difficulties except a few and sometimes the drop rates increase at higher difficulties. We will highlight all these rewards and changes below:
Classic Mode Rewards
| Reward | Quantity | Drop Rate % |
|---|---|---|
| Gold Coins | 8 | 100% |
| Healing Potion | 5-15 | 100% |
| Badger’s Hat (when defeated on the same day as Eye of Cthulhu) | 1 | 100% |
| Wall of Flesh Mask | 1 | 14.29% |
| Wall of Flesh Trophy | 1 | 10% |
| Pwnhammer | 1 | 100% |
| One of the following 4 weapons is a guaranteed drop | ||
| Breaker Blade | 1 | 25% |
| Clockwork Assault Rifle | 1 | 25% |
| Laser Rifle | 1 | 25% |
| Firecracker | 1 | 25% |
| One of the following 4 emblems is a guaranteed drop | ||
| Warrior Emblem | 1 | 25% |
| Ranger Emblem | 1 | 25% |
| Sorcerer Emblem | 1 | 25% |
| Summoner Emblem | 1 | 25% |
Expert Mode Rewards
| Reward | Quantity | Drop Rate % |
|---|---|---|
| Gold Coins | 20 | 100% |
| Treasure Bag | 1 | 100% |
| Demon Heart | 1 | 100% |
| Extra Gold Coin | 8 | 100% |
Master Mode Rewards
| Reward | Quantity | Drop Rate % |
|---|---|---|
| Goat Skull | 1 | 25% |
| Wall of Flesh Relic | 1 | 100% |
There you go, this was the ultimate guide to beating Wall of Flesh in Terraria. The difficulty you chose and the class you play will greatly impact your experience, and hopefully, our guide will have pointed you in the right direction.