Valheim is based on the concept that all the fallen Vikings go to the world of Valheim to prove themselves worthy for the halls of Valhalla. According to Norse mythology, there are nine realms, and all these nine realms are inhabited by mortals or divine beings.
Iron gate, aka the creators of the game, introduced a new and 10th realm, called Valheim, where otherworldly creatures dominate and occupy the realm to the point where even Odin himself fears stepping foot inside.
Valheim’s narrative is just a small interpretation of Norse mythology as there are many references to establish mythological lore in the game.
Valheim World Mythology


The All-Father Odin brought the worlds together and united them. He threw his enemies down to the 10th world known as Valheim and split the branch that held the realm to the world-tree to leave Valheim unanchored, exiled. When Odin realized that his enemies in the 10th realm were growing in strength once again, he turned to Midgard and sent his Valkyries to search the battlefields for the best warriors fallen during battle, that may be dead to the world but would be born again in the world of Valheim. The god orders the fallen Vikings (players) to clear the realm of its destructive creatures so they can make the kingdom into a paradise like that of Valhalla.
What to Do First
Like most survival games, a player begins his journey with nothing and progresses with each step. Surviving in Valheim seems rather basic in the beginning by collecting wood and stones, but it is not as simple as it seems because you can die by simply cutting down a tree.
The beauty of the meadow is just a mask to what lies beyond. As soon as you finish setting up your character and map, you are greeted with an introduction screen, and you see a Valkyrie carrying you inside the realm. As soon as the Valkyrie drops you into the forest, you are exposed to immediate danger, and whenever there is danger, shelter is needed.
At the beginning of the game, when you are dropped into the forest, you are very weak and can be killed by the weakest mobs. Naturally, the first thing that comes to one’s mind is immediately building a home, but that is not the way to go. You progress with time with limited resources.
You start your journey alone as soon as you are dropped into the forest by a Valkyrie. You need to start gathering some basic resources.
Main Resources and How to Obtain Them
Wood
As soon as the Valkyrie drops you in the forest, this is the most basic and abundant material you will find at your disposal. You can pick the wood off the ground in the form of sticks, or you can punch trees.
It can be used to build a lot of things in the game as you will unlock various recipes. A few of the things that you can craft include Workbenches, walls, and roofs for shelter, hammer.
Stone
With the wooden sticks on the ground, the stone is the second material you will find without any problems as you can just pick up stones as you find them. This will also unlock various recipes for you to use. It can be used to make stone axe and pickaxes.
Flint
Flint is another important material that you will require early in the game. You will need it to make weapons like flint spear, flint arrowheads, and flint axe. You can easily find Flint on the ground near beaches.
Leather Scraps
Leather scraps are obtained by killing boars and deer. These are essential early game as you will need them to make but not limited to armor, bows, and boats.
Bronze
Bronze is an important metal you will acquire after you have won the battle with Eikthyr, the first boss. Only then will you be able to mine for copper and tin ore. By smelting the two, you get the bronze metal which can be used to make armor and weapons.
Fine wood
Fine wood can be obtained from pine trees present in the black forest biome or birch and oak trees in the meadows. It is an important material to make tools, weapons, and building parts.
Iron
Iron scraps are found in muddy scrap piles in the swamp biome. You will be able to navigate the swamp biome after you have defeated the second boss, The Elder. Iron can be obtained from scraps by smelting. You will be able to make upgraded tools and weapons that include an iron axe, iron longsword, iron scale mail, and stone cutter.
Silver
You can find silver ore in the mountain biome with an iron pickaxe after you have defeated the third boss, Bonemass. You can smelt the ore, giving you silver that you can use to upgrade your gear which may include a frostner, silver sword, and wolf armor.
Black Metal
Black metal is the strongest material in the game. It is mainly used for weapons and armor. You can obtain it in the plain biome after killing Fulings. Black metal can be smelted in a blast furnace, giving you black metal bars. Items that can be crafted include a black metal sword, axe, and shield.
In the beginning, you will find wood and stones that will unlock the most basic recipes that you can view to create available things. The more items you obtain, the more recipes are unlocked that can be made with the certain collected item.
- You start with equipping the torch. It will keep you safe from mobs as they cannot attack you while you have it equipped.
- You can gather wood by punching trees or picking up branches from the ground. You can gather stones by picking them up from the ground.
- Next, craft a Stone axe from the wood and stone you have gathered. You can use the axe to cut down trees to get wood faster, and you can also use the axe to defend yourself from Greylings and Boars. Please be wary of the falling trees. You do not want to be directly in the way of a falling tree because it will kill you.
The next step would be to explore the lands a bit and look for a nice spot to set up shelter.
- It does not have to be very fancy; you can have a very basic small hut or even an old, abandoned hut that you may find at random spots.
- Try to keep your spot close to the coast so you can access Flint easily.
- You may find Raspberries and Mushrooms scattered over the meadows, so always remember to collect and consume them regularly. This will give you healing and, with time, a small boost to get to maximum HP.
When you have finally settled on a spot for your shelter or camp, you need to start setting up as soon as possible.
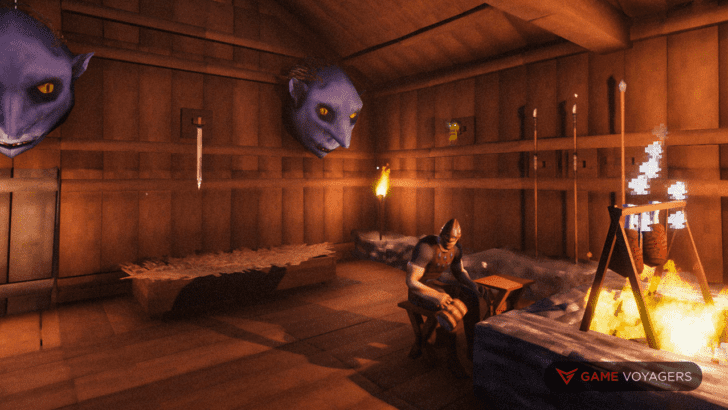
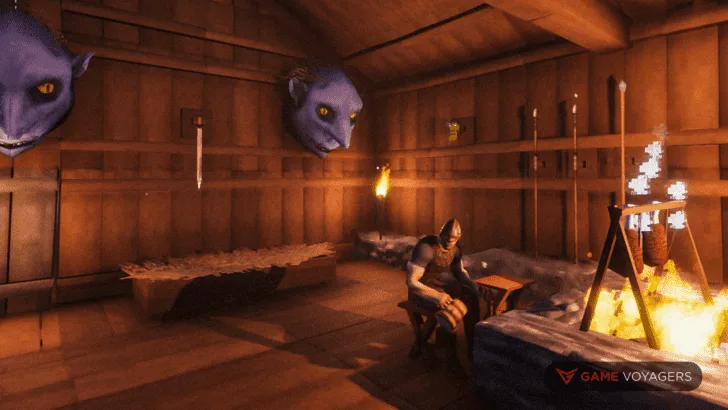
The first thing you will need to do is to craft a jammer. Of course, you will need to craft a starting tool to be able to craft more stuff, right? Now that you have crafted a hammer, you are now able to craft a Workbench. Now you need to build a small basic shelter that should at least cover the bench and contain a bed with a campfire. Make sure to leave an open area over the campfire to let the smoke out!
Sleep during the night and avoid being outside as much as you can at night. Try to collect stuff during daylight. Basic things that you need to collect,
- Now, as suggested above, try to set up your camp near a coast. You can easily quire Flint from the beach, and with it, you can start crafting weapons. Craft a Flint axe with it. Since in the beginning, you will not have much to work with, so the flint axe will be your main tool and weapon for a while.
- The next thing you will need is leather scraps to craft a bow and arrows. You can collect leather by hunting boars. Boars are super easy to kill. All you have to do is run up behind them and hit them with the axe, and voila, meat and leather acquired!
- Now that you have a bow, you can start hunting deer. To give the game a bit of a realistic touch, there is an arrow drop upon shooting them from the bows, so make sure you aim a bit higher than the head when at a distance. After you acquire deer hides, you can start crafting leather armor. Craft a Chopping block to upgrade your gear to level 2. You can also craft a Tanning rack that will upgrade your gear further.
You should build cooking stations over your campfire and start cooking meat that you got from boars and deer. The meat will give you more health and stamina. Try looking for some abandoned houses. Some of these houses will have beehives in them. You can use a bow to destroy the beehives.
The hives will occasionally not drop a Queen bee. If you acquire a Queen bee, you can start building your own beehives that generate honey. Honey is the best healing food (even during a boss fight!).
The Workbenches


Workbenches are your one-stop-shop for crafting anything in Valheim. It will probably be the single most used object for you in the entire game. You’ll use it to craft weapons and armor as well as build structures later on in the game which are impossible to craft without a Workbench. Crafting one is pretty simple.
You’ll need ten pieces of wood, and you’re good to go.
Workbench Level 1 – Starting Workbench
The Workbench you create initially will get you through a fair bit of levels. However, you will need to upgrade it for future weapons and armor. The Workbench you create at the start of the game is the level one default Workbench. You won’t need to upgrade right at the start, but an upgrade is definitely necessary along the way. The next upgrade will be to a level two Chopping Block Workbench.
Workbench Level 2 – Chopping Block Workbench
Once you milk all the resources you can from the default Workbench, it’s time to upgrade! The Chopping Block Workbench recipe demands that you have a default Workbench already and pair it up with a piece of Flint.
The Workbench itself will be crafted with 10x Flint and 10x Wood.
Workbench Level 3 – Tanning Rack Workbench
This is where things get interesting. To get your hands on the recipe, you’ll need to learn how to hunt a deer for the very first time and combine that with a chopping block Workbench. Crafting the bench requires a fair bit of resources, though.
You’ll need the basic 10x Wood and 10x Flint but will also need to grab 20x Leather Scrap and 5x Deer Hide.
Workbench Level 4 – Adze Workbench
The final Workbench that’ll allow you to create the strongest weapons and armor in the game is the Adze Workbench.
To craft the Workbench, you’ll need 1x Fine Wood and some Bronze Nails. These nails can be found by smelting Bronze Ingots.
Set Up a Forge
Other than the obvious requirement of a Workbench, you’ll also need a forge to really amplify the quality of materials you can craft. A forge gives you the option to craft a lot more cool stuff that you wouldn’t have access to otherwise. Similar to Workbenches, a forge can also be upgraded through levels. Once you have both the max-level Workbench and forge, you’re free to craft practically any craftable object in the game.
To craft a level one forge, you’ll need some coal, copper, stone, and wood. There are two ways to obtain coal. You can either place wood in a charcoal kiln and wait a bit, or you just leave some meat on the fire and let it sit there for some time.
The latter option may take a bit of time, though. The following upgrades are anvils, forge bellows, forge cooler, forge tool rack, and grinding wheel.
- Anvil – x5 wood and x2 bronze.
- Forge Bellows – x5 wood, x5 deer hide, and x4 chain.
- Forge cooler – x25 fine wood and x10 copper
- Tool Rack – x10 wood and x15 iron
- Grinding Wheel – x25 wood and a Sharpening Stone which will, in turn, need a Stonecutter
Recipes
Recipes in Valheim are pretty simple and easy to get. Most of the time, they’ll get unlocked automatically as you go around unlocking the right materials for your crafting. Once you have the required resources needed to unlock the recipe, it pops up automatically. If you go around grabbing some spare flint, you’ll unlock the recipe for a flinthead arrow, flint knife, etc. Alternatively, you could simply google the recipe for whatever you’re trying to make and find the ingredients required for that recipe.
Most recipes won’t require that much effort. But, there are some that will ask you to travel to some far-off land and mine some specific material to unlock the recipe. Other recipes are handed to you when you defeat bosses and complete quests. Make sure you’re always on the lookout for recipes. They could pop up in the most random of places!