The Legend of Zelda: Tears of the Kingdom has been a bombastic release from Nintendo. The game has scored through the roof, and many players can’t wait to get their hands on this masterpiece. But what about the Steam Deck owners who don’t have a Switch? We do not condone piracy, so please buy Tears of the Kingdom before you go about emulating it on the Steam Deck.
To Tears of the Kingdom on the Steam Deck, you need to install YUZU i.e. the Switch emulator software on the device. Fortunately, the all-in-one emulator hub Emu Deck for Steam Deck makes things easy for anyone by removing much of the hassle of setting up this emulator.
This detailed article will help you properly run Zelda: Tears of the Kingdom on your Steam Deck by going over each step. Simply install Emu Deck on your Steam Deck, find Tears of the Kingdom ROM online, and play to your heart’s content.
Installing EmuDeck On The Steam Deck
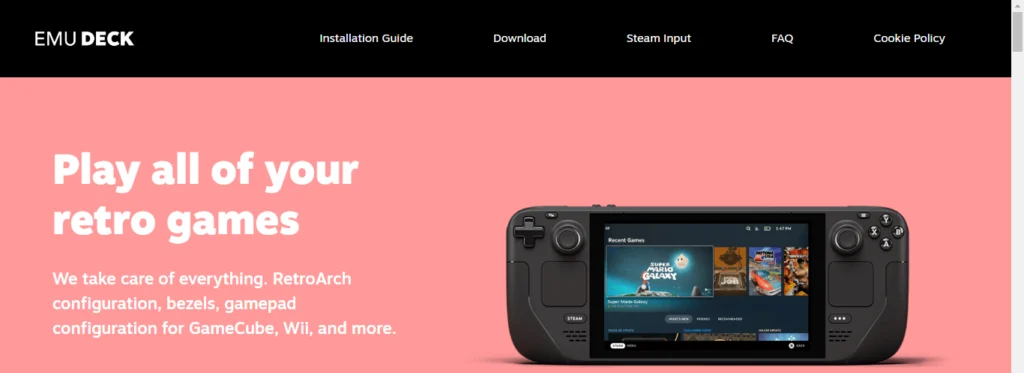
EmuDeck is a hub where all types of consoles can be emulated, tailor-made for the Steam Deck.
Not only can you emulate Switch on the YUZU emulator using this, but you can also play many other consoles of the past with the help of this nifty little piece of software.
Also, it streamlines many of the configurations of the emulators to suit better the Steam Deck including the hassle of mapping the buttons/controls of the device. It is the perfect companion if you are into game emulation.
Optional Action
To take advantage of EmuDeck’s full capabilities, we will recommend an Expert installation later down the line, and for that, you will need to set up an account password for your Steam Deck.
In Desktop Mode, go to System Settings, then Users, and select change password.
If you are not using a physical keyboard, then you can always bring up the virtual keyboard on the Steam Deck by pressing the STEAM + X buttons.
Downloading EmuDeck
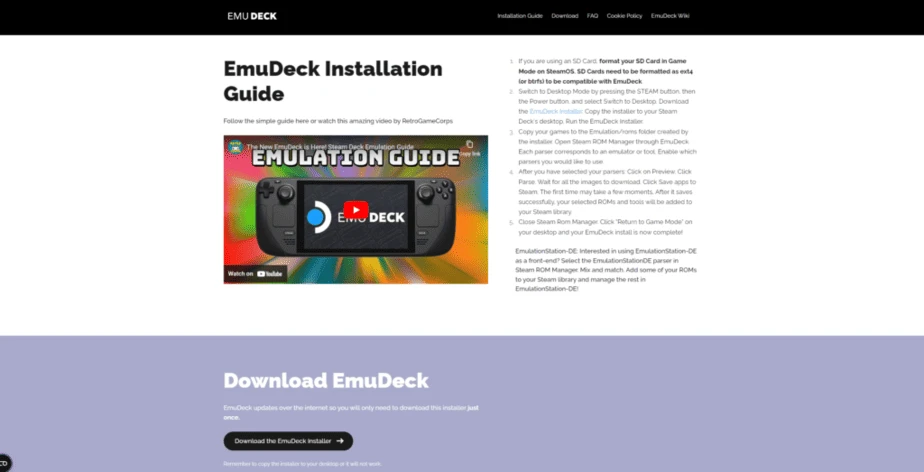
To download EmuDeck launch the web browser and go to EmuDeck.com. At the top of the page, select Download and then Download the app. Drag the downloaded file to your desktop and select [Move here]. Then close the browser.
EmuDeck Installation
Go back to the desktop and run “Install Emu Deck“. Click “Continue” and wait for the script to download the necessary files, then select OK.
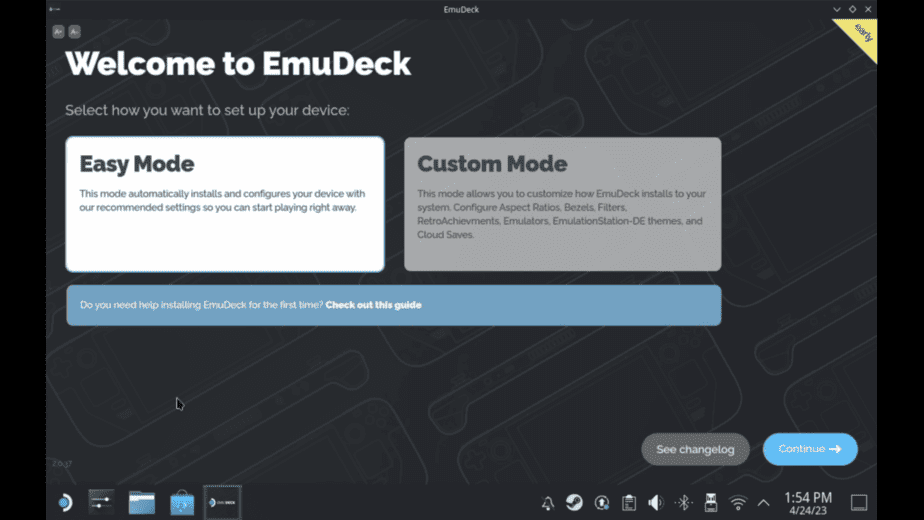
Now you have a choice of two installation modes Easy or Expert/Custom. We recommend choosing Expert.
It allows you to take full advantage of Steam Deck’s capabilities, including motion controls or changing the number of CPU threads which allows you to get better performance in some games.
Choose where you want to install the ROMs, presumably, you will be using an SD card for this. We do recommend that you format the card before doing this.
You can then select the individual components you want to install. Enter the password you created earlier using the physical or on-screen keyboard.
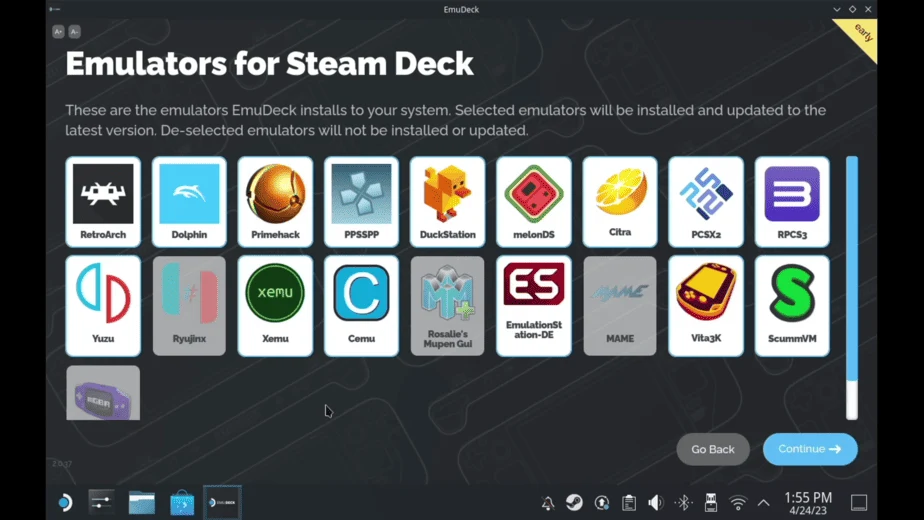
In the next step, the installer will ask for a theme for EmuStation-DE if you have decided to install it, followed by a selection of emulators you want to use. Select the ones you want to play, especially YUZU for Nintendo Switch emulation.
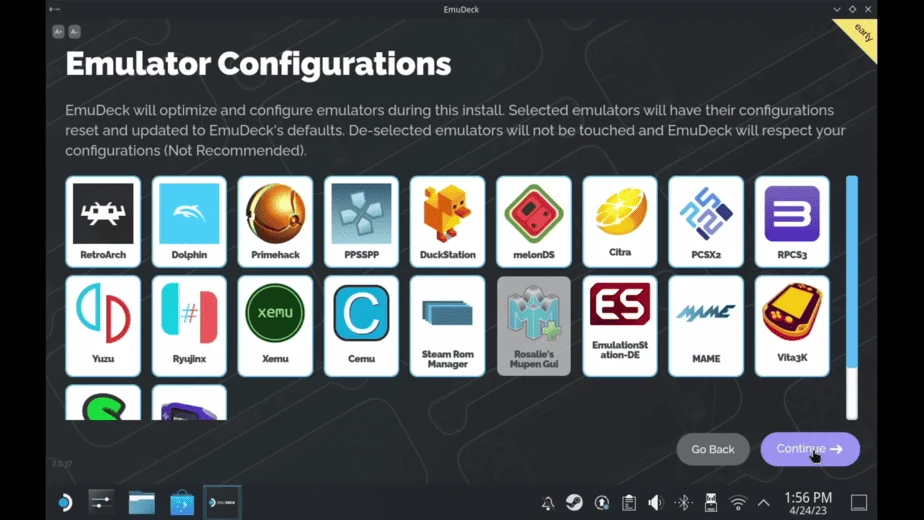
The next window will ask you to install the configurations for the emulators you just installed. It is bets to install the ones you have selected previously (Yuzu in this case).
These configurations should be installed as they are fine-tuned to work with the Steam Deck. It will take the tedium out of setting up the emulator later on.
Next, choose whether you want to use widescreen hacks. Note that not all of them work perfectly and may cause problems. You can always disable them later from the emulator.
It is not important during initial installation, but EmuDeck will ask you whether to keep the individual emulator settings or reset them to defaults. Pay attention to this when you make updates. Select OK.
Now wait for the installation and automatic configuration of all files, it may take a while.
If you are using RetroArch Achievements then you can log in now.
EmuDeck has been properly installed on your Steam Deck.
Adding ToTK Game ROM
Please keep in mind that game ROMs are illegal to be shared as they are copyrighted products, so we won’t be sharing any here. Although you can find amazing repositories of retro games online, you have to surf the web for them. You can also rip these ROMs from any physical games you own.
Assuming you have the Tears of the Kingdom game ROM already downloaded/stored, locate where you have installed EmuDeck. In our case, it is the SD Card so the path goes as:
ROMS: Primary/Emulation/roms/switch
Place the game ROMS in the switch folder and move to the next step to add them to the Steam Library.
The Switch file formats are :
| Console | Folder Name | File Types |
| Nintendo Switch | switch | .kp .nca .nro .nso .nsp .xci |
Once you got the game in the right place, it’s time to get into the updates. Since this is a new game it will be going through constant updates. You will have to get these updates by Googling.
Do not keep your DLC or update files in the Emulation/roms/switch folder. After installing your DLC or updates, you can discard them. DLC and Updates are installed directly through the Yuzu menu. Below is a quick tutorial of that:
- In Desktop Mode, open Yuzu
- Click File
- Click Install Files to NAND.
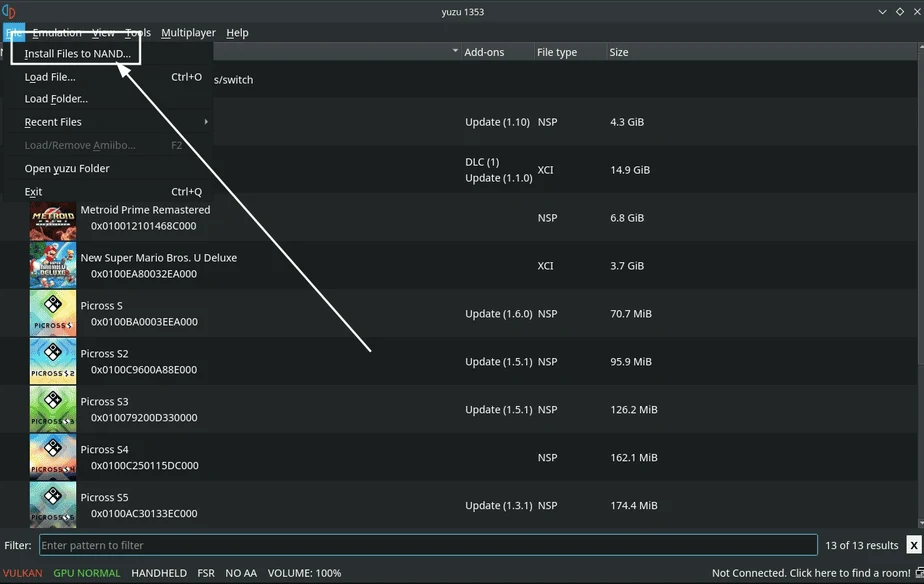
- (Optional) If your DLC or update files are on your SD Card, your path is: /run/media/…. To navigate here, click Computer on the left, open the / folder, open the run folder, then the media folder, and follow the path to the files on your SD Card.
- Locate your DLC or update files in your directory
- Your DLC or update files are now installed
YUZU Emulator Configuration for TotK
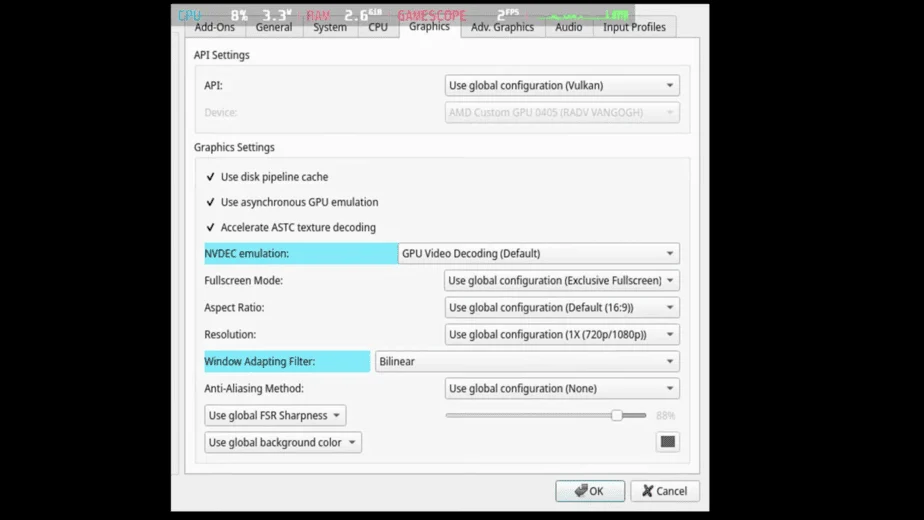
To create per-game configurations, right-click on the game while in the main Yuzu menu, and select Properties — here, you can adjust resolution, VSync, and accuracy levels. Some games simply don’t work well on the emulator, which you can check in the “Compatibility” column in the app itself, or via Yuzu’s compatibility page.
Although EmuDeck will have configured Yuzu to work fine on the Steam Deck, we will mention all the settings just in case you want to be a little more hands-on. For the most part, the settings will be kept at default. We will go over the ones that need to be changed:
- CPU – Auto
- Accelerate ASTC Texture Decoding – OFF
- GPU Accuracy Level – High
- Enable Async Presentation – ON
- Force Maximum Clocks – ON
- Decode ASTC Textures Asynchronously – OFF
- Enable Reactive Flushing – ON
- Use Async Shader Building – ON
- Use Fast GPU Time – ON
- Use Vulkan Pipeline Cache – ON
Ensure you are on the latest version of Yuzu and have the updates to the Tears of the Kingdom. This is a new game, and the mods and updates are still quite fresh, so expect things to remain a bit beta-ish for now.
Tears of the Kingdom – Considerations
Here are some things that you should know when you are going for Tears of the Kingdom emulation:
- The latest update on the day of writing is Update 1.1.
- FPS Mods, for now, are only 20/30/60. We recommend staying at 30 fps max as there are some glitches in the 60fps mod.
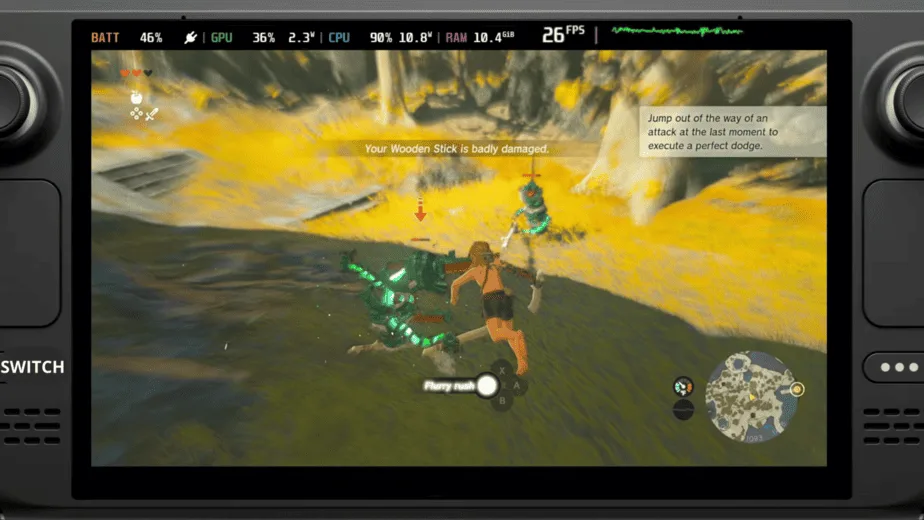
This game is still new, and the optimization is not completely stable, so expect things to run choppy. Keep updating to the latest version of the game, and soon it will be much better to play.
Steam ROM Manager
The final step in Desktop Mode is Steam ROM Manager. It is a program that will automatically add individual games and emulators to Steam/Steam OS with all the necessary commands.
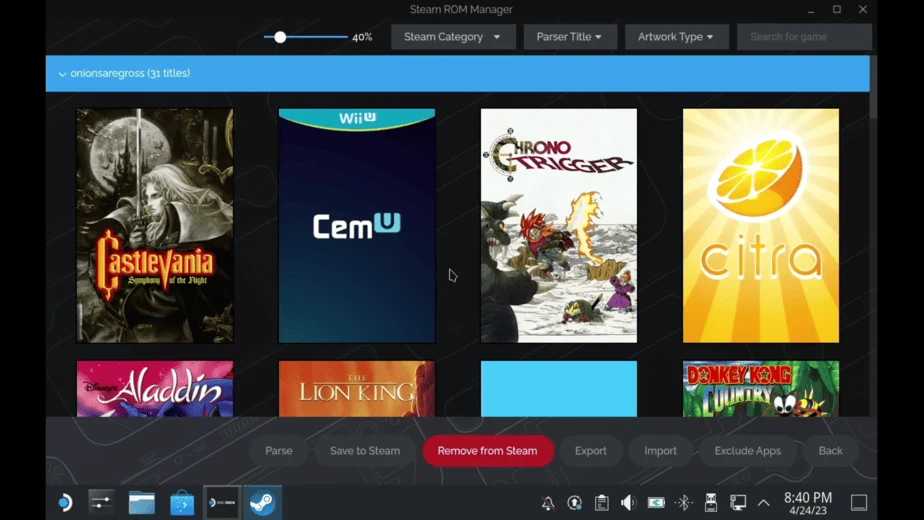
Click on “Preview”, “Generate app list” and as the final step “Save app list”. Make sure that the Nintendo Switch– Yuzu option is enabled from the emulator list on the left side of the software.
This will add the Switch games’ ROMs to the Gaming Mode, i.e. Steam, along with the artwork for a more “official” feel for your library view. You can visit this site for more information on Steam ROM Manager.
Once this is done, all your games with their respective emulator (Yuzu) will be added to the Steam OS within neatly categorized folders. You can simply hop into the Gaming Mode and begin Tears of the Kingdom.
There you have it folks, the complete guide to Zelda Tears of the Kingdom Emulation on the Steam Deck. We hope that you’ve found this article useful and that you’ve learned how to maximize the emulation potential of your Steam Deck through it.

