
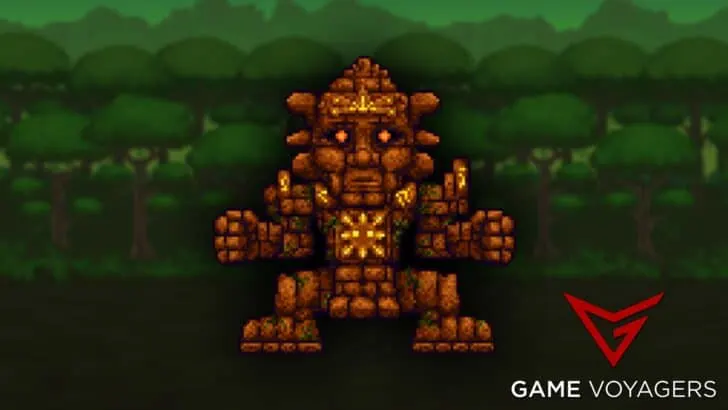
Golem in Terraria is a post-Plantera hardmode boss and can be found in the Jungle Temple. In this article, we will cover in much detail what facing this boss is like and what you should do to prepare for the fight. So get ready for the ultimate guide to beating Golem in Terraria.
Golem in Terraria is a mixed bag of a boss. Its initial phase is in a stationary state allowing the player to maneuver the boss quite easily. However, the second stage is more erratic and demands heightened skills from you.
Golem can be summoned in Terraria using the Lihzahrd Power Cell on the Lihzahrd Altar in the Jungle Temple. Learn more about the best strategies and builds for defeating this foe through this guide.
How to Spawn Golem?
 1")
 1")
The Jungle Temple houses Golem, a Hardmode, post-Plantera boss. To summon Golem, one must use the Open/Activate Key on the Lihzahrd Altar, which is located in the final and largest chamber of the Jungle Temple. However, this can only be done if the player has at least one Lihzahrd Power Cell in their inventory.
Each of the Jungle Temple’s Lihzahrd Chests contains a single Lihzahrd Power Cell. Alternatively, Lihzahrds or Flying Snakes have a rare 2% chance of dropping them. Golem spawns directly above the Altar.
For Golem to appear, Plantera must have already been defeated at least once in the current world. Otherwise, nothing will occur, and the Lihzahrd Power Cell will remain unconsumed.
How to Defeat Golem?
Defeating Golem in Terraria boils down to the class you are using. Some classes will find it harder to beat this boss while for others it will be a breeze. We will go over which weapons best suit the class when fighting the boss.
Melee Class Strategy
The Death Sickle proves to be a formidable weapon against Golem, especially when strategically positioned behind walls. Weaker alternatives to consider are the Chlorophyte Partisan and Mushroom Spear. Starlight boasts exceptional DPS and possesses the ability to immobilize Golem’s fists effectively.
For melee enthusiasts, the Vampire Knives come highly recommended. Although they deal moderate damage, their life-stealing effect makes it nearly impossible to meet one’s demise. The Scourge of the Corruptor proves extremely useful due to its potent damage output, ability to split into three projectiles, and homing capabilities.
If seeking rapid and consistent damage at medium range, the Seedler serves as an excellent choice. Those fortunate enough to acquire the Paladin’s Hammer will wield a remarkably powerful weapon, boasting high damage and the added advantage of piercing capabilities.
The Eye of Cthulhu combined with the Yoyo Bag, can swiftly dispatch Golem within a minute. The Kraken serves as a viable alternative. The Terra Blade excels in this battle, particularly when utilizing the blade itself to target Golem’s fists.
With the combination of Fetid Baghnakhs, a Cross Necklace, an Obsidian Shield, and the best available melee bonuses, the fight against Golem can be cleared without the need for evasive maneuvers.
For melee users, the most optimal gear set comprises a Chlorophyte Mask, Monk’s Shirt, and Squire’s Greaves. This combination offers the best offensive bonuses while also providing higher defense compared to Chlorophyte armor. Acceptable substitutes include the Hallowed Mask and Turtle Scale Mail.
Ranged Class Strategy
 2")
 2")
It is highly recommended to wield either the Megashark or Venus Magnum in conjunction with Crystal Bullets when facing Golem. The Candy Corn Rifle can also be a viable option.
For arrow-based weaponry, the Chlorophyte Shotbow reigns as the top single-target choice, inflicting massive damage when combined with Holy or Ichor Arrows. The Pulse Bow, paired with Cursed, Chlorophyte, or Venom Arrows, proves highly effective within the confined space, often striking Golem multiple times.
In the initial phase of the battle, the Stake Launcher demonstrates extreme effectiveness, as its projectiles can deal significant damage to all three attackable parts. Both the Eventide and Tsunami dish out substantial amounts of damage.
The Piranha Gun provides a remarkable advantage by completely preventing Golem’s fists from attacking, thereby simplifying the fight. Once the fists are destroyed, redirecting the piranha toward Golem’s head while evading lasers and fireballs will yield significant damage.
When coupled with Chlorophyte or Crystal Bullets, the Tactical Shotgun proves to be a powerful weapon. Alternatively, the Onyx Blaster is effective when paired with Ichor Bullets.
Utilizing a Rocket Launcher or Grenade Launcher armed with Rocket III or Mini Nuke I will rapidly deplete Golem’s health, resulting in a swift victory. However, caution must be exercised as both weapons possess dangerous splash damage. While the Nail Gun can be expensive to use, it surpasses the Rocket Launcher in power and provides a safer alternative for enclosed spaces.
For consistent and substantial damage, the Sniper Rifle proves to be a reliable choice when paired with Chlorophyte or Ichor Bullets. If fallen stars are available, the Super Star Shooter will tear Golem apart, even in Expert Mode.
Ranged characters can enhance their combat prowess by donning Shroomite armor, known for its superior defensive capabilities. Those who incorporate minions into their strategy may consider substituting the Shroomite Leggings with Forbidden Treads.
Frost armor offers commendable stat bonuses along with the Frostburn debuff, although it provides lower defense compared to other armor options, necessitating proficient dodging skills.
Mage Class Strategy
Summoning clouds above Golem’s head using the Nimbus Rod ensures a constant stream of damage. Swiftly finishing off Golem is possible with high-damage weapons like the Spectre Staff, Venom Staff, and Unholy Trident.
Both the Nightglow and Razorblade Typhoon serve as potent homing weapons, swiftly dispatching Golem with their remarkable damage output. For accurate and high-DPS attacks, the Leaf Blower proves to be a reliable choice.
The Magnet Sphere, Bat Scepter, and Rainbow Gun facilitate sustained healing when paired with the Spectre Hood. When targeting Golem’s head, the Inferno Fork becomes highly useful, as the explosion radius prevents the fists from retaliating while dealing significant damage.
The Rainbow Rod delivers impressive damage to all parts of Golem, thanks to its homing and piercing projectiles. For the initial phase of the fight, the Toxic Flask serves as a favorable alternative, inflicting considerable splash damage. However, its high mana cost should be taken into account.
Magic users should equip the Hallowed Headgear, Spectre Robe, and Apprentice’s Trousers for optimal performance. Switching to the Spectre Hood and Spectre Pants when low on health maximizes damage output. The Spectre Mask provides a slightly weaker offensive option. Considering Golem’s immobility, the Forbidden Mask set bonus can prove effective against it.
Summoner Class Strategy
The Staff of the Frost Hydra proves to be an invaluable asset, as the Hydra can swiftly attack Golem’s opposing side, effectively dealing with his fists. In the absence of the Frost Hydra, the Queen Spider Staff serves as a preferable alternative to having some summoning power.
When utilizing Squire armor, the Ballista Cane stands out as the best available sentry. Alternatively, the Raven Staff or Deadly Spheres can also perform admirably. The Desert Tiger Staff inflicts significant damage against Golem.
The combination of the Dark Harvest with Ravens or the Blade Staff can obliterate Golem within seconds, thanks to the dark energy effect emanating from the Dark Harvest, which targets Golem’s other parts. This strategy proves especially effective when accompanied by standard summoner accessories and armor.
Squire armor offers notable benefits such as high health regeneration and the ability to deploy two additional sentries, preferably Ballista Canes. Tiki armor remains the go-to choice for summoners. Alternatively, those who have braved the challenges of the Pumpkin Moon can opt for the stronger Spooky armor.
Summoners seeking increased survivability can consider employing a mixed set comprising the Squire’s Great Helm, Tiki Shirt, and Forbidden Treads. This set provides slightly higher defense compared to Tiki armor and regenerates 4 health per second. Furthermore, it offers the same minion capacity bonus as Spooky armor.
Other Strategies
 3")
 3")
Here are some strategies you can employ for fighting Golem in Terraria:
Small Space Strategy:
Construct a vertical wall, ensuring there is a 3-block gap at both the bottom and top for convenient access. Additionally, create a horizontal line using solid blocks (not platforms) and include a 3-block gap along its length. The horizontal line should intersect with the vertical wall, effectively forming a barrier.
When Golem spawns, it will ascend onto the horizontal platform but remain unable to descend. This strategic positioning enables you to continuously engage Golem in combat, making use of the highly recommended Death Sickle while minimizing the need for excessive potion consumption (maximum 2-3 potions).
Having a team member stationed atop the vertical wall to shoot at Golem proves immensely beneficial in swiftly dispatching the boss.
Static Hook Strategy:
By utilizing a static hook, the player can actively grapple onto the arena wall and skillfully maneuver from side to side, effectively evading the majority of Golem’s projectiles. Meanwhile, unleashing a barrage of Chlorophyte bullets from the Onyx Blaster allows the player to tear through the boss, simultaneously keeping the menacing fists at bay.
Bunny Cannon Strategy:
The Bunny Cannon proves to be highly effective when battling Golem. Set up the cannon in an area that Golem cannot reach by strategically placing blocks. This will prevent Golem from pursuing you during the fight.
Once positioned, unleash the explosive bunnies by firing the cannon. To determine the optimal number of explosive bunnies to use, calculate Golem’s health and divide it by the damage dealt by each bunny (350). This calculation will provide an approximate estimate of the quantity required for maximum impact.
Slime Mount + Target Dummies Strategy:
Arrange two target dummies side by side, and position several blocks 5 tiles above the uppermost tile of the dummy. Obtain the Slime Mount and activate it in front of the dummies. Simply jump, and you will observe your character rapidly bouncing up and down while benefiting from immunity granted by the slime mount.
When combined with summoning abilities, this technique allows the player to avoid sustaining any damage during the fight. It is advised not to wield actual weapons if constructing this setup above Golem, as they could disrupt the dummies and nullify the immunity. Such interference may cause Golem to prioritize attacking the player directly, leading to potential damage being inflicted.
Teleporter Strategy
To employ this strategy, position 2 Teleporters at opposite ends of Golem’s chamber and interconnect them using wiring. Ensure the presence of activation devices such as levers or Pressure Plates. Summon Golem and swiftly teleport between the two Teleporters.
By maintaining a rapid teleportation rhythm, Golem will struggle to land hits on you. This method proves highly effective for swiftly defeating Golem, and neutralizing the damage he can inflict. However, it’s important to note that as Golem sustains more damage, he increases the frequency of his laser attacks, diminishing the effectiveness of this strategy.
What are the Difficulty Differences?
 4")
 4")
The boss has different stats depending on the difficulty and the phase it is in. These differences are as follows:
Classic Mode
In Classic Mode the Golem in Terraria has the following stats:
- First Phase:
| Stats | Golem Body (Total) | Golem Head | Golem Fists (Left & Right) |
|---|---|---|---|
| Damage | – | 36-64 | 59 |
| HP | 60000 (Total) | 25000 | 10000 (Each Fist) |
| Defense | – | 20 | 28 |
| Knockback Resistance | – | 100% | 100% |
| Immunity | Poisoned On Fire! Confused | Shimmering Confused Hellfire On Fire! Poisoned | Shimmering Confused Hellfire On Fire! Poisoned |
| Inflicts Debuff | On Fire! Chance – 50% Duration 5-7 Seconds | – | – |
- Second Phase:
| Stats | Golem Body | Golem Head |
|---|---|---|
| Damage | 72 | 80 |
| HP | 15000 | 16000 |
| Defense | 26 | 32 |
| Knockback Resistance | 100% | 100% |
| Immunity | Shimmering Confused Hellfire On Fire! Poisoned | Shimmering Confused Hellfire On Fire! Poisoned |
First Phase
Golem unleashes ricocheting fireballs from its mouth, extends its fists through chains for attacks, and jumps towards the player. When hit, its fireballs have a 50% chance of inflicting the On Fire! debuff, lasting for 5-7 seconds. As each part of Golem sustains more damage, its long-range attacks become more frequent.
Prior to launching its fists, it will emit a bright orange glow and can pass through solid blocks. However, any hit with a weapon causes the fists to retract instantly, as they have a limited range. Furthermore, Golem’s jumping frequency increases when one or both fists are destroyed.
When Golem’s head drops below half health, its eyes begin firing lasers capable of traversing through blocks. Its head turns towards the targeted player, and the eye lasers intensify in frequency as Golem takes more damage. In the second phase, the fists no longer retract upon being struck by a weapon.
Although Golem’s main body cannot pass through blocks under normal circumstances, its fists, lasers, and detached head in the second phase can do so. If the path between Golem’s body and the player is obstructed by solid tiles, Golem will leap onto the player, granting it passage through any solid blocks.
Second Phase
Once the player depletes the health of Golem’s stone head, it separates from the body and hovers directly above the player, seamlessly phasing through blocks. Immune to damage, the detached head assumes a passive role while the main target becomes Golem’s body.
If the fists remain intact, they intensify their assault on the player, launching attacks at a heightened pace, while the body continues its erratic jumping. The head adheres to its previous attack pattern, increasing the frequency of its onslaught as the body’s health diminishes.
The only means of vanquishing Golem at this stage is to completely exhaust the body’s health, subsequently obliterating the head and concluding the battle.
Enraged
If Golem is compelled to venture outside of the Underground Jungle, whether by being led or awakened elsewhere, it enters a state of “enraged.” In this state, Golem exhibits accelerated jumping and, if its head’s HP drops below half, it unleashes its lasers with increased speed.
Notably, Golem’s damage output and defense remain unchanged. The enraged behavior persists until Golem is returned to the Underground Jungle, at which point it reverts to its normal demeanor.
Unlike Plantera, Golem’s enraged behavior is not evident until the latter part of its initial form. It is during this stage that Golem intensifies its leaping and laser-firing rate. However, the disparity between its enraged and normal behavior may not be apparent to most individuals.
Expert Mode
 5")
 5")
In Expert Mode the Golem in Terraria has the following stats:
- First Phase:
| Stats | Golem Body (Total) | Golem Head | Golem Fists (Left & Right) |
|---|---|---|---|
| Damage | – | 72-116 | 94 |
| HP | 90000 (Total) | 37500 | 15000 (Each Fist) |
| Defense | – | 20 | 28 |
| Knockback Resistance | – | 100% | 100% |
| Immunity | Poisoned On Fire! Confused | Shimmering Confused Hellfire On Fire! Poisoned | Shimmering Confused Hellfire On Fire! Poisoned |
| Inflicts Debuff | On Fire! Chance – 50% Duration 10-14 Seconds | – | – |
- Second Phase:
| Stats | Golem Body | Golem Head |
|---|---|---|
| Damage | 115 | 128 |
| HP | 22500 | 24000 |
| Defense | 26 | 32 |
| Knockback Resistance | 100% | 100% |
| Immunity | Shimmering Confused Hellfire On Fire! Poisoned | Shimmering Confused Hellfire On Fire! Poisoned |
Other than the more HP, damage, and longer duration for the On Fire! debuff, there are little to no behavioral changes in Golem on Expert Mode.
Master Mode
In Master Mode the Golem in Terraria has the following stats:
- First Phase:
| Stats | Golem Body (Total) | Golem Head | Golem Fists (Left & Right) |
|---|---|---|---|
| Damage | – | 108-174 | 141 |
| HP | 114794 (Total) | 47812 | 19125 (Each Fist) |
| Defense | – | 20 | 28 |
| Knockback Resistance | – | 100% | 100% |
| Immunity | Poisoned On Fire! Confused | Shimmering Confused Hellfire On Fire! Poisoned | Shimmering Confused Hellfire On Fire! Poisoned |
| Inflicts Debuff | On Fire! Chance – 50% Duration 15-21 Seconds | – | – |
- Second Phase:
| Stats | Golem Body | Golem Head |
|---|---|---|
| Damage | 172 | 192 |
| HP | 28687 | 30600 |
| Defense | 26 | 32 |
| Knockback Resistance | 100% | 100% |
| Immunity | Shimmering Confused Hellfire On Fire! Poisoned | Shimmering Confused Hellfire On Fire! Poisoned |
HP, damage, and debuff duration are further increased in Master Mode while everything else stays the same as it was in Classic/Expert Mode.
Is Golem Harder Solo or With Friends?
When facing Golem solo, the difficulty level can be higher due to several factors. Firstly, the player has to handle all aspects of the battle alone, including dealing damage, avoiding attacks, and managing their health and resources effectively.
This requires a higher level of skill, reflexes, and strategic thinking to overcome Golem’s various attacks and patterns.
Solo players may also face limitations in terms of available firepower and support. With fewer players, there are fewer opportunities for coordinated attacks and synergistic abilities that can make the fight easier. Additionally, Golem’s high health pool may take longer to deplete without the added damage output from multiple players.
On the other hand, facing Golem with friends can provide distinct advantages. Cooperative gameplay allows players to divide tasks, such as one player focusing on attacking while others handle dodging or healing. This distribution of roles can lead to better overall coordination and efficiency in dealing with Golem’s attacks.
Furthermore, with multiple players, the combined damage output can be significantly higher, potentially leading to a quicker defeat of Golem. The presence of teammates can also provide a sense of support and backup, reducing the pressure on individual players and allowing for better recovery from mistakes.
However, it’s worth noting that the specific difficulty of the Golem fight can vary depending on the skill and coordination of the players involved. Highly skilled solo players may find the challenge manageable, while a group of inexperienced or uncoordinated players may struggle even with the added support of friends.
What are the Rewards for Defeating Golem?
 6")
 6")
The rewards for defeating Golem in Terraria differ according to the difficulty. The majority of rewards are the same for all difficulties except a few and sometimes the drop rates increase at higher difficulties. We will highlight all these rewards and changes below:
Classic Mode Rewards
| Reward | Quantity | Drop Rate % |
|---|---|---|
| Gold Coins | 15 | 100% |
| Picksaw | 1 | 25% |
| Beetle Husk | 4-8 | 100% |
| Greater Healing Potion | 5-15 | 100% |
| Golem Mask | 1 | 14.29% |
| Golem Trophy | 1 | 10% |
| One of the following 7 items is a guaranteed drop | ||
| Stynger | 1 | 14.29% |
| Possessed Hatchet | 1 | 14.29% |
| Sun Stone | 1 | 14.29% |
| Eye of the Golem | 1 | 14.29% |
| Heat Ray | 1 | 14.29% |
| Staff of Earth | 1 | 14.29% |
| Golem Fist | 1 | 14.29% |
Expert Mode Rewards
| Reward | Quantity | Drop Rate % |
|---|---|---|
| Gold Coins | 37 | 100% |
| Silver Coins | 50 | 100% |
| Treasure Bag | 1 | 100% |
| Shiny Stone | 1 | 100% |
| Picksaw | 1 | 33.33% |
| Beetle Husk | 18-23 | 100% |
| Extra Gold Coin | 12 | 100% |
Master Mode Rewards
| Reward | Quantity | Drop Rate % |
|---|---|---|
| Guardian Golem | 1 | 25% |
| Golem Relic | 1 | 100% |
There you go, this was the ultimate guide to beating Golem in Terraria. The difficulty you chose and the class you play will greatly impact your experience and hopefully our guide will have pointed you in the right direction.