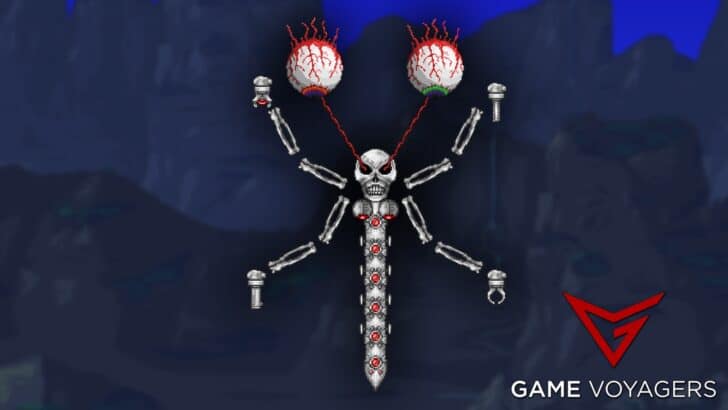
Mechdusa is Terraria is a Get fixed boi seed exclusive boss and is essentially three mechanical bosses in one. In this article, we will cover in much detail what facing this boss is like and what you should do to prepare for the fight. So get ready for the ultimate guide to beating Mechdusa in Terraria.
Mechdusa in Terraria is a Getfixedboi world-exclusive boss. It is the only way to defeat all three Hardmode mechanical bosses in said world. It can be summoned using an Ocram’s Razor item. It has a chance of spawning naturally by destroying a Demon or Crimson Altar. It behaves as all three mechanical bosses in the game.
This detailed guide will be going over some of the best builds and combat strategies to use against the Mechdusa boss in Terraria.
How to Spawn Mechdusa?
 1")
 1")
Mechdusa, an early Hardmode boss exclusive to “Get fixed boi” worlds, consists of all three mechanical bosses. Players in this world can manually summon Mechdusa anywhere and at any time using Ocram’s Razor.
There is a 5% chance for Mechdusa to spawn naturally at 7:30 PM dusk once a Demon or Crimson Altar has been destroyed. Only possible when at least one of its constituent bosses has not yet been defeated in the current world.
The following seeds can be used to generate a Get Fixed boi world when you are starting or creating a new world at the start. Keep in mind these seeds are case-insensitive when you are entering them into the world creation field.
get fixed boi
OR
getfixedboi
Ocram’s Razor can only be crafted in a Get fixed boi world. Using the Mechanical Eye, Mechanical Worm, and Mechanical Skull items. It can be crafted using the Mythril or Orichalcum Anvil crafting stations. This item has no function when brought to other worlds.
In Get fixed boi worlds, Mechdusa replaces the mechanical bosses since the summoning items for the bosses become unusable. Summoning Mechdusa becomes the sole method to battle these bosses in such worlds.
How to Defeat Mechdusa?
Defeating Mechdusa in Terraria boils down to the class you are using. Some classes will find it harder to beat this boss while for others it will be a breeze. We will go over which weapons best suit the class when fighting the boss.
Due to its large size and numerous components susceptible to damage, Mechdusa offers a significant advantage to weapons with area or piercing effects during the initial phase of the fight.
As the battle progresses, it becomes necessary to switch out weapons to adapt to the distinct characteristics of the bosses comprising Mechdusa. For instance, once the Destroyer portion perishes, transitioning to single-target damage becomes essential.
Melee Class Strategy
The Drippler Crippler fires a piercing projectile, which enables it to deal substantial damage to the boss while keeping a safe distance. Alternatively, the Shadowflame Knife proves to be a formidable option as it possesses the ability to bounce multiple times off of Mechdusa, effectively striking multiple parts simultaneously.
Among the available armors, Adamantite armor stands out by offering the most substantial increase to all stats, even though it does not possess a unique set bonus.
On the other hand, Crystal Assassin armor provides commendable defense, stat enhancements, and a useful dash ability, which can eliminate the need for using the Shield of Cthulhu accessory, thereby presenting a viable alternative to both Adamantite armor and Titanium armor.
Ranged Class Strategy
 2")
 2")
The Daedalus Stormbow proves to be highly effective against all component bosses, although it requires some open space above the player to unleash its full potential, making it particularly effective above ground. Another option that works well with various arrow types is the Adamantite Repeater or Titanium Repeater.
For a screen-filling assault, the Dart Pistol or Dart Rifle combined with Cursed Darts can cover the entire screen in flames, simultaneously attacking every segment. Crystal Darts can be particularly effective against Probes, while Ichor Darts exhibit strength against Skeletron Prime and the Twins.
Obtaining the Uzi can yield excellent results, especially when paired with the Endless Musket Pouch, as its piercing High-Velocity Bullets offer a significant advantage.
When considering armor options, Titanium armor emerges as a top choice due to its impressive stats and the added benefit of the Titanium Barrier buff. Frost armor, on the other hand, excels at applying Frostbite against all portions except the Destroyer, and its set bonus includes substantial stat increases, making it a worthy alternative to Adamantite and Titanium armors.
Mage Class Strategy
The Orange Zapinator possesses a unique property where it randomly multiplies damage when it pierces enemies. Given the numerous parts of Mechdusa, individual lasers from the Zapinator can experience damage multiplication of ten times or more. However, as the battle progresses and only a few parts of Mechdusa remain, switching to another option becomes a sensible choice.
Both the Nimbus Rod and Clinger Staff exhibit powerful piercing capabilities that can inflict heavy damage specifically to the Destroyer portion of Mechdusa.
The Golden Shower proves to be an excellent choice due to its remarkable piercing damage and the ability to afflict the Ichor debuff on several parts of Mechdusa. This debuff enhances the effectiveness of other weapons, allowing them to deal even more damage.
For high damage output, the Cursed Flames spell is highly recommended as it inflicts substantial damage while applying the Cursed Inferno debuff.
While the Forbidden armor may offer weak stat bonuses, its set bonus can be utilized with great effect against the Destroyer portion of Mechdusa. On the other hand, Orichalcum armor stands out for its exceptional power, as its set bonus has the potential to hit multiple parts of Mechdusa simultaneously.
Summoner Class Strategy
The Firecracker and Cool Whip stand out as the top choices for whips in this fight. The Firecracker has the special ability to multiply enemy damage, while the Cool Whip features a snowflake projectile that can pierce multiple segments and effectively hit probes.
When it comes to summoning, the Sanguine Staff proves to be an excellent option. It delivers consistent attacks and performs exceptionally well against Probes, making it one of the strongest summoning weapons available for this particular battle.
Another viable choice is the Blade Staff, especially when paired with a whip that has Summon Tag damage, such as the Cool Whip. This combination amplifies its effectiveness even further.
For summoners, Spider armor emerges as the best choice due to its numerous benefits. However, if one desires extra range for whips like the Firecracker or the Cool Whip, Obsidian armor may prove useful.
Additionally, Palladium armor provides lower stat bonuses but compensates with the Rapid Healing effect, significantly boosting natural regeneration, which can be particularly helpful in this prolonged battle.
Other Strategies
 3")
 3")
Underground Arena Strategy:
If dealing with low gravity in this seed becomes challenging, the next best option is the area between the Underworld spawn island and the ruined houses. Players can choose either side based on convenience. The process involves using a significant amount of Dynamite (around 300 to start).
Here’s a step-by-step approach:
- Dynamite the blocks in the lava, causing it to sink and creating more vertical space. For even deeper sinking, dynamite the bottom of the spawn island.
- Place rows of a lava-resistant platform, tailored to suit the player’s needs. (Note: Underworld enemies drop lava when killed in this seed.)
- Utilize a Lava Walking item (such as a Water Walking Potion or Lava Waders), or construct a row of blocks or platforms above the lava. If blocks are used, periodically dig holes to allow the lava to pass through and fill the gaps with platforms to prevent Guide Voodoo Dolls from falling into the lava.
- If desired, incorporate Campfires or similar items, bearing in mind that campfires burn when in contact with lava. Bubble Blocks can help mitigate this issue.
- If additional vertical space is required, the top of the Underworld can be easily demolished using Sticky Dynamite.
- Remember to equip a lava immunity item during the fight to avoid damage from enemies’ lava. An Obsidian Skin Potion is recommended as it eliminates the need for an accessory slot.
Asphalt Blocks are accessible from the beginning of the game, thanks to the early spawning of the Steampunker in the Getfixedboi seed. However, note that she will perish after the first day and won’t respawn until at least one part of Mechdusa is defeated.
Creating two rows of widely spaced blocks can serve as an arena, and players can utilize Gravitation Potions to switch between them efficiently.
Despawning Strategy:
The despawn ranges for the different parts of Mechdusa do not have equal distances. By deliberately moving a significant distance away from the main body, it becomes possible to despawn all the components except for the Destroyer.
By defeating only this particular part, players gain access to valuable post-mech gear, including Hallowed Armor and weapons from the Old One’s Army event.
Minecart Strategy:
Utilizing a long minecart track can prove to be an efficient strategy for battling this boss, as the player can evade many attacks by maintaining a high speed.
In the Get fixed boi seed, creating a minecart in hell becomes particularly advantageous since Retinazer and Skeletron Prime’s Laser arm can become lodged in the ceiling, rendering them unable to fire during certain parts of the fight.
As mentioned in the previous strategy, it’s important to note that parts of Mechdusa will despawn if the player moves too far away. To control this aspect, adjusting the speed becomes crucial: going faster will trigger despawning of parts, while going slower will help keep them together.
Turning around on the minecart track can be achieved using pressure plate tracks, strategically placed teleporters (with a spacing of one or two screens apart to avoid collision with the body of Mechdusa), and hammered minecart tracks to reverse the direction of travel.
What are the Difficulty Differences?
 4")
 4")
The boss only has different HP stat depending on the difficulty you are playing in. Mechdusa is the amalgamation of the three mechanical bosses in Terraria i.e. Skeletron Prime, The Destroyer, and The Twins.
This is reflected in her stats which will be according to their constituent bosses (Check the links we have provided above for more detail on each boss).
Her behavior will be similar to the three bosses. More on this below. The HP differences are as follows:
Stats
Mechdusa in Terraria has the following HP stat:
- Classic Mode – Total HP: 256,800
- Expert Mode – Total HP: 327,420
- Master Mode – Total HP: 436,560
Behavior
Mechdusa combines the abilities of all three mechanical bosses. Incorporating Skeletron Prime’s arm attacks, The Twins’ distinct patterns, and The Destroyer’s laser-shooting abilities. Each mechanical boss retains its own health bar.
Skeletron Prime serves as the “core” of the boss, imposing limitations on the movement of the other parts. It can charge at the player every 10 seconds, but its head remains stationary during this attack.
Defeating Skeletron Prime allows the other parts to move independently. The Twins will start following the player, The Destroyer will begin burrowing, and the Probes will fly like regular Probes.
Initially, The Twins are connected to Skeletron Prime’s head. While attached, they can freely move during charge attacks and Retinazer’s laser barrage. However, after these attacks, they will attempt to realign themselves above Skeletron Prime.
Similarly, The Destroyer’s head segment is initially attached to Skeletron Prime’s head. While attached, The Destroyer cannot move on its own; instead, its segments are pulled along with Skeletron Prime’s head. Despite being attached, The Destroyer can intermittently unleash laser barrages and release Probes when damaged.
The two additional Probes start off invulnerable. They become liberated and vulnerable once either the Destroyer or Skeletron Prime is defeated.
Is Mechdusa Harder Solo or With Friends?
Mechdusa poses different levels of difficulty when faced solo or with friends. Taking on Mechdusa solo requires the player to handle all aspects of the battle independently, including dodging attacks and dealing damage. This can be more challenging as there is no direct assistance or support from other players.
On the other hand, facing Mechdusa with friends introduces the advantage of cooperative gameplay. Working together, players can distribute roles, coordinate attacks, and provide mutual aid. This collaborative approach can make the battle feel less daunting and increase the chances of success.
Overall, the difficulty of defeating Mechdusa can vary depending on the individual’s skill level, coordination among friends, and ability to strategize effectively.
What are the Rewards for Defeating Mechdusa?
 5")
 5")
The rewards for defeating Mechdusa in Terraria remain the same. The Get fixed boi world internally advances the world’s difficulty by one stage hence defeating the Mechdusa in Classic Mode will still drop the same reward as in Expert or Master Mode.
Defeating Mechdusa will drop all mechanical bosses’ Treasure Bags. These rewards include drops from Skeletron Prime, The Destroyer, and The Twins. The Treasure Bags and healing potions themselves drop after their respective boss part is defeated.
The only exclusive reward that this boss has is a Waffle’s Iron weapon. It has a 100% chance of dropping upon defeat.
There you go, this was the ultimate guide to beating Mechdusa in Terraria. The difficulty you chose and the class you play will greatly impact your experience and hopefully our guide will have pointed you in the right direction.