Nintendo Wii is among the top-selling consoles of all time. Owing to this, it’s safe to assume that it has won tons of hearts, and console fans will still be clamoring to play their Wii game library to this day. Luckily, with the Steam Deck, you can take your Wii games on the go with the magic of emulation.
To emulate and play Nintendo Wii games on the Steam Deck, you need to install Dolphin Emulator i.e. the Wii emulator software on the device. Fortunately, the all-in-one emulator hub Emu Deck for Steam Deck makes things easy for anyone by removing much of the hassle of setting up this emulator.
Simply install Emu Deck on your Steam Deck, find some Wii game ROMs online, and play your desired games.
Installing EmuDeck On The Steam Deck
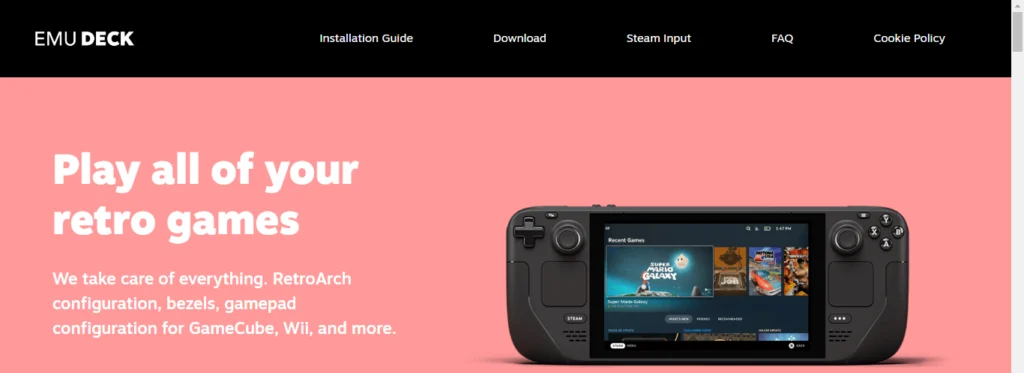
EmuDeck is a hub where all types of consoles can be emulated tailored made for the Steam Deck. Not only can you emulate Wii on Dolphin emulator using this but you can also play many other consoles of the past with the help of this nifty little piece of software.
Also, it streamlines many of the configurations of the emulators to suit better the Steam Deck including the hassle of mapping the buttons/controls of the device. It is the perfect companion if you are into game emulation.
Optional Action
To take advantage of EmuDeck’s full capabilities, we will recommend an Expert installation later down the line, and for that, you will need to set up an account password for your Steam Deck.
In Desktop Mode, go to System Settings, then Users, and select change password.
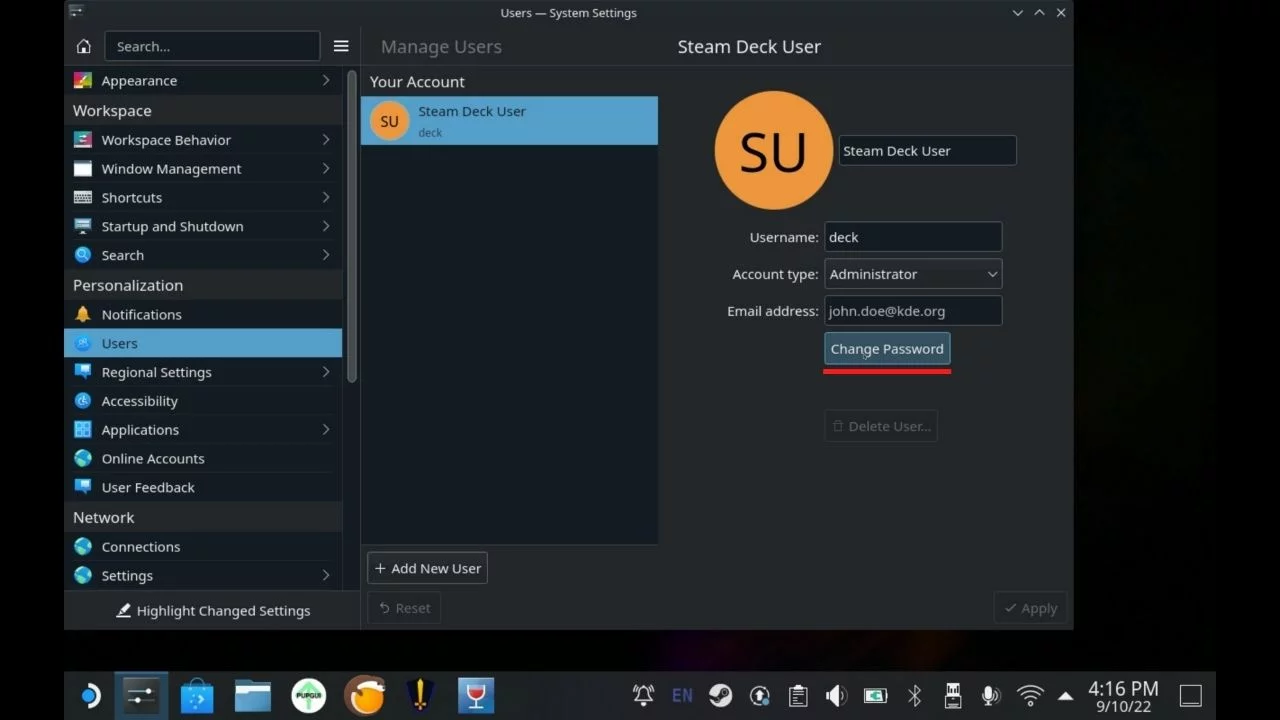
If you are not using a physical keyboard then you can always bring up the virtual keyboard on the Steam Deck by pressing the STEAM + X buttons.
Downloading EmuDeck
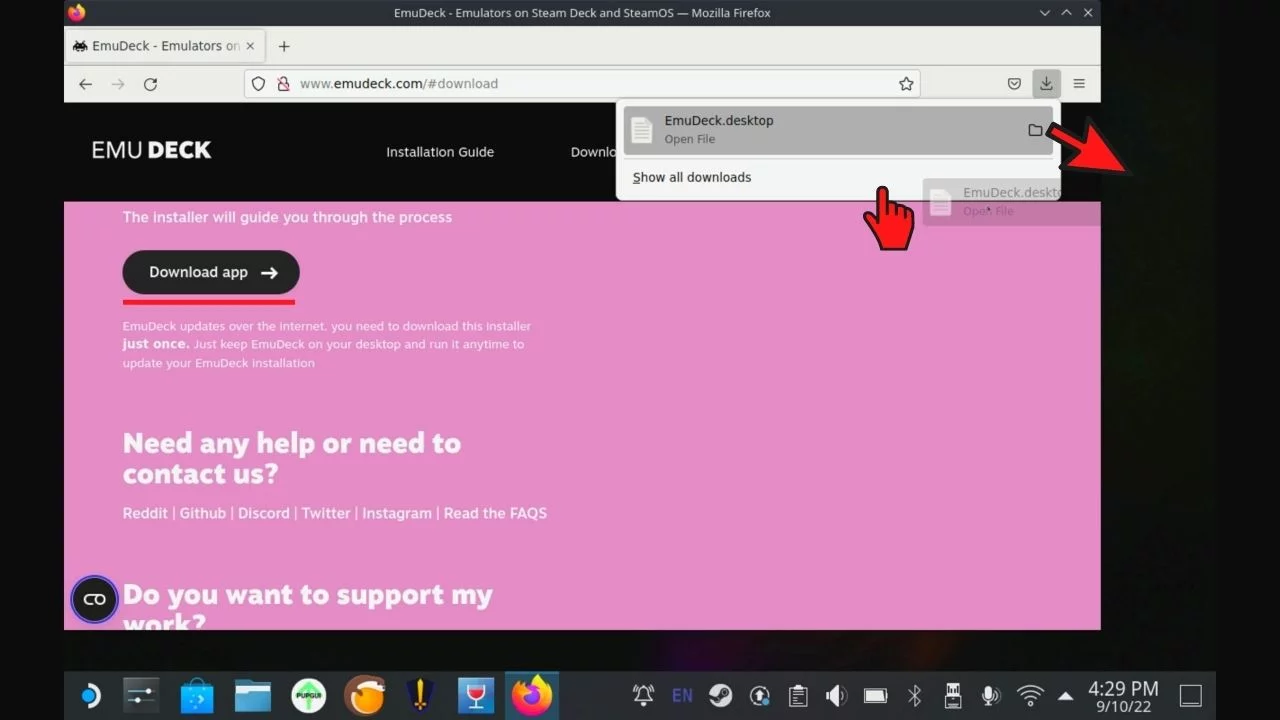
To download EmuDeck launch the web browser and go to EmuDeck.com. At the top of the page, select Download and then Download the app. Drag the downloaded file to your desktop and select [Move here]. Then close the browser.
EmuDeck Installation
Go back to the desktop and run “Install Emu Deck“. Click “Continue” and wait for the script to download the necessary files, then select OK.
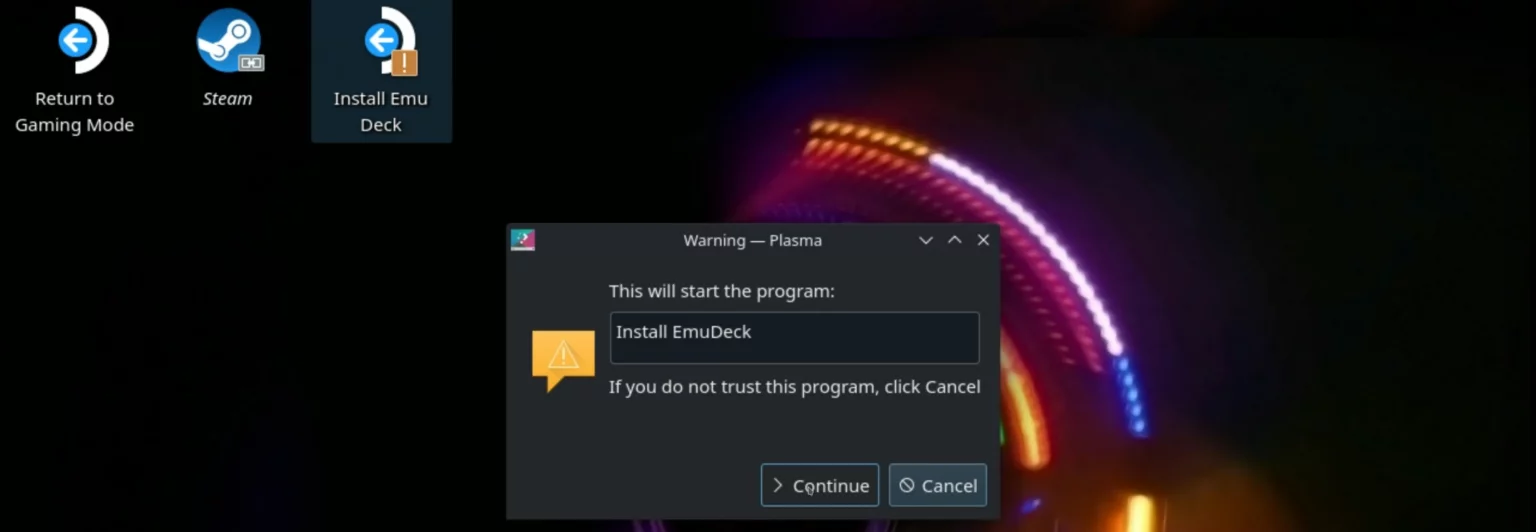
Now you have a choice of two installation modes Easy or Expert/Custom. We recommend choosing Expert as it allows you to take full advantage of Steam Deck’s capabilities including motion controls or changing the number of CPU threads which allows you to get better performance in some games.

Choose where you want to install the ROMs, presumably you will be using an SD card for this. We do recommend that you format the card before doing this.

You can then select the individual components you want to install. Enter the password you created earlier using the physical or on-screen keyboard.
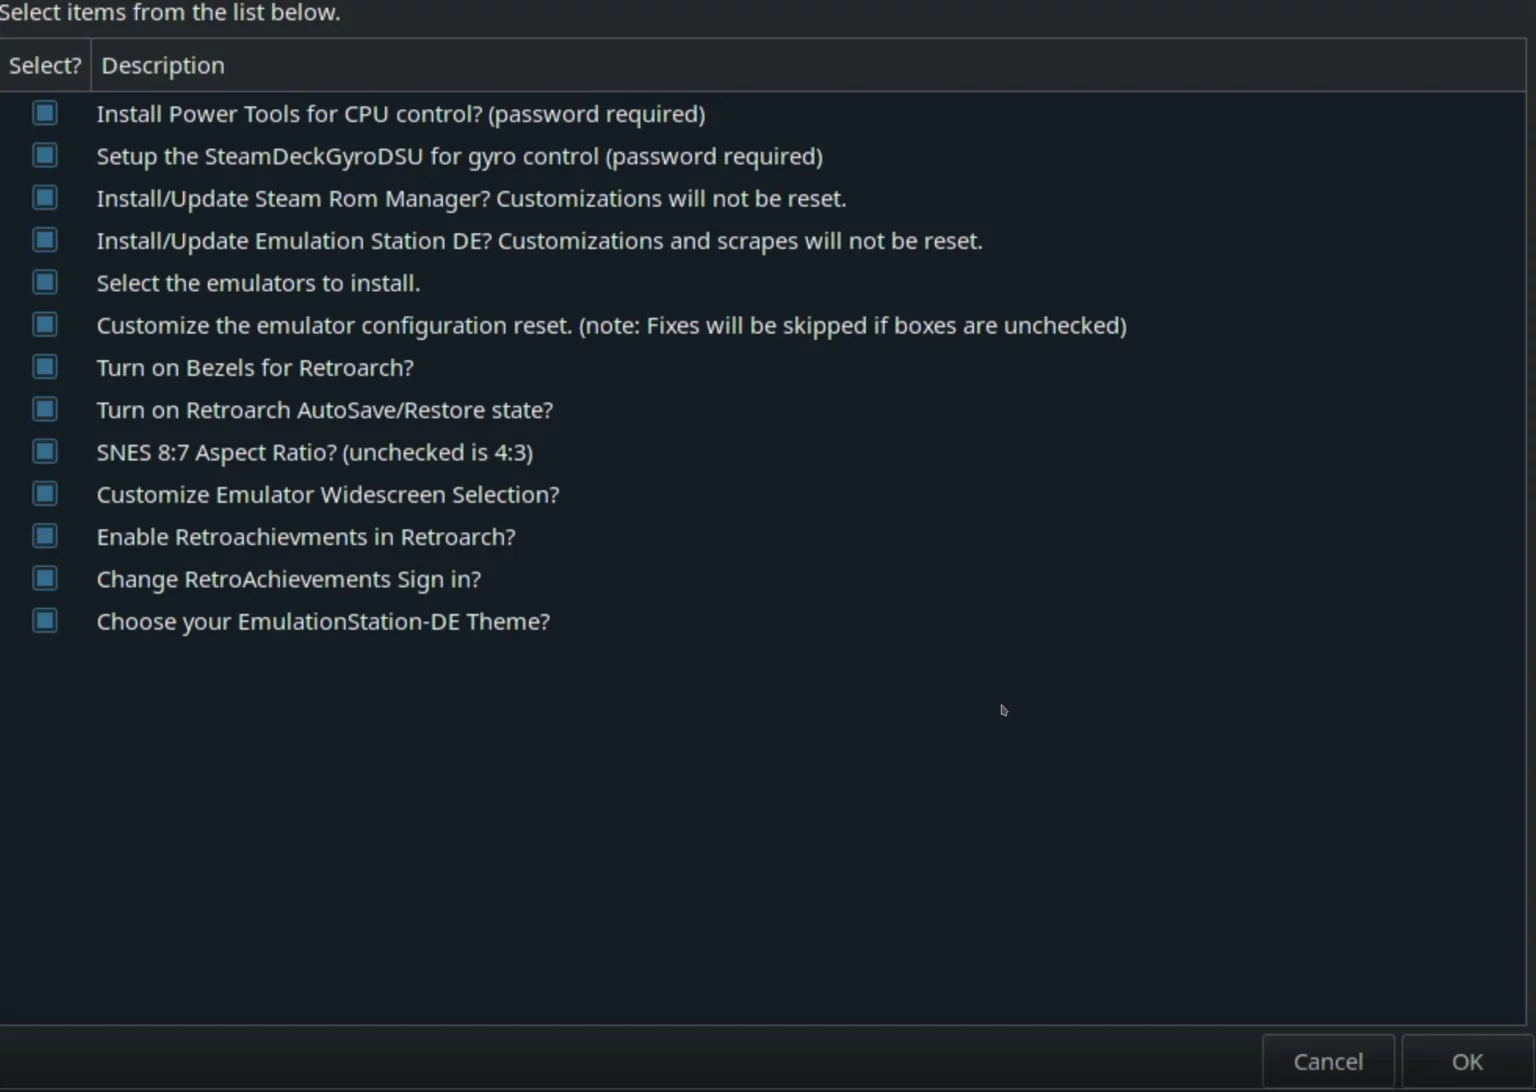
In the next step, the installer will ask for a theme for EmuStation-DE if you have decided to install it, followed by a selection of emulators you want to use. Select the ones you want to play especially RetroArch for Nintendo DS emulation.
Next, choose whether you want to use widescreen hacks. Note that not all of them work perfectly and may cause problems. You can always disable them later from the emulator.
It is not important during initial installation, but EmuDeck will ask you whether to keep the individual emulator settings or reset them to defaults. Pay attention to this when you make updates. Select OK.
Now wait for the installation and automatic configuration of all files, it may take a while.
If you are using RetroArch Achievements then you can log in now.

EmuDeck has been properly installed on your Steam Deck.
Related: Complete Guide to 3DS Emulation on the Steam Deck
Adding Nintendo Wii Game ROMs
Please keep in mind that game ROMs are illegal to be shared as they are copyrighted products, so we won’t be sharing any here. Although you can find amazing repositories of retro games online, you just have to surf the web for them. You can also rip these ROMs from any physical games you own.
Assuming you have the Wii game ROMs already downloaded/stored, locate where you have installed EmuDeck. In our case it is the SD Card so the path goes as:
ROMS: Primary/Emulation/roms/nwii
Place the game ROMS in the nwii folder and move to the next step to add them to the Steam Library.
The Wii file formats are :
| Console | Folder Name | File Types |
| Nintendo Wii | nwii | .ciso .dol .elf .gcm .gcz .iso .json .nkit.iso .rvz .wad .wia .wbfs |
Dolphin Emulator Configuration
- PowerTools plugin: Some Wii games will not run at full speed by default, due to how the Steam Deck handles its cores when running the program. To fix this, you will need to run the PowerTools plugin.
- In addition to using this plugin, you can open up the QAM (“three dots button”) menu, enable Advance View, and enable Manual GPU Clock Control and set it to 1200. Details for this will be given in the next section.
- Wii system menu: Open Dolphin in Desktop Mode, then go to Tools > Perform Online System Update > United States (or your preferred region). Next, go to Tools > Load Wii System Menu (4.3U) and perform the initial setup (not that selecting the 16:9 aspect ratio will make it hard to reach the sides of the screen with your pointer).
- If you have .wad file types for your Wii Virtual Console or WiiWare games and would like to have them added to your Wii menu, you can go into Tool > Install WAD and choose them from there.
- Note that this is mostly just a parlor trick since there is no way to enter the Wii Menu from the Steam Deck Game Mode. For more in-depth coverage check out this helpful video from Archades Games.
Dolphin Wii Controller Setup

EmuDeck will pre-install several control profiles (as seen in the pictures in this section) on your device, you can toggle between them by pressing SELECT + LEFT or RIGHT on the left analog stick.
Each Wii game accepts different control profiles, and while most control schemes can be handled by the profiles above, some games that require full Wii motion controls (Wii Sports, for example) won’t be fully playable on the Steam Deck using these profiles.
Instead, try to focus on games that have nunchuck, Classic Controller, or GameCube controller support.
Here is a list of games that support the Classic Controller.

Note that the control schemes seen here aren’t definitive; if you’d like an alternative layout, you can enter the settings and adjust the controller profiles as you wish.
For example, the layout below was recommended by some Youtuber:
- C = L1
- Z = L2
- A = A
- B = R2
- 1 = B
- 2 = Y
- Shake = R1
Gyro controls: It is possible to add gyro controls using SteamDeckGyroDSU. Here are instructions on how to get it set up.
Related: Complete Guide to DS Emulation on the Steam Deck
Dolphin Emulator Considerations

PowerTools: PowerTools is a plugin that will allow you to tweak specific emulators and games for the best performance. It works well with Dolphin by allowing you to reduce the number of CPU threads used by the app from 8 to 3 (be sure to also turn SMT OFF), which will make the 3 threads perform at a higher clock speed and provide smooth gameplay.
Using EmuDeck, you can install PowerTools directly in the app. Open EmuDeck and select “Tools & Stuff” > PowerTools and follow the prompts. Once installed, you should find the plugins menu at the bottom of your Quick Access Menu (QAM) by pressing the “three dots” button while in game mode.
From there you can tap on the store icon and find PowerTools. Note that all plugins require sudo access, and EmuDeck will walk you through the process when necessary.
Improved visuals: By default, EmuDeck will display games at a 2x resolution. If you would like to increase or decrease the resolution, you can press START + UP or START + DOWN on the d-pad.
The difference between 2x and 3x resolution is indiscernible for most games when playing on the Steam Deck’s screen, but 3x resolution may look better when playing with the Steam Deck docked to an external display.
Steam ROM Manager
The final step in Desktop Mode is Steam ROM Manager. It is a program that will automatically add individual games and emulators to Steam/Steam OS with all the necessary commands.
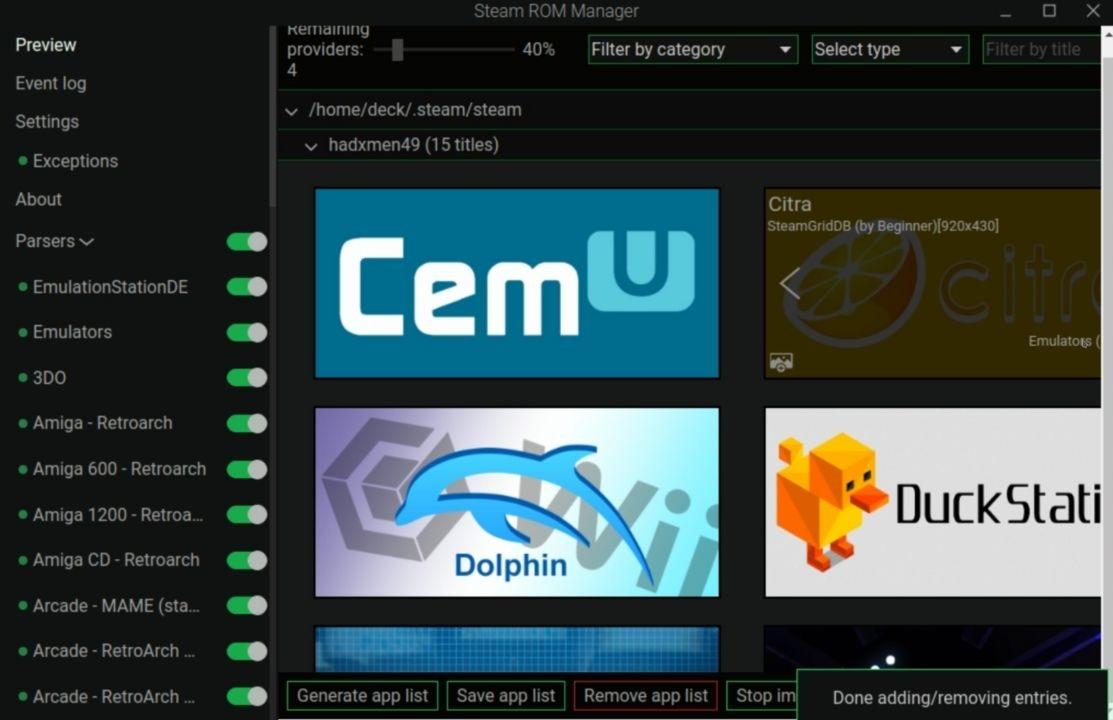
Click on “Preview”, “Generate app list” and as the final step “Save app list”. Make sure that the Nintendo Wii– Dolphin option is enabled from the emulator list on the left side of the software.
This will add the Wii games’ ROMs to the Gaming Mode i.e. Steam along with the artwork for a more “official” feel for your library view. You can visit this site for more information on Steam ROM Manager.
Once this is done, all your games with their respective emulator (Dolphin) will be added to the Steam OS within neatly categorized folders. You can simply hop into the Gaming Mode and begin gaming.
There you have it folks, the complete guide to Wii Emulation on the Steam Deck. We hope that you’ve found this article useful and that you’ve learned how to maximize the emulation potential of your Steam Deck through it.

